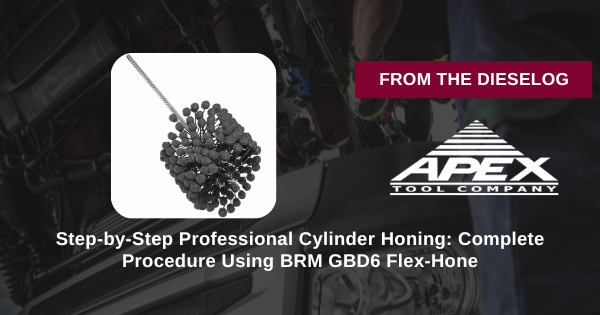
Step-by-Step Professional Cylinder Honing: Complete Procedure Using BRM GBD6 Flex-Hone
Professional technicians follow this exact procedure for accurate cylinder wall conditioning using the BRM GBD6 Flex-Hone. Proper technique ensures the precise crosshatch finish required for optimal piston ring seating and engine performance.
Introduction: Professional Cylinder Honing Technique
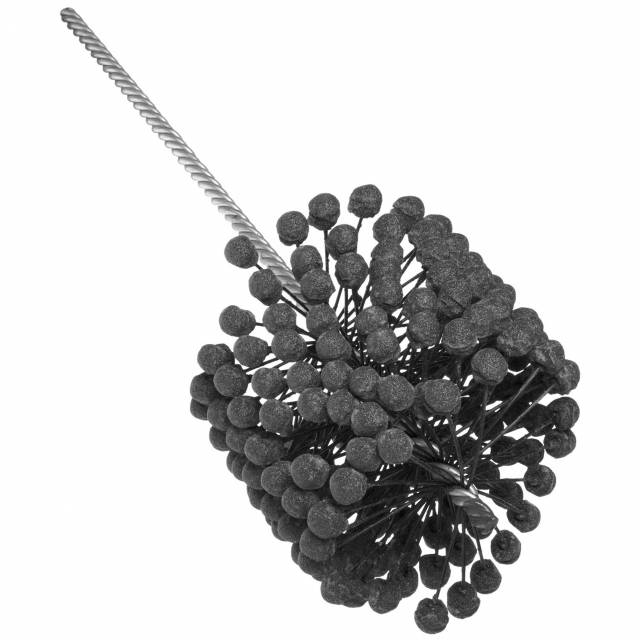
Professional cylinder honing is a precision procedure that requires proper technique, correct tooling, and careful attention to crosshatch geometry. Improper honing produces poor ring seating, extended break-in periods, and customer dissatisfaction. The BRM GBD6 Flex-Hone provides the flexible abrasive technology needed; this procedure ensures it is used correctly to produce the optimal crosshatch finish.
Phase 1: Block Preparation & Bore Inspection
- Secure engine block in honing machine or vise – Block must be stable and cannot rock or shift during honing operation.
- Verify cylinder bore diameter within range (5-1/2" to 6") – GBD6 is sized for this specific range. Verify bore is within specification before proceeding.
- Visually inspect cylinder bore for damage – Look for scoring, corrosion, or previous honing damage. Severe scoring may require professional reboring before honing.
- Clean cylinder bore with solvent and brush – Remove all oil, debris, and machining residue. Clean bore enables better surface finish during honing.
- Measure bore diameter at top, middle, and bottom – Document initial bore size. Honing should remove minimal material (0.0005–0.001 inches only).
Phase 2: Honing Machine Setup & Tool Installation
- Select low-speed drill or honing machine – Flex-Hone operates best at 300–700 RPM (never exceed 1,000 RPM). High speed causes excessive heat and tool wear.
- Install GBD6 Flex-Hone in drill chuck or honing machine spindle – Ensure installation is centered and secure. Tool runout must be minimal for uniform honing.
- Apply honing oil to cylinder bore – Use appropriate cutting/honing oil. Oil cools the tool, removes debris, and extends tool life. Never hone dry.
- Lower honing tool into cylinder bore gently – Flex-Hone should be centered in bore without forcing. Abrasive globules will expand as tool rotates.
- Verify tool is centered and balanced – Machine should run smoothly without vibration. Any vibration indicates misalignment or binding.
Phase 3: Cylinder Honing Operation
- Start rotating honing tool at low speed (300–500 RPM) – Begin honing with gentle downward pressure. Tool expands as rotation begins.
- Gradually increase spindle speed to 600–700 RPM – Abrasive globules conform to bore geometry as speed increases. Smooth operation without vibration is normal.
- Begin vertical stroking motion (up and down in bore) – Vertical stroking combined with rotation creates crosshatch pattern. Stroke speed should be steady, approximately 80–120 strokes per minute.
- Maintain continuous honing oil supply – Oil must flow freely to bore. Dry honing causes excessive tool wear and poor surface finish. Check oil supply frequently during operation.
- Monitor honing progress (typically 2–5 minutes per cylinder) – Honing time depends on initial bore condition and desired surface finish. Over-honing removes excessive material and changes bore geometry.
- Listen and feel for consistent cutting action – Uniform resistance during stroking indicates proper contact. Sudden changes suggest binding or misalignment—stop and investigate.
Phase 4: Crosshatch Verification & Finish Assessment
- Reduce spindle speed gradually to 300 RPM – Slow rotation before removing tool from bore.
- Carefully withdraw honing tool from cylinder – Stop tool rotation after complete withdrawal. Remove and clean tool immediately after use.
- Visually inspect honed bore surface for crosshatch pattern – Proper crosshatch should show diagonal lines at 25–35° angle crossing vertically, creating diamond pattern throughout bore.
- Assess surface finish texture with finger touch – Honed surface should feel smooth with controlled texture. Excessive roughness or glazing indicates improper honing.
- Verify bore diameter after honing – Measure bore at top, middle, and bottom. Diameter change should be 0.0005–0.001 inches. Out-of-round should not exceed 0.0005 inches.
- Confirm crosshatch angle with honing angle gauge if available – Optimal angle: 25–35°. Incorrect angle reduces ring seating efficiency.
Phase 5: Bore Cleaning & Oil Removal
- Flood bore with cleaning solvent – Remove all honing oil and metal debris from bore. Oil remaining on bore interferes with piston ring installation.
- Scrub bore with soft brush and solvent – Use brass or soft nylon brush (not steel). Gentle scrubbing removes particles trapped in crosshatch pattern.
- Dry bore thoroughly with clean cloth – All moisture and oil must be removed. Dry bore is essential for proper ring installation and seating.
- Verify bore is completely clean and dry – Final inspection confirms ready for piston ring installation. No oil residue should be visible.
Phase 6: Ring Installation & Performance Verification
- Install new piston rings according to engine specification – Proper ring installation on clean, properly honed bore ensures optimal seating and performance.
- Monitor engine break-in period (typically 500–1,000 miles) – Proper crosshatch finish enables quick ring seating. Break-in period should show progressive performance improvement.
- Observe oil consumption during break-in – Properly honed cylinder with good crosshatch shows minimal oil consumption. Excessive oil consumption indicates poor honing or defective rings.
- Confirm engine reaches full power output post-break-in – Proper ring seating from good honing delivers full engine power. Any power deficit suggests honing problem or ring issue.
- Document honing procedure in engine service records – Maintain permanent record of bore diameter before/after honing, crosshatch assessment, and break-in observations.
Critical Safety & Procedure Warnings
Never Commit These Mistakes:
- ❌ Never exceed 1,000 RPM spindle speed – High speed causes excessive heat, tool wear, and poor surface finish. Stay in 300–700 RPM range.
- ❌ Never hone without adequate honing oil – Dry honing damages tool and produces poor surface finish. Continuous oil supply essential throughout operation.
- ❌ Never over-hone (remove excessive material) – Honing should remove only 0.0005–0.001 inches. Over-honing changes bore diameter and defeats ring seating benefits.
- ❌ Never skip crosshatch verification – Poor crosshatch pattern compromises ring seating and oil control. Always verify 25–35° crosshatch angle.
- ❌ Never install rings on oily or wet bore – Oil interferes with ring seating. Always clean and dry bore completely after honing.
- ❌ Never use inadequate block securing – Block must be stable and fixed. Movement during honing creates out-of-round conditions.
- ❌ Never skip bore measurement verification – Verify bore diameter before/after honing. Excessive diameter change indicates honing error.
- ❌ Never skip break-in period observation – Monitor engine performance and oil consumption. Problems indicate honing issue requiring correction.
Frequently Asked Questions
Q: What is the optimal crosshatch angle for ring seating?
A: Optimal crosshatch angle is 25–35°. This angle provides optimal oil retention and ring seating guidance. Too steep or too shallow reduces ring seating efficiency.
Q: How much material should honing remove from bore?
A: Honing should remove only 0.0005–0.001 inches of material. Over-honing removes excessive material, changes bore diameter, and creates out-of-round conditions.
Q: Can GBD6 be used on aluminum cylinders?
A: GBD6 is designed for cast iron and steel cylinders. Aluminum cylinders require softer abrasive to prevent galling. Consult tool specifications for aluminum honing.
Q: How long does GBD6 Flex-Hone typically last?
A: Tool life depends on use. With proper honing oil, low spindle speed (300–700 RPM), and correct technique, a single GBD6 can hone dozens of cylinders. Tool life reduces with high speed, inadequate cooling, or over-honing.
Professional Honing Ensures Ring Seating Success
Get BRM GBD6 – $127.30Key Takeaways
- BRM GBD6 Flex-Hone is essential for professional cylinder honing on 5-1/2" to 6" bores
- Proper procedure ensures 25–35° crosshatch finish for optimal ring seating
- Flexible abrasive globules conform to bore geometry without tapering or out-of-round
- Low spindle speed (300–700 RPM) with continuous honing oil prevents heat and tool damage
- Honing should remove only 0.0005–0.001 inches of material for precision results
- Complete bore cleaning and drying essential before piston ring installation
- Proper honing reduces engine break-in time and ensures warranty-free performance