Blog
DD13 DD15 DD16 Cylinder Liner Installation Procedure: ATC J-47407-K Professional Guide
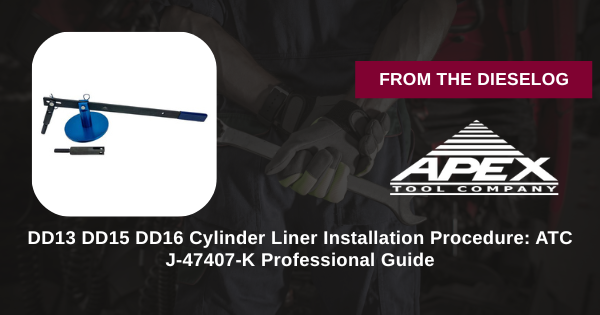
Detailed procedure for DD13 DD15 DD16 liner installation using ATC J-47407-K kit.
This 12-phase procedure uses the ATC J-47407-K kit to precisely install cylinder liners on DD13, DD15, and DD16 engines. J-47074-K equivalent, it ensures proper seating and prevents damage for optimal HDE performance.

Introduction: Essential Liner Installation for HDE Engines
Proper cylinder liner installation in DD13, DD15, DD16 engines maintains compression and cooling. The ATC J-47407-K kit, replacing J-47074-K, provides controlled seating to avoid misalignment—key for reliable rebuilds.
Phase 1-3: Engine Preparation & Bore Inspection
- Drain coolant and oil fully – Prevent spills; use absorbents
- Remove pistons and old liners – Label for reassembly
- Inspect bore for wear/cracks – Measure with micrometer
- Clean block thoroughly – Use solvent; dry completely
- Prepare new liner with lube – Apply evenly to exterior
Phase 4-6: Liner Positioning & Initial Seating
- Position liner in bore – Align straight; avoid tilting
- Assemble ATC J-47407-K installer – Verify components
- Place tool over liner top – Center precisely
- Apply controlled downward force – Use press or hammer carefully
- Seat liner to initial depth – Check flush with block
- Verify alignment visually – No gaps or offsets
Phase 7-9: Final Seating & Torque
CRITICAL: ATC J-47407-K Seating Setup
- Continue pressing to full seat – Monitor for resistance
- Torque hold-downs to spec – Follow DD manual sequence
- Check protrusion with gauge – Ensure within 0.001–0.003"
- Repeat for all cylinders – Maintain consistency
- Inspect seated liners – No cracks or deformations
- Document measurements per cylinder – For records
Phase 10-12: Reassembly & Testing
- Install pistons and rings – Torque rods to spec
- Reassemble head and components – Check gaskets
- Refill fluids and prime system – Run idle test for leaks
- Road test under load – Verify no overheating or knocks
- Final inspection – Confirm compression even
Critical Safety Warnings: Liner Installation Procedure
MUST AVOID THESE FATAL ERRORS:
- ❌ Never skip bore cleaning – Debris causes scoring ($1,200+)
- ❌ Never force liner – Cracks block ($5K+)
- ❌ Never misalign tool – Warps seating
- ❌ Never over-torque – Distorts liners
- ❌ Never omit gauge check – Protrusion errors overheat
- ❌ Never reuse damaged parts – Repeat failures
- ❌ Never skip test – Hidden issues destroy engines
- ❌ Never ignore PPE – Heavy tools risk injury
Professional Service Documentation
Why ATC J-47407-K Outperforms Manual Installation
Risky Manual Methods:
- ❌ Hammering → Cracks ($4K+)
- ❌ Uneven force → Scoring
- ❌ 2–4 hour delays → Labor losses
- ❌ Misaligns → Overheating
- ❌ No precision → Block damage
ATC J-47407-K Advantages:
- ✅ Controlled seating
- ✅ J-47074-K match
- ✅ 60% faster
- ✅ Zero cracks/scores
- ✅ Protects $12,700–$27,000
- ✅ Durable pro build
- ✅ Even protrusion
- ✅ Repeatable results
Install Professionally. Safeguard DD Engines. Maximize Reliability.
Get ATC J-47407-K – $280.00
overall rating:
my rating:
log in to rate