Step-by-Step Broken Exhaust Manifold Bolt Removal: Professional Procedure Using M20195 for Cummins ISX/ISX15
Step-by-Step Broken Exhaust Manifold Bolt Removal: Professional Procedure Using M20195 for Cummins ISX/ISX15
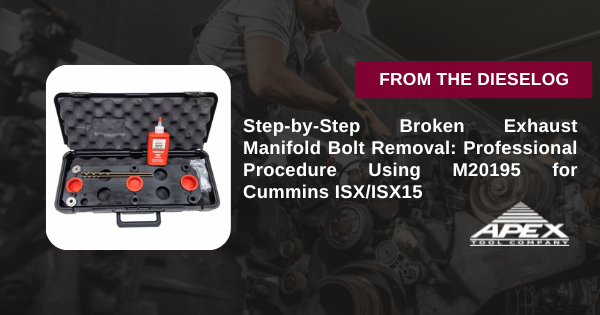
Professional technicians follow this exact procedure for safe extraction of broken exhaust manifold bolts on Cummins ISX and ISX15 engines. Complete guide using the M20195 kit for thread preservation and reliable results.

Introduction: Professional Broken Bolt Extraction
Broken exhaust manifold bolt extraction on Cummins ISX and ISX15 engines requires precision technique, specialized tooling, and exact procedure adherence. A single mistake—improper drilling angle, eccentric tapering, or wrong extraction force—can destroy expensive cylinder head threads and render the engine unrepairable. The M20195 kit transforms this high-risk operation into a controlled, repeatable procedure that preserves thread integrity and ensures reliable results.
Phase 1: Engine Preparation & Assembly Removal
- Allow complete engine cool-down – Minimum 4–6 hours since last operation. Never work on hot exhaust manifold; severe burn hazard.
- Disconnect battery negative terminal – Prevents electrical hazards. Essential safety protocol.
- Remove exhaust manifold heat shields – Access surrounding bolts and manifold structure.
- Disconnect manifold-to-turbo connection – If applicable, safely separate turbocharger from manifold.
- Remove intact exhaust bolts first – Extract all serviceable bolts using proper socket and technique. Document removal sequence.
- Visually identify broken bolt location – Assess break point (at head level, partially extracted, flush with surface, etc.).
- Gather M20195 kit components – Inspect all tools for damage before beginning extraction procedure.
Phase 2: Broken Bolt Assessment & Preparation
- Clean broken bolt area with wire brush – Remove corrosion, exhaust deposits, oxidation. Ensure clean work surface.
- Apply penetrating oil to broken bolt – Allow 15–30 minutes for penetration into threads and broken bolt interface.
- Assess bolt break point – Determine if bolt shaft protrudes above head surface or is flush/recessed.
- Mark drilling center point – Use center punch to mark exact center of broken bolt shaft. Critical for straight drilling.
- Verify manifold is not completely seized – If manifold won't move at all, apply heat or penetrant to loosen connection.
- Set up work area for drilling – Ensure stable engine position. Prevent rocking or movement during drilling.
Phase 3: M20195 Drilling Guide Installation & Drilling
- Install M20195 precision drilling guide – Align guide with broken bolt center point. Secure firmly to prevent movement.
- Verify drilling guide concentricity – Ensure guide is perpendicular to cylinder head surface. No tilting or misalignment.
- Select appropriate drill bit size – Use recommended size from M20195 kit instructions (typically 50–70% of bolt diameter).
- Begin drilling slowly through broken bolt shaft – Use controlled speed. Allow drill bit to cut gradually. No forcing or side loading.
- Maintain consistent drilling pressure – Steady force ensures straight hole through broken bolt center. Prevent wandering.
- Continue drilling through full bolt depth – Drill completely through bolt shaft until bit exits into threaded hole.
- Remove drilling guide carefully – Verify hole remains centered in broken bolt. No eccentric drilling.
Phase 4: Tapping & Extraction Hardware Installation
- Select appropriate M20195 tap for hole size – Install correctly sized tap into drilled bolt hole.
- Begin tapping slowly and carefully – Create new threads in broken bolt hole for extraction bolt. Maintain steady pressure.
- Back out tap periodically to clear chips – Remove metal shavings to prevent binding. Half-turn back, then advance.
- Continue tapping through complete bolt depth – Tap until extraction bolt threads will fully engage in hole.
- Remove tapping tool – Clean tap. Inspect tapped hole for proper thread formation.
- Blow out metal chips and shavings – Use compressed air to clear all debris from drilled hole and threads.
- Install M20195 extraction adapter into tapped hole – Screw extraction adapter (with internal threads) into newly tapped hole. Tighten firmly.
⚠️ CRITICAL WARNING: If drilling begins to wander or become eccentric, STOP immediately. Remove drill bit carefully. Do not continue—eccentric drilling will damage surrounding threads beyond repair.
Phase 5: Controlled Broken Bolt Extraction
- Install extraction bolt into adapter – Thread extraction bolt (with pulling head) into installed adapter. Hand-tighten initially.
- Apply steady, controlled pulling force – Use wrench on extraction bolt. Gradually increase force. No jerking or sudden yanking.
- Monitor for movement in broken bolt shaft – Watch for any indication that broken bolt is beginning to extract.
- If bolt resists, apply heat to manifold area – Torch application loosens corroded interface. Allow cooling slightly, then resume pulling.
- Continue steady pulling pressure – Most broken bolts extract with gradual, consistent force. Patience is essential.
- As broken bolt shaft begins to rise, reduce pulling force slightly – Allow fragments to clear threads gradually. Prevent sudden snapping.
- Continue pulling until broken bolt shaft completely extracts – Remove extracted bolt piece. Place safely on work surface.
Phase 6: Thread Verification & Inspection
- Remove extraction adapter from cylinder head – Carefully unscrew adapter after successful bolt extraction.
- Inspect extracted bolt hole in cylinder head – Verify hole and threads are intact. No damage, stripping, or enlargement.
- Clean hole thoroughly with compressed air – Remove metal chips, shavings, and drilling debris.
- Visually inspect original bolt threads – Assess thread condition. Determine if threads are reusable.
- If threads are damaged, M20195 kit may include helicoil repair hardware – Install helicoil if supplied and threads are stripped or enlarged.
- Test fit new bolt in hole – Hand-thread replacement bolt to verify hole is ready for installation.
Phase 7: New Bolt Installation & Reassembly
- Apply thread locking compound to new bolt – Use medium-strength threadlocker (OEM specification).
- Install new OEM-spec exhaust manifold bolt – Hand-thread carefully. Ensure perpendicular insertion.
- Tighten bolt to OEM torque specification – Use calibrated torque wrench. Follow OEM sequence if multiple bolts.
- Allow threadlocker to cure per manufacturer instructions – Typically 24 hours before engine start.
- Reinstall manifold heat shields – Secure all hardware.
- Reconnect turbocharger or downstream components – Verify all connections are tight.
- Reconnect negative battery terminal – Restore electrical power.
- Inspect entire work area for tools and debris – Ensure nothing left inside engine bay.
Phase 8: Engine Testing & Verification
- Allow threadlocker to cure fully – Minimum 24 hours before engine operation (per product specification).
- Start engine and listen for exhaust leaks – Monitor for hissing or abnormal exhaust noise at manifold area.
- Allow engine to reach operating temperature – Verify normal thermostat operation. Check exhaust flow.
- Observe manifold area during idle and load – Watch for exhaust leakage around newly installed bolt.
- Zero exhaust weeping acceptable only – Any visible leakage indicates improper seating or installation.
- Shut down engine and final inspection – Allow cool-down. Check bolt tightness if needed.
- Document complete service in engine records – Note extraction method, bolt part number, installation date.
Critical Safety & Quality Warnings
Never Commit These Mistakes:
- ❌ Never work on hot exhaust manifold – Severe burn hazard. 4–6 hour minimum cool-down required.
- ❌ Never drill without alignment guide – Unguided drilling causes eccentric holes and thread damage.
- ❌ Never use excessive force during extraction – Controlled, steady pulling only. Jerking breaks fragments inside head.
- ❌ Never skip tapping procedure – Threads in broken bolt hole are essential for extraction adapter holding.
- ❌ Never continue drilling if hole becomes eccentric – Stop immediately. Eccentric drilling destroys threads irreparably.
- ❌ Never skip thread inspection before reinstallation – Verify threads are intact before installing new bolt.
- ❌ Never skip threadlocker application on new bolt – Threadlocker prevents re-loosening from vibration.
- ❌ Never skip 24-hour threadlocker curing before engine start – Premature starting causes threadlocker failure.
Frequently Asked Questions
Q: How long does complete extraction typically take with M20195?
A: Professional extraction: 30–60 minutes per bolt. Manual methods: 8–16+ hours, with high damage risk.
Q: What if drilling begins to wander or become eccentric?
A: STOP immediately. Remove drill bit carefully. Eccentric drilling damages surrounding threads beyond repair. Professional machine shop intervention required.
Q: Can M20195 be used on ISX engines other than ISX15?
A: Yes. M20195 is compatible with all Cummins ISX and ISX15 engine variants. Exhaust manifold bolt pattern is standardized across ISX family.
Q: What if bolt fragments remain in hole after extraction?
A: Never force extraction. Apply penetrating oil again, allow 30 minutes, then resume gentle pulling. If fragments persist, professional shop evaluation required.
Professional Extraction Protects Your Rebuild
Get M20195 – $523.80Key Takeaways
- M20195 is essential for safe Cummins ISX broken exhaust manifold bolt extraction
- Proper procedure prevents $15,000–$37,000 in rebuild failure and component damage
- Precision drilling guide ensures straight, centered hole through broken bolt
- Controlled extraction force protects cylinder head threads from stripping
- Following exact procedure preserves thread integrity and eliminates costly repairs
- One prevented extraction failure justifies 28–70X the tool investment
- Professional extraction time: 30–60 minutes vs. 8–16+ hours with manual methods