Blog
Tech Guide: John Deere Injector Sleeve Removal with the JDG10014
Professional Shop Procedure for John Deere PowerTech Injector Sleeve Service

A professional shop procedure for pulling John Deere electronic injector sleeves cleanly — bore intact, sealing surfaces preserved, and the cylinder head ready for fresh sleeves.
Why Proper Sleeve Removal is Non-Negotiable
On a John Deere diesel, the cylinder head is the most expensive single casting in the top end. The injector sleeve bore is the most damage-sensitive feature on that casting. Combine those two facts and you land at the core principle of this procedure: the cost of doing it wrong is orders of magnitude greater than the cost of doing it right. The JDG10014 Servicegard tool exists because the OEM recognized that improvised sleeve removal was generating more warranty claims than the sleeves themselves ever caused.
This guide walks through the full shop procedure — from head prep to bore inspection — with the torque specs, tool callouts, and common pitfalls that separate a clean sleeve pull from a cylinder head replacement. Read it end-to-end before you touch the first sleeve.
The Injector Sleeve Removal Checklist
- Step 1 — Decommission the Fuel and Cooling Systems and Remove the Injectors.
Before the JDG10014 ever comes out of the drawer, the engine needs to be correctly prepped. Drain the cooling system to below the head level, relieve the high-pressure fuel rail per the John Deere service procedure, and disconnect the batteries. Remove the rocker cover, valve train components as specified, and the fuel rail. Back off the injector hold-down bolts evenly and remove each injector carefully — inspect each one for evidence of the failure mode (carbon on the tip indicates combustion blow-by; coolant wash on the body indicates upper o-ring failure). Tools needed: standard metric socket set, torque wrench, injector puller if required, clean rags, labeled containers for hardware. Common mistake: skipping the fuel system depressurization step — residual rail pressure on common-rail systems is lethal. - Step 2 — Clean and Inspect the Sleeve Bore Area.
Before pulling the sleeve, clean the upper bore area with a non-metallic brush and lint-free rag. You are looking for the sleeve flange, the upper retaining feature (if equipped), and any sealant residue from previous service. Never use abrasive media or wire brushes on the head surfaces — you will alter dimensions. Tools needed: nylon bore brush, solvent-safe rags, inspection light, borescope if available. Common mistake: pulling a sleeve with carbon build-up still holding it — always clean first, then pull. - Step 3 — Engage the JDG10014 on the Injector Sleeve.
Follow the John Deere service manual for the correct engagement sequence. The JDG10014 is designed to seat on the sleeve's internal geometry and transfer pulling force along the sleeve centerline. Hand-thread and hand-seat the tool — do not use impact tools to engage. Verify full, square engagement before applying pulling force. Tools needed: JDG10014, hand wrenches only during engagement. Common mistake: partial engagement — a tool that's only half-seated will cock the sleeve and score the bore the moment you apply load. - Step 4 — Apply Controlled, Progressive Pulling Force.
With the JDG10014 fully engaged, apply pulling force per the service procedure — smooth, progressive, and along the sleeve axis. On a free sleeve, the initial break is immediate. On a corroded sleeve, you may need to apply force, hold, and let thermal and mechanical relaxation do part of the work before the sleeve breaks free. Never use impact wrenches on the pulling mechanism. Reference torque or force specifications in the John Deere CTM for the specific engine family. Common mistake: brute-forcing a sleeve that needs penetrating solvent and patience — if a sleeve resists, back off, apply an appropriate penetrant to the bore area, wait, and retry. A broken pulling mechanism or sheared sleeve flange costs far more than an extra twenty minutes. - Step 5 — Remove the Sleeve, Inspect the Bore, and Prep for Installation.
Once the sleeve releases, remove it smoothly along the bore axis. Inspect the removed sleeve for the failure mode and document it — this informs whether a single-sleeve or full-set replacement is warranted. Inspect the cylinder head bore for scoring, distortion, corrosion pitting, or out-of-round condition. The bore should be smooth, within dimensional spec per the John Deere CTM, and free of any residual sleeve material. Clean the bore thoroughly with approved solvent and a non-metallic brush. Any bore damage must be evaluated against the service limit — if out of spec, the head requires repair or replacement before new sleeves can be installed. Tools needed: bore micrometer, inspection light, borescope, solvent-approved cleaning brush. Common mistake: installing a new sleeve into a damaged bore and hoping the interference fit compensates — it won't, and the comeback is guaranteed.
🛠 PRO-TIP
Before any sleeve pull on a high-mileage or severe-service engine, spray the bore-to-sleeve interface with an approved penetrant, reinstall the valve cover loosely, and let the engine sit overnight. Thermal cycling and capillary action will break down corrosion bonds you can't touch mechanically. The difference between a fighting sleeve and a smooth pull is often eight hours of soak time.
Troubleshooting Common Issues
Symptom 1: Sleeve won't break free at rated pulling force.
Cause is almost always corrosion bonding between sleeve OD and head bore. Back off the tool, apply a penetrating lubricant to the bore area, let it soak (overnight if possible), and retry. Never exceed the force specification — at that point the risk is a sheared sleeve flange or damaged tool, not a successful pull.
Symptom 2: Sleeve comes out distorted or with visible wall collapse.
Indicates the sleeve was already compromised before pulling, often from a prior combustion blow-by event or freeze damage. The bore still needs full inspection — distorted sleeves often leave material bonded to the bore wall that has to be carefully removed before new sleeve installation.
Symptom 3: Bore shows scoring after removal.
Measure the scoring depth and bore dimensions against the John Deere CTM service limits. Minor cosmetic scoring outside the sealing lands may be acceptable; scoring on the upper o-ring land or lower seat surface is not. When in doubt, the head goes to a qualified machine shop for evaluation or gets replaced.
Symptom 4: New sleeve won't seat fully during installation.
Almost always a bore prep issue — residual debris, corrosion, or deformation. Do not force the installation. Re-inspect the bore, clean it again, and verify dimensions. Forcing a new sleeve into a contaminated or out-of-spec bore is the fastest way to generate a second repair.
Symptom 5: Coolant leak at the sleeve after reassembly.
Root cause is typically either a damaged upper o-ring during installation, an out-of-spec bore that wasn't caught on inspection, or incorrect seating depth. Pull the injector, inspect the upper sealing area, and redo. The JDG10014 extraction quality directly influences whether this leak happens in the first place — clean bores seal on the first try.
Tool Compatibility & Engine Platforms
The JDG10014 is designed for John Deere electronic injector sleeve removal across the PowerTech engine family. This includes a wide range of off-highway applications: construction equipment (excavators, wheel loaders, backhoes, skid steers, articulated trucks), agricultural equipment (tractors, combines, sprayers), power generation (stationary gensets, mobile power units), and industrial drives. Because John Deere uses consistent sleeve geometry across the electronic injector platform, the JDG10014 sees duty across all of these applications with the same engagement procedure.
Always verify the specific tool callout against the John Deere Component Technical Manual (CTM) for your engine serial range. John Deere occasionally revises sleeve geometry across production breaks, and a service campaign may require a specific tool variant. The Apex Tool Company product team — 812-579-5478 — maintains application coverage data and can confirm fit before you commit to the job.
Safety and Shop Best Practices
Injector sleeve service happens inside a cylinder head that has seen combustion, coolant, and high-pressure fuel. Treat the workspace accordingly. Eye protection is mandatory — sleeve flanges and o-ring remnants can become projectiles under pulling load. Keep the engine bay and bench free of contamination; any debris that enters the bore during service becomes an installation problem later. Never apply heat to the sleeve or bore with open flame — heads have aluminum components, residual fuel, and cooling passages that make torches genuinely dangerous.
Document the job. Photograph each removed sleeve, record the bore measurements, note any unusual findings (corrosion patterns, carbon build-up, evidence of prior repair), and retain the paperwork with the service order. This protects the shop on warranty questions and gives the tech a reference if the same engine comes back for follow-up work. Good sleeve service is half mechanical skill and half documentation discipline.
Wear the right gloves. Nitrile or mechanic's gloves protect hands from coolant residue, fuel contamination, and sharp edges on removed sleeves. Avoid cloth gloves that can snag on tool features or leave lint in the bore. Keep a dedicated lint-free cloth for bore cleaning — a single fiber left in the sealing area can initiate a leak path that defeats the entire repair.
Manage the work environment. Injector sleeve service is not a job to do with the shop door open on a windy day. Dust, airborne debris, and temperature swings all complicate bore inspection and sealing-surface work. Pick the cleanest bay in the shop and treat it as a controlled environment for the duration of the repair. The extra discipline pays off in first-time-fix rates.
Train the whole team, not just the lead tech. The JDG10014 is simple enough that any qualified diesel technician can learn to use it correctly in one supervised job. Shops that restrict the tool to one person create bottlenecks — and when that one person is out, the injector work either stops or gets handed to someone who hasn't been trained. Document the procedure, run hands-on training, and build the expertise across the team so that John Deere injector work never stalls on personnel availability.
Companion Tools and Consumables to Have On Hand
A professional injector sleeve service job goes faster and cleaner when the full toolkit is staged before the first fastener comes off the engine. Beyond the JDG10014 itself, the bench should have the matching sleeve installer sized to the engine family, a bore cleaning brush set approved for non-abrasive use on cylinder head bores, a bore micrometer calibrated to the John Deere service limit range, and an inspection borescope for visual confirmation of bore condition. Consumables include new sleeves in the correct part number, fresh o-rings (never reuse), seat washers where specified, appropriate thread sealant per the service manual, and an approved penetrant for corrosion-bonded sleeves.
Torque wrenches deserve a note of their own. Injector hold-down bolts and any fasteners in the sealing path must be torqued to spec on reassembly — no exceptions, no approximations. Every professional shop should have a calibrated torque wrench in the working range of the injector fasteners, and torque calibration should be documented on a periodic basis. A sleeve installed perfectly with the JDG10014 can still leak if the injector hold-down torque is off spec; the entire sealing chain has to be respected.
Keep the JDG10014 itself in a dedicated drawer or foam-fit case. Specialty tools that get tossed into a general drawer accumulate edge damage, dimensional wear, and surface contamination that eventually compromise extraction quality. A $25 foam-cutout organizer preserves a $440 tool across years of shop use. The ROI on basic tool care is embarrassingly high and almost never prioritized.
Working with Customer Expectations on Sleeve Service
Injector sleeve service is not a repair most end customers understand, and a surprise $2,000–$5,000 bill on what they thought was a "fuel system problem" generates the kind of friction that damages long-term customer relationships. The shop's job is to pre-frame the work correctly: when diagnostic evidence points toward sleeve involvement (coolant-in-oil, fuel-in-coolant, combustion-gas-in-cooling, injector bore corrosion), explain it to the customer before quoting, include the sleeve replacement as part of a complete repair, and document why doing it right the first time beats doing it partially and watching the failure return.
The JDG10014 factors into this conversation. A shop that owns and uses the correct OE service tool is in a stronger position to quote the work at a professional rate, warranty the repair with confidence, and demonstrate to the customer that the engine is being serviced to the manufacturer's standard. A shop that doesn't have the tool either declines the work, subcontracts it, or attempts it with improvised methods — none of which is a good long-term business posture on John Deere diesels.
Technician FAQ
Q1: Can I use penetrating oil inside the bore?
Yes — use a product approved for use near combustion surfaces and flush the bore thoroughly before installing new sleeves. Residual penetrant can contaminate sealing surfaces.
Q2: Do I need to remove the head to use the JDG10014?
Head removal isn't required for sleeve service — the JDG10014 is designed to work with the head installed on the engine. Cooling system drain and injector removal are the prerequisites.
Q3: How do I know if a bore is reusable?
Measure against the John Deere CTM service limit spec with a bore micrometer. Visually inspect under good lighting for scoring, pitting, or corrosion damage to sealing lands. When in doubt, consult a machinist — some bores can be repaired; others require head replacement.
Q4: What torque spec should the new sleeve installer be set to?
Installation torque is specific to the engine family and is published in the John Deere CTM. Never guess — installation force affects sealing and sleeve geometry downstream.
Q5: Should I always replace all sleeves or just the failed one?
Best practice on a major service or rebuild: replace all sleeves. On a targeted single-cylinder repair with documented low hours since the last service, a single-sleeve replacement is defensible — but inspect every remaining sleeve carefully before buttoning up.
Q6: What's the service life of the JDG10014 itself?
Treated correctly — hand-seated, loaded within spec, cleaned after each use — the tool is a multi-decade shop asset. Inspect the engagement surfaces periodically for wear or distortion; a worn tool eventually compromises extraction quality.
Q7: Do I need any additional John Deere service tools to complete an injector sleeve job?
Typically yes — you'll need the corresponding sleeve installer for the engine family and occasionally bore cleaning fixtures. Apex Tool Company stocks the complete Servicegard line; call the product team for a kit recommendation on your specific engine.
Q8: Can I rent or borrow this tool instead of buying it?
For shops that regularly service John Deere diesels, ownership is the correct call — rental logistics alone will cost you as much as the tool over a couple of jobs, and tool availability on demand is a real revenue factor on a down machine.
Service the Head Right the First Time.
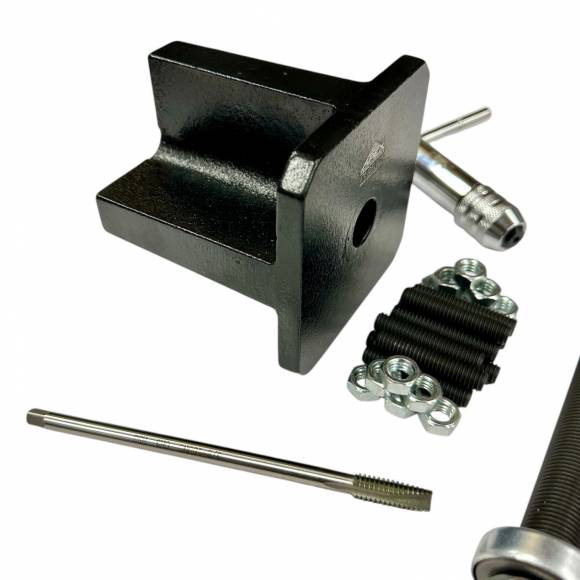
JDG10014 John Deere Servicegard Injector Sleeve Removal Tool — $440.00 — In Stock.
ADD JDG10014 TO CART →📞 812-579-5478 / 800-365-2233 · Mon–Fri 8 a.m.–5 p.m. ET · Free Shipping on Orders Over $500
overall rating:
my rating:
log in to rate