
Blog
PACCAR MX-13 Rear Main Crankshaft Seal Service Steps
Precision engine seal maintenance guidelines for commercial diesel mechanics and fleet overhaul rebuilders.
Replacing the rear main crankshaft oil seal on a PACCAR MX-13 engine during clutch replacement or engine overhaul? Follow this step-by-step professional workshop procedure to mount the M50164 guide plate, extract the old seal cleanly, prepare the dry crankshaft journal, position the new PTFE seal, and drive the press plate to positive mechanical stops without damaging the sealing lip.
Why "Hammering & Prying" Rear Seals Causes Clutch-Destroying Oil Leaks
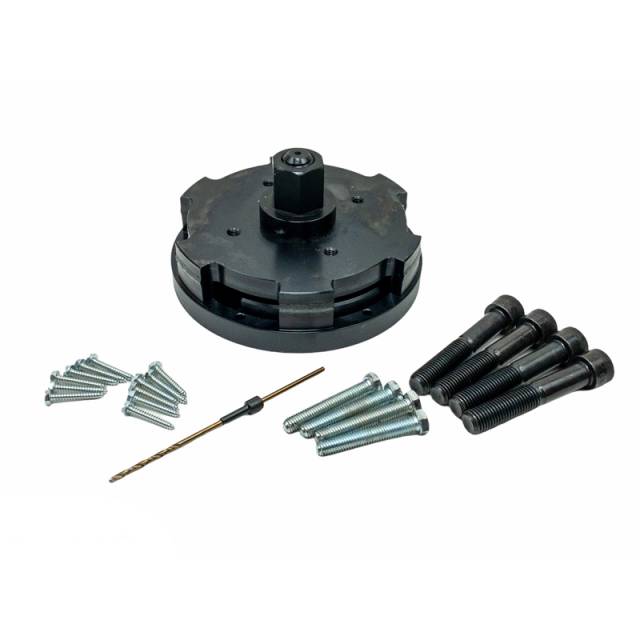
On PACCAR MX-13 commercial diesel engines, the rear main crankshaft oil seal forms the primary fluid barrier between the engine crankcase and the wet transmission bellhousing area. Because the rear main seal surrounds a large-diameter crankshaft flange, installing the seal perfectly square is exceptionally difficult without dedicated guide tooling. Technicians who attempt to seat a rear seal by tapping around its perimeter with a hammer or wood block inevitably cock the steel seal body in the housing. Driving a cocked seal causes one side of the PTFE sealing lip to fold backward or tear against the sharp edge of the crankshaft flange. Once the engine reaches operating temperature and oil pressure, oil streams past the inverted lip, soaking the clutch friction discs and slipping the transmission under load. Furthermore, trying to extract the old seal by driving screwdrivers into the housing space gouges the precision-ground steel crankshaft flange. Any deep scratch on the revolving shaft acts as a mechanical pump, shredding new seal lips in miles. Utilizing the 22-pound M50164 Guided Tool System eliminates these costly service failures. The kit bolts securely to the crankshaft flange, keeping the installer plate 100% perpendicular while advancing the seal smoothly to positive stops—guaranteeing a leak-free repair every time.
The 5-Step PACCAR MX-13 Rear Main Seal Replacement Protocol
- Remove Flywheel & Mount M50164 Removal Plate: Remove the transmission and flywheel. Secure the M50164 base guide plate directly to the rear crankshaft flange bolt holes using included mounting hardware.
- Extract Old Rear Seal Unit Cleanly: Engage the removal collet/screws into the outer steel casing of the old seal. Turn the central forcing screw clockwise to draw the old seal assembly straight off the crankshaft without touching the crank journal.
- Clean & Inspect Crankshaft Sealing Journal: Wipe the crankshaft sealing flange completely clean with dry solvent. Inspect the shaft for grooves or burrs. *CRITICAL: PTFE seals MUST be installed on completely DRY crankshaft surfaces—never apply grease or oil to the PTFE lip!*
- Position New PACCAR PTFE Seal & M50164 Press Plate: Slide the new OEM PACCAR rear main seal onto the pilot adapter sleeve of the M50164 tool. Position the heavy driver press plate and forcing nut assembly over the guide stud.
- Advance Forcing Nut to Mechanical Positive Stops: Turn the forcing nut clockwise using a hand wrench to drive the press plate forward. Continue advancing smoothly until the driver plate seats flush against the physical depth stops. Remove tooling and re-install flywheel to factory torque specs.
PRO-TECH DRY INSTALLATION & POSITIVE STOP MANDATE:
NEVER APPLY OIL OR GREASE TO PACCAR PTFE SEAL LIPS! PTFE seals require a 100% dry crankshaft journal to transfer a microscopic PTFE wear layer during initial startup! Oil lubrication WILL cause permanent high-pressure leaks! ALWAYS TURN FORCING NUTS TO FULL POSITIVE STOPS to guarantee exact OEM depth seating!
22.00 lbs Precision Guided Rear Crankshaft Seal Remover & Installer. Protect PACCAR Overhauls.
Get the M50164 Kit Now
overall rating:
my rating:
log in to rate