Blog
Cummins ISX/QSX Cam Bearing Removal & Installation with the ATC 3164088
A technician's step-by-step procedure for cam bearing service on Cummins ISX, QSX, ISX15, and QSX15

A step-by-step shop-floor procedure for removing and installing cam bearings on Cummins ISX, QSX, ISX15, and QSX15 engines — using the ATC 3164088 kit the way Cummins engineers intended.
Why This Procedure is Non-Negotiable
Cummins ISX and QSX engines run camshafts that operate inside line-bored cast-iron housings — each cam journal must remain in perfect concentric alignment with every other journal for the engine to maintain valve timing, oil pressure, and lobe-to-lifter contact geometry. The bearings that ride between the cam and the bore are thin-wall, oil-grooved, and dimensionally precise. There is no margin for improvisation. A correctly executed cam bearing job, performed with the ATC 3164088 kit, gives the rebuilt engine the same in-spec geometry it had when it left the Cummins factory floor. A poorly executed job — wrong driver, off-axis force, rushed setup — sends the engine out the bay with a defect that won't surface until it's already destroyed something expensive.
This guide walks through the procedure as it should be done on the shop floor: with the proper tools staged before the engine is opened, the bores prepped clean, and the new bearings installed under controlled, axial driving force.
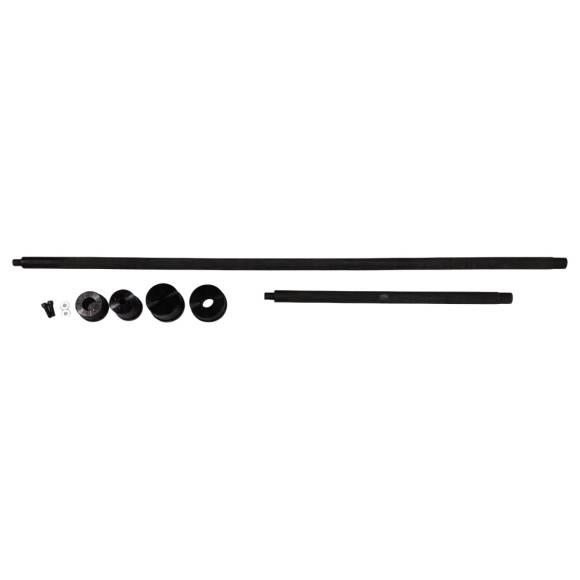
The Cam Bearing Service Checklist
-
Engine Preparation and Workspace Setup
Position the engine on a heavy-duty rebuild stand with full 360-degree rotation. The cam bore axis should be horizontal and accessible from both block ends. Drain all residual oil from the cam galleries and surrounding passages. Clean the block thoroughly — any residual debris in the cam bores will be trapped between the new bearing and the cast iron, creating the exact alignment problem you're working to prevent. Lay out the ATC 3164088 kit on a clean bench, verify both the 24″ and 55″ driver bars are present, and confirm each adaptor's identification before starting.
Tools needed at this stage: engine stand, parts washer, lint-free shop towels, inspection light, dial bore gauge (for post-cleaning bore measurement).
Common mistake: rushing the cleaning step. Residual carbon in the cam bore is the single most common cause of bearing-to-bore misalignment.
-
Old Cam Bearing Removal
Select the correct adaptor from the ATC 3164088 kit for the bearing position being removed. Mate the adaptor to the appropriate driver bar — the 24″ for intermediate positions, the 55″ for through-block reach to the rear journals. Position the adaptor against the cam bearing inner edge, ensuring it is squarely seated. Apply steady, axial driving force from the opposite block end using a calibrated dead-blow or shop press setup. The old bearing should release cleanly without rotating or scoring the bore. Repeat for each bearing position, working systematically from one end of the block to the other so you don't lose track of which positions have been serviced.
Tools needed: appropriate ATC adaptor, 24″ or 55″ driver bar, dead-blow mallet or shop press, inspection mirror.
Common mistake: using the wrong driver bar length and applying force off-axis as a result. Always match the driver bar to the bearing position depth.
-
Bore Inspection and Measurement
With all old bearings removed, inspect each cam bore under strong light. Look for scoring marks, ovality, raised burrs, or pitting at the bore edges. Use a dial bore gauge to measure each bore at multiple points around the circumference and along the bore length. Compare measurements to Cummins service manual specifications for the specific ISX or QSX variant being serviced. Any bore showing ovality beyond tolerance, deep scoring, or out-of-round condition must be addressed before new bearings are installed — typically through machine shop work or sleeve insertion. Skipping this measurement step is how shops install new bearings into compromised bores and create the next comeback.
Tools needed: dial bore gauge, inspection light, Cummins service manual reference data, machinist's straight edge.
Common mistake: visual inspection only. Bores that look fine to the eye can be 0.002″ out of round — well within the failure window.
-
New Bearing Preparation and Oil Hole Alignment
Remove each new cam bearing from its protective packaging only when ready to install it — these are precision parts and benchtop time invites contamination. Lightly coat the bearing OD with clean engine assembly lubricant to ease installation force and reduce risk of micro-scoring. Identify the oil feed hole on each bearing and orient it to align with the corresponding oil passage in the block. This step cannot be corrected after installation — once the bearing is seated, rotating it will damage the bore and the bearing simultaneously. Mark the alignment reference clearly before driving.
Tools needed: clean assembly lube, lint-free wipes, alignment marker, oil-passage reference diagram from service manual.
Common mistake: installing bearings with oil holes blocked or misaligned. This single error has caused more cam failures than any other in the ISX platform.
-
New Bearing Installation
Position the new bearing at the bore entry, ensuring oil hole alignment is correct. Engage the appropriate ATC 3164088 adaptor against the bearing edge — the adaptor face must contact the bearing OD evenly around the full circumference. Mate the driver bar (24″ or 55″ depending on position) and apply steady, axial driving force. The bearing should enter the bore smoothly without rotation or hesitation. Drive until the bearing is fully seated to specification depth — typically flush with or slightly recessed from the bore face per Cummins service data. Repeat for every bearing position, verifying alignment and depth before moving to the next.
Tools needed: correct ATC adaptor, matched driver bar, dead-blow mallet or hydraulic press, depth gauge, inspection mirror.
Common mistake: over-driving the bearing past its proper seated depth, which deforms the bearing shell and reduces oil clearance.
Troubleshooting Common Issues
Symptom 1: Bearing Won't Start Square Into the Bore
This almost always indicates either residual carbon in the bore mouth or an undersized adaptor that isn't seating evenly against the bearing OD. Stop driving immediately, withdraw the bearing if possible, re-clean the bore, and verify the correct adaptor has been selected from the ATC 3164088 kit. Forcing the bearing in at an angle guarantees a comeback.
Symptom 2: Excessive Force Required to Seat the Bearing
A properly prepped bore and correctly oriented bearing should accept the new shell with firm but controlled driving force. If the force required suddenly spikes, suspect carbon buildup, a deformed bearing shell, or partial bore damage. Back off, inspect, and resolve the root cause before continuing.
Symptom 3: Bearing Rotates During Installation
Rotation during driving destroys the oil hole alignment and scores the bore. Stop and remove the bearing if rotation is detected. The cause is typically uneven driving force from a poorly seated adaptor — verify the ATC adaptor face is parallel to the bearing edge before resuming.
Symptom 4: Bearing Seated Past Specification Depth
Over-driven bearings cannot be simply backed out — they are typically deformed and require replacement. Always use a depth gauge against the bore face to verify position before applying final driving force. Cummins service data specifies the precise inset depth for each cam position.
Symptom 5: Visible Bore Scoring After Removal
Any visible scoring on the bore wall means the previous installation went wrong. Document the damage, consult with a qualified machine shop, and do not attempt to install new bearings into a damaged bore — the new bearings will either fail prematurely or telegraph the damage into the cam journal itself.
Tool Compatibility & Variations
The ATC 3164088 kit is engineered specifically for the Cummins ISX, QSX, ISX15, and QSX15 family of heavy-duty diesel engines. These engines share the same cam bore geometry and bearing diameters, making the kit applicable across multiple chassis platforms — including Class 8 over-the-road trucks, heavy construction equipment, mining and oil-field service applications, marine propulsion variants, and stationary power generation installations.
The kit is not compatible with the Cummins ISX12, which uses a different displacement, bore architecture, and cam bearing specification. Shops servicing both ISX15 and ISX12 platforms will need a separate tool kit for the ISX12 platform — never improvise an ATC 3164088 component to fit a different engine series.
🔧 PRO-TIP
Before every cam bearing installation, run a clean lint-free shop towel through the bore one final time and inspect under strong light for embedded debris. Carbon flakes and machining residue invisible to the naked eye are the leading cause of post-install bearing misalignment on ISX/QSX rebuilds. The five extra minutes of bore prep saves the four-hour teardown later.
Safety & Shop Best Practices
Cam bearing service involves significant driving force and heavy components — the ATC 3164088 kit itself ships as a heavy-freight item for good reason. Always wear ANSI-rated safety glasses and impact-resistant gloves when working with driver bars and dead-blow mallets. Keep the work area free of personnel during driving operations; the 55″ bar in particular extends well beyond the engine block and creates a swing-zone hazard. Verify the engine stand is locked and the block is fully secured before applying any driving force. Never strike the driver bar with a steel hammer — always use a dead-blow or a hydraulic press setup for controlled, predictable force application. Inspect the adaptors and bars before each use for cracks, deformation, or wear marks; tools that have been abused or dropped can fracture under load and become projectile hazards.
Maintain organized shop discipline throughout the procedure. Lay out adaptors in installation order on a padded bench. Use parts trays for old bearings and clearly label which position each came from. Keep the new bearing inventory wrapped until immediately before installation. These habits eliminate the small errors that compound into expensive ones.
Frequently Asked Questions
Q: Can I use the ATC 3164088 with a pneumatic or hydraulic press instead of a dead-blow mallet?
Yes. The kit is designed to work with controlled-force tooling including shop presses. In fact, hydraulic press setup is the preferred method in high-volume rebuild shops because it delivers consistent, repeatable driving force with minimal operator variation.
Q: How do I know which adaptor matches which cam bearing position?
Each adaptor in the ATC 3164088 kit is dimensionally matched to the bearing OD specification for the ISX/QSX platform. Reference the Cummins service manual for the specific bearing positions on your engine variant and match the adaptor diameter accordingly.
Q: Should I lubricate the new bearings before installation?
Yes — apply a thin, even coat of clean engine assembly lubricant to the bearing OD. This reduces friction during installation, prevents micro-scoring, and helps the bearing seat smoothly. Do not over-apply; excess lube can contaminate downstream oil passages.
Q: What is the proper installed depth for each cam bearing?
Refer to your Cummins service manual for the specific ISX or QSX variant. Installed depth varies by position and is typically specified as a measurement from the bore face. Always use a depth gauge to verify.
Q: Can the ATC 3164088 kit be used on engines that have been rebored or sleeved?
Only if the bore has been returned to original Cummins specification dimensions. Any non-standard machining alters the bearing fit and the adaptor's effective contact geometry.
Q: How should the kit be stored between uses?
Clean each component after use, apply a light coat of rust-preventive oil, and store in the original case or a dedicated tool drawer away from moisture and contamination. The hardened steel adaptors will hold tolerance for years with proper care.
Q: Is technical support available for first-time users?
Yes. Apex Tool Company offers direct phone support at 812-579-5478 or 800-365-2233, Monday through Friday, 8 a.m. to 5 p.m. Eastern, for application questions and procedural guidance.
Q: How heavy is the kit and what should I expect for shipping?
The ATC 3164088 is classified as a heavy freight item due to the 55″ driver bar and the full adaptor set. It does not qualify for the standard free continental US shipping promotion. Specific freight rates are calculated at checkout.
Equip Your Shop for Precision Cam Service
The ATC 3164088 is the only kit engineered exactly for the Cummins ISX/QSX cam bearing geometry — complete with both the 24″ and 55″ driver bars. Order today and bring factory-grade precision to your next rebuild.
ORDER THE ATC 3164088 → Apexinds.com📞 812-579-5478 / 800-365-2233 • Mon–Fri 8 a.m.–5 p.m. ET
overall rating:
my rating:
log in to rate