Blog
Cummins ISX/QSX Rear Crankshaft Seal Replacement Procedure
The shop-floor procedure for removing and installing the rear seal and wear sleeve — done right, the first time.
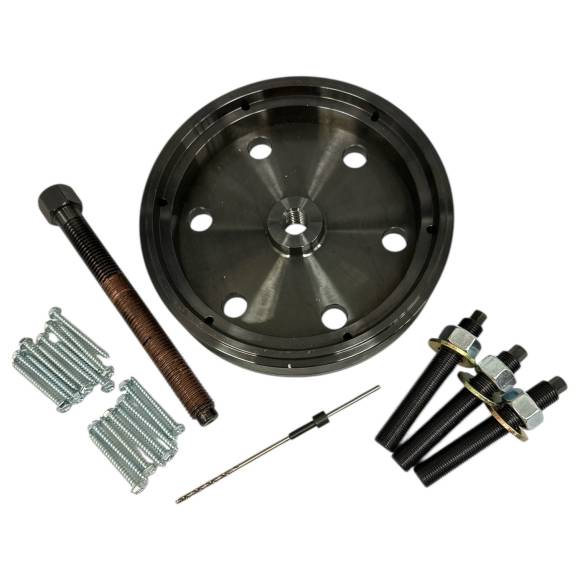
A step-by-step shop-floor procedure for removing and installing the Cummins ISX/QSX rear crankshaft seal and wear sleeve using the M20147-A kit (OEM 3164780 replacement). Built for technicians who need it done right, the first time.
Why This Procedure is Non-Negotiable
The rear crankshaft seal on a Cummins ISX or QSX engine is the last line of defense between the crankcase oil and the bell housing. When that seal fails — or when it is reinstalled incorrectly during a rebuild — the consequences cascade quickly. Oil contamination of the clutch disc destroys friction performance within hours, and once the friction material is saturated, no amount of cleaning will restore it; the clutch must be replaced. Bell housing pooling soaks the starter, the speed sensor, and the wiring harness, creating electrical reliability issues that can persist long after the seal itself is replaced. The flywheel ring gear ends up coated in oil that bakes onto the teeth after a few hot soak cycles, eventually causing starter engagement issues and ring gear wear. None of that is acceptable on a fleet truck or a rebuilt long block. The procedure below is the shop-tested sequence using the M20147-A kit — the direct replacement for Cummins service tool #3164780 — and following it eliminates the most common comebacks a heavy-duty rebuild shop sees.
The ISX/QSX Rear Seal Service Checklist
- Prepare the Engine and Inspect the Sealing Area.
With the transmission removed and the flywheel off, you have direct access to the rear seal housing. Before any tooling touches the engine, clean the entire rear face of the block with a parts-safe degreaser and a lint-free shop towel. Inspect the crankshaft nose for scoring, the wear sleeve for grooving, and the housing for any cracks or distortion around the seal bore. Document any damage before proceeding — if the crank nose is scored beyond the recoverable range, the crankshaft is condemned and no rear seal procedure will hold. Have shop air available for blow-off, fresh assembly lube, the new seal, the new wear sleeve, and the M20147-A kit on the bench within arm's reach. The new seal should remain in its original package until installation to keep the lip clean and the spring captive. - Remove the Old Seal Using the M20147-A Remover Component.
Position the M20147-A remover squarely against the old seal face. Apply removal force in line with the crankshaft axis — never angled, never with a pry-bar substitute. The kit is engineered to pull the seal straight off without contacting the crank nose or distorting the seal bore in the rear cover. As the seal lifts free, support it and remove it cleanly from the work area. If the seal comes out in pieces — which occasionally happens on high-mileage units with hardened seal material — recover every fragment from the bore before moving on. A piece of old seal trapped behind the new one will lift the new seal off its sealing depth and cause an immediate leak. Inspect the seal bore for any galling or aluminum transfer; the bore must be smooth and clean before the new seal goes anywhere near it. - Remove and Replace the Wear Sleeve.
The wear sleeve is the press-fit ring on the crankshaft flange that the seal lip rides against. After tens of thousands of miles, that sleeve develops a microscopic groove worn into it by the seal lip — and even if the groove is invisible to the eye, a new seal lip will not seat correctly against a worn sleeve surface. Use the M20147-A sleeve removal component to lift the old sleeve straight off the crank flange. Never use a chisel, a torch, or a die grinder near the crankshaft — any of those will damage the crank flange surface and create a problem far more expensive than a worn sleeve. With the old sleeve off, clean the flange surface, apply a thin film of the manufacturer-specified installation lubricant, and use the M20147-A installer to drive the new sleeve squarely onto the flange to the correct depth. The new sleeve must be concentric to the crankshaft centerline and seated to the registration shoulder. - Install the New Rear Crankshaft Seal.
With the new wear sleeve in place, lightly lubricate the new seal lip with the lubricant specified in the Cummins service manual — typically engine oil or a Cummins-approved assembly lube. Do not use grease, do not use silicone, and do not run the seal dry. Position the M20147-A installer over the seal and align it with the rear cover bore. Apply controlled installation force in line with the crankshaft axis. The installer registers against the rear cover face at the correct seal depth — there is no guesswork involved. As the seal seats, the lip rolls correctly over the wear sleeve and into its operating position. Once the installer bottoms against the rear cover, the seal is at the correct installed depth. Remove the installer, inspect the seal face for any installation marks, and verify that the seal sits square in its bore. - Reassemble and Verify.
With the seal and sleeve installed, the rebuild sequence continues with the flywheel installation. Torque the flywheel bolts to the Cummins service manual specification for the specific ISX or QSX variant — generally in stages, with the final torque achieved using a calibrated torque wrench. Inspect the seal area one final time before the transmission goes back in. After initial engine start-up and a brief idle, shut the engine down and check the seal area for any sign of weep. A correctly installed M20147-A-serviced seal will be bone dry at the bell housing inspection port — and stay that way for the service life of the engine.
🛠 PRO-TIP
Never reuse a rear crankshaft seal on a Cummins ISX or QSX engine. Even if the seal looks intact during a teardown, the lip has taken a permanent set against the wear sleeve and will not re-seat correctly. Always install a new seal — and always replace the wear sleeve at the same time. The M20147-A handles both operations from one kit, which is exactly why Cummins built the OEM 3164780 around the same workflow.
Troubleshooting Common Issues
Symptom 1: New Seal Leaks Within Hours of First Run
This is almost always an installation depth or alignment issue. The seal either went in cocked, went in too deep, or the lip rolled backward over the sleeve during installation. The M20147-A installer prevents all three by registering against the rear cover at the correct depth and applying force concentrically. If a leak appears after using improvised tooling, the only fix is to remove the seal and reinstall a new one using the proper kit. The seal that just leaked is permanently deformed and cannot be reused — even if it looks intact under inspection, the lip has taken a set that will not re-seat. Order a new seal, a new wear sleeve, and complete the second installation with the M20147-A on the bench. The second installation will hold for the service life of the engine, and the lesson learned from the failure is worth more than the cost of the additional parts.
Symptom 2: Seal Lip Damage Discovered After Installation
If a visible nick or roll-back is seen on the seal lip after the installer is removed, the seal is condemned. Do not start the engine. Pull the seal, inspect the wear sleeve for any debris or burr that may have caused the damage, and install a fresh seal using the M20147-A. Continuing to run a damaged-lip seal will guarantee a comeback within a few hundred operating hours.
Symptom 3: Wear Sleeve Will Not Seat Square
If the new wear sleeve appears to be sitting at an angle on the crank flange, stop driving. Remove the sleeve, clean the flange thoroughly, inspect for any aluminum or material transfer from the old sleeve, and verify that the M20147-A installer is engaged squarely against the sleeve face. A cocked sleeve will create an out-of-round sealing surface that no seal can compensate for.
Symptom 4: Oil Pooling at Bell Housing After Restart
If the seal area shows wetness on the first restart, do not assume the seal failed. Inspect the rear cover gasket, the rear main cap, the oil gallery plugs, and the bell housing drain. Oil that pools at the bell housing can originate from sources other than the rear seal. The rear main cap on a Cummins ISX has its own sealing surfaces that can leak independently of the rear crank seal, and that leak path looks identical to a rear seal failure from the outside. Check the oil pressure sender, the oil gallery plugs along the rear of the block, and any auxiliary drives mounted on the rear of the engine. If those sources are confirmed dry and oil is still appearing at the seal area, the rear seal must be removed and replaced using the M20147-A. Do not run the engine for extended periods with active oil contamination at the bell housing — clutch saturation begins within a few operating hours.
Symptom 5: Difficulty Removing the Old Seal
On high-mileage units, the seal material can harden against the rear cover bore. If the M20147-A remover requires more than expected force, stop and inspect for any retaining hardware or debris around the seal. Never apply impact force — controlled steady pulling will free even the most stubborn seal without damage to the surrounding components.
Tool Compatibility & Variations
The M20147-A is engineered for the Cummins ISX engine family — including ISX15 and ISX12 variants — and the QSX series. These engines share the rear seal and wear sleeve geometry that the kit is designed around, which is why a single kit covers the entire platform. The M20147-A is a direct functional replacement for Cummins OEM service tool 3164780, meaning any procedure documented in the Cummins service manual that references tool 3164780 can be executed with the M20147-A. For shops that service mixed fleets, the kit pairs naturally with other Cummins service tooling on the bench — front cover service tools, injector pullers, valve train tooling, and cam timing fixtures all live in the same workflow, and the M20147-A fits cleanly into that production sequence.
On the application side, the kit covers the full operational range of the ISX platform from the highest horsepower over-the-road tractors down to the lower-rated vocational and stationary applications. The QSX series — used in industrial power generation, marine propulsion, and mining equipment — uses the same rear seal architecture as the on-highway ISX, which is exactly why both engines fall under a single kit specification. The kit does not cross-apply to Cummins B-series or C-series engines, which use a different rear seal architecture and require their own dedicated tooling. It also does not service front crankshaft seals, camshaft seals, or other sealing interfaces on the ISX/QSX — those operations require their own specific service tools, and trying to repurpose the M20147-A for those jobs will damage both the tool and the engine.
Safety & Shop Best Practices
Heavy-duty diesel rebuild work carries real risk, and rear seal service is no exception. Always work on a properly supported engine — either on an engine stand rated for the ISX/QSX weight class or on a level shop floor with the engine secured. A Cummins ISX long block weighs in the neighborhood of 2,800 pounds, and any engine stand under that rating is a safety hazard waiting to find someone. Eye protection is mandatory; seal material can fragment unpredictably during removal, especially on high-mileage units where the elastomer has hardened and become brittle. Hand protection in the form of mechanic's gloves is recommended both for grip and for keeping skin oils off the new seal lip during installation — even a small amount of skin oil can compromise lubricant compatibility on the lip surface.
Use only the M20147-A kit components for their intended purpose — do not substitute random sockets or drift pins, and do not use the kit components for unrelated service operations that may damage them. The kit is precision tooling, and using the installer mandrel as a hammer on an unrelated job will compromise the dimensional accuracy that makes the M20147-A work. Keep the kit clean and dry between uses, and inspect each component for wear or damage before every job. Store the kit in its original case when not in use, ideally on a shelf above floor level to prevent contamination from shop dust and debris. The kit is built for production use, but like any precision tool, it lasts longer and performs better when treated with respect on the bench. A well-maintained M20147-A delivers consistent results across the full service life of the tool, which in a typical fleet shop environment runs for many years.
Technician FAQ
Q: Can I use the M20147-A on an in-frame rebuild or only on out-of-frame?
The kit works for both scenarios as long as the transmission and flywheel are out and the rear seal area is accessible. Most rear seal services happen as part of a clutch replacement or full rebuild.
Q: Do I need to torque anything specific during this procedure?
The seal and sleeve installation themselves are non-torqued — the M20147-A registers against engine surfaces to set correct depth. Flywheel bolt torque must follow the Cummins service manual specification for your specific ISX/QSX variant.
Q: What lubricant should I use on the seal lip?
Follow the Cummins service manual specification. In most cases, clean engine oil or a Cummins-approved assembly lubricant is correct. Never use grease, silicone, or sealant on the seal lip.
Q: How long does the M20147-A last in a production shop?
With reasonable care, the kit performs reliably across hundreds of seal services. It is built for repeated heavy-duty use, not single-job consumption.
Q: Can the kit be used by a single technician?
Yes. The M20147-A is engineered for one-person operation on the bench. No second set of hands required.
Q: What if the crank nose shows scoring from a previous bad installation?
Minor surface marking may be cleaned up with light polishing per the Cummins service manual, but deep scoring condemns the crankshaft. The M20147-A prevents this damage on every future service.
Q: Is technical support available if I have a procedure question?
Yes. Apex Tool Company supports the M20147-A and the full diesel service tool catalog. Reach the team at 812-579-5478 or 800-365-2233, Monday through Friday, 8 a.m. to 5 p.m. ET.
Q: Does the kit include the new seal and wear sleeve, or do I source those separately?
The M20147-A is the tooling kit — the seal and wear sleeve are sourced separately from your Cummins parts supplier per the engine specification.
Get the Job Done Right the First Time
The M20147-A is the direct Cummins 3164780 replacement — engineered for production rebuild shops servicing ISX and QSX engines. $352.08, in stock, ready to ship.
ORDER THE M20147-A NOW →📞 812-579-5478 | Mon–Fri 8 a.m.–5 p.m. ET | Free US shipping over $500
overall rating:
my rating:
log in to rate