Blog
Volvo D13 / Mack MP8 Rear Crankshaft Oil Seal Installation Procedure
A technician's full procedure for rear crank seal replacement on Volvo and Mack heavy-duty engines
A step-by-step service procedure for installing the rear crankshaft oil seal on Volvo FM12, D12, D13, D16 and Mack MP8 / MP10 engines using the ATC 9990166 installer (Volvo 8880013 equivalent).
Why Rear Seal Installation is Non-Negotiable
The rear crankshaft oil seal on a Volvo D13 or Mack MP8 engine is a hidden, high-stakes component. It sits between the crankshaft flange and the flywheel — a sealing surface you cannot inspect once the driveline is reassembled. Get the install right and it lives for 500,000+ miles. Get it wrong and oil ends up on the clutch friction surface within weeks, the truck comes back to your shop, and you eat the labor on a full driveline pull.
The procedure is not difficult — but it is unforgiving. Every step matters: bore prep, lip lubrication, square entry, controlled depth, and consistent press force. Skip or shortcut any one of them and the seal will leak, no matter how good the part is. The ATC 9990166 exists to eliminate the two highest-risk variables in that procedure — alignment and depth — by mechanically enforcing both.
This guide walks the procedure top to bottom for Volvo FM12, D12, D13, D16 and Mack MP8 / MP10 platforms, including tooling, torque references, and the mistakes that cost shops their warranty margin.
The Rear Seal Installation Checklist
- Inspect and Prep the Crankshaft Sealing Surface. Before any new seal touches the engine, inspect the crank flange sealing surface under good light. Look for grooves, scoring, or polishing wear from the previous seal. A faint wear band is normal; a visible groove is not. If you can catch a fingernail on the wear track, the crank needs a speedi-sleeve or the seal will leak regardless of how perfectly it's installed. Clean the sealing surface with brake cleaner and a lint-free cloth. Do not use abrasives. Tools needed: bright drop light, lint-free shop towels, brake cleaner, magnifying glass for marginal cases. Common mistake: rushing this step and accepting a marginal surface "because the new seal will cover it." The new seal will leak in under 10,000 miles.
- Inspect and Prep the Seal Bore. The rear seal bore in the block (or the rear seal carrier, depending on platform variant) must be clean, dry, and free of the old seal's outer casing residue. Old PTFE-faced seals often leave a thin polymer ring bonded to the bore — this must come off. Use a plastic scraper and brake cleaner. Never use a screwdriver, gasket scraper, or wire wheel on the bore. Inspect the bore chamfer; if it's damaged, the new seal will cock on entry. Tools needed: plastic scraper, brake cleaner, inspection light. Torque-relevant note: if the seal carrier was removed, surface-clean both mating faces before reinstall, and torque the carrier to spec per Volvo or Mack service data before pressing the seal — never with the seal already in place.
- Lubricate the Seal Lip and Sealing Surface. Apply a light film of clean engine oil — the same grade running in the engine — to the inner sealing lip of the new seal. The dust lip stays dry. Lightly oil the crankshaft sealing surface where the lip will ride. Never use grease, white lithium, or assembly lube on the lip — they don't break down at operating temperature and they prevent the lip from seating properly during the first revolutions. Tools needed: clean engine oil, lint-free applicator. Common mistake: dry installs. A dry lip rolls under during install and tears within the first 30 seconds of crank rotation on startup.
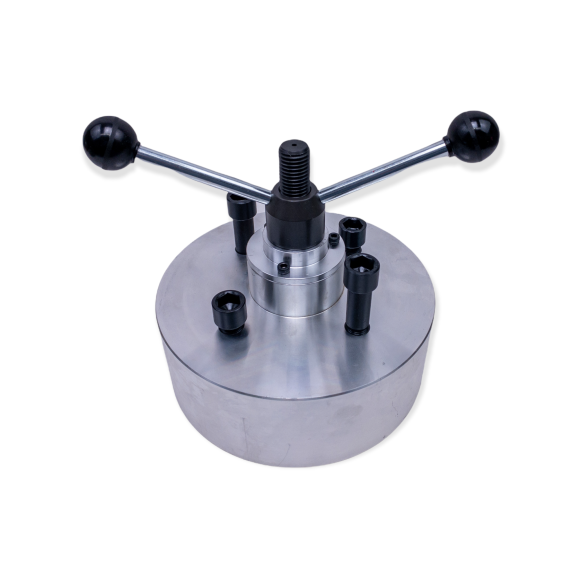
- Position the Installer and Pilot the Seal. Place the new seal onto the ATC 9990166 installer with the dust lip facing outward (away from the engine). Slide the installer assembly onto the crankshaft snout — the machined pilot will center on the crank, holding the seal perfectly perpendicular to the bore axis. This is the entire purpose of the tool: it removes alignment from the technician's hands and mechanically guarantees square entry. Tools needed: ATC 9990166 installer, new Volvo seal 22191895 or 1543896 (or platform-correct equivalent). Common mistake: trying to "pre-seat" the seal by hand before mounting the installer. Don't. The installer is faster, square, and damage-free.
- Drive the Seal to Spec Depth. With the installer aligned, drive the seal into the bore using even, controlled force. On most platform variants the installer features a built-in depth stop — when it bottoms out, the seal is at spec. Do not continue striking after the stop is reached. If your variant of the procedure requires a measured depth (consult Volvo or Mack service data for the specific engine and year), verify with a depth gauge before removing the tool. Tools needed: ATC 9990166 installer, soft-face mallet or controlled press, depth gauge for verification. Common mistake: hammering past the depth stop "just to be sure." Over-driving distorts the seal OD and crushes the dust lip against the bore chamfer.
🔧 PRO-TIP from the Shop Floor
Before you put the truck back together, hand-rotate the crankshaft one full revolution after the seal is installed. The seal lip should glide silently and uniformly around the sealing surface. If you feel any grab, drag, or hear the slightest squeak, stop and inspect. A binding lip on assembly is a leak on the road. The 30 seconds you spend doing this saves a transmission pull six months later.
Troubleshooting Common Issues
Symptom 1 — New Seal Leaks Within 5,000 Miles. Almost always a cocked install or a lip rollover during pressing. Pull the seal, inspect the sealing lip under magnification — you'll usually see a wear pattern that's deeper on one side than the other. Replace the seal, re-inspect the crank surface, and re-install with the ATC 9990166. Do not reuse a removed seal under any circumstances.
Symptom 2 — Seal Won't Fully Seat. The bore chamfer is damaged, or the seal OD is being squeezed by carbon or sealant residue in the bore. Remove the seal, clean the bore thoroughly with a plastic scraper and brake cleaner, deburr the chamfer with a fine abrasive pad (never a file), and reinstall a fresh seal. A seal that's been partially pressed and then pulled is finished — don't try to reuse it.
Symptom 3 — Oil Leak Reappears After 30,000 Miles. Usually crank surface wear, not seal failure. The original seal probably ran on a marginal sealing surface, and the new seal wore the marginal area through. Solution: install a speedi-sleeve on the crank flange before the next seal goes in, then use the ATC 9990166 to seat the new seal at the correct depth on the sleeve.
Symptom 4 — Seal Carrier Won't Sit Flat. If your platform variant uses a removable rear seal carrier and the carrier won't sit flat against the block, the carrier face is warped (usually from over-tightening during the last service) or the dowel pins are damaged. Replace the carrier or have the face machined. Never shim it with sealant.
Symptom 5 — Oil in the Bell Housing After Reassembly. If oil appears in the bell housing immediately on startup, the rear seal is leaking. If it appears gradually over days or weeks, also suspect the rear main bearing cap seal or a porous block. Diagnose by cleaning the bell housing completely, running the engine for a controlled period, and inspecting the leak path. Don't pull the trans twice for the same symptom — diagnose first.
Tool Compatibility & Engine Variations
The ATC 9990166 covers a wide cross-section of the Volvo-Mack heavy-duty engine family. Compatible platforms include:
- Volvo FM12 — 12.1L Euro-spec and early North American applications
- Volvo D12 — Predecessor platform, North American on-highway
- Volvo D13 — 12.8L primary North American on-highway platform (VHD, VNL, VNR, VAH)
- Volvo D16 — 16.1L heavy-haul and severe-service platform
- Mack MP8 — 13L primary Mack on-highway and vocational platform
- Mack MP10 — 16L heavy-haul and severe-service Mack platform
Because Volvo and Mack share the same heavy-duty engine architecture across these platforms, a single installer covers virtually every North American Volvo and Mack on-highway truck with a single-piece rear crankshaft oil seal. The compatible OE seal part numbers — including 22191895 and 1543896 — drop in with no adapters. Note: this installer is designed for single-piece (non two-piece) rear seals only.
Safety & Shop Best Practices
Rear seal work is low-energy compared to most heavy-duty service, but a few safety items matter. Always support the flywheel before the trans comes out — a Mack or Volvo heavy-duty flywheel can exceed 90 pounds. Use a transmission jack with a flywheel cradle. Never rotate the crankshaft using the flywheel ring gear unless the trans is securely supported.
Use shop gloves rated for solvents when handling brake cleaner. The aerosol propellant is harmless at low volumes but in an enclosed bay it displaces oxygen — ventilate.
When using the ATC 9990166 with a soft-face mallet, strike the installer body, never the seal directly, and never use a steel-face hammer. Steel strikes deform the installer over time and degrade its accuracy.
Store the installer in a dedicated tool drawer or case. The pilot surface is the critical wear surface — protect it from drops, debris, and corrosion. A 60-second wipe-down with light oil before storage extends the tool's service life indefinitely.
Technician FAQ
Q: Do I need to remove the rear seal carrier on a D13?
On most D13 variants the seal is replaced with the carrier installed. Check the specific service manual for your engine serial range — early and late D13 variants differ. The ATC 9990166 works for both configurations.
Q: What's the install depth for the seal on a Mack MP8?
The ATC 9990166 has a built-in depth stop that matches the OEM-spec depth. When the installer bottoms, the seal is correctly depthed.
Q: Can I use anaerobic sealant on the seal OD?
No. Modern PTFE-faced seals have an integral coating on the outer casing — adding sealant traps it and prevents proper bore seating. Install dry on the OD, lightly oiled on the inner lip.
Q: How tight should the trans-to-engine bolts be after this job?
Always to current Volvo or Mack service spec for your specific platform and year. Do not reuse stretch bolts. Cross-torque in the correct pattern.
Q: Should I replace the pilot bearing while I'm in there?
On manual-transmission applications, yes — pilot bearings are inexpensive and the labor is already done. Skip this step and you'll be back in 50,000 miles.
Q: How do I prime the new seal before startup?
You don't need to. The oil applied to the lip during install is enough for the first revolutions. Normal crankcase oil mist takes over from there.
Q: Can I use this installer on a Volvo D11?
The ATC 9990166 is specified for FM12, D12, D13, D16, MP8, and MP10. D11 uses a different rear seal architecture — confirm with current service data before assuming tool compatibility.
Q: How do I know my installer hasn't worn out?
Visually inspect the pilot surface for galling or material transfer every 25 to 30 installs. A worn pilot loses concentricity and reintroduces alignment risk. With normal care, the ATC 9990166 holds spec for hundreds of installs.
The Right Tool for a Job That Can't Come Back.
ATC 9990166 Rear Crankshaft Oil Seal Installer — Volvo FM12 / D12 / D13 / D16 / Mack MP8 / MP10. $375.00 — In Stock.
SHOP NOW →📞 812-579-5478 / 800-365-2233 | Mon–Fri 8 a.m.–5 p.m. ET
Free shipping on orders over $500 (US continental)
overall rating:
my rating:
log in to rate