
Blog
Cummins Fuel Injector Preload Adjustment Steps
Precision valve train and fuel system maintenance guidelines for commercial diesel mechanics and fleet rebuilders.

Performing valve overhead adjustments or setting fuel injector plungers on a Cummins diesel engine? Follow this step-by-step professional workshop procedure to rotate the engine to timing markzs, position the rocker arm, apply exact 6 in-lb micro-torque with the ATC20126-A T-handle wrench, and lock down jam nuts without altering preload settings.
Why "By-Feel" Overhead Adjustments Cause Cylinder Misfires & Damaged Plungers
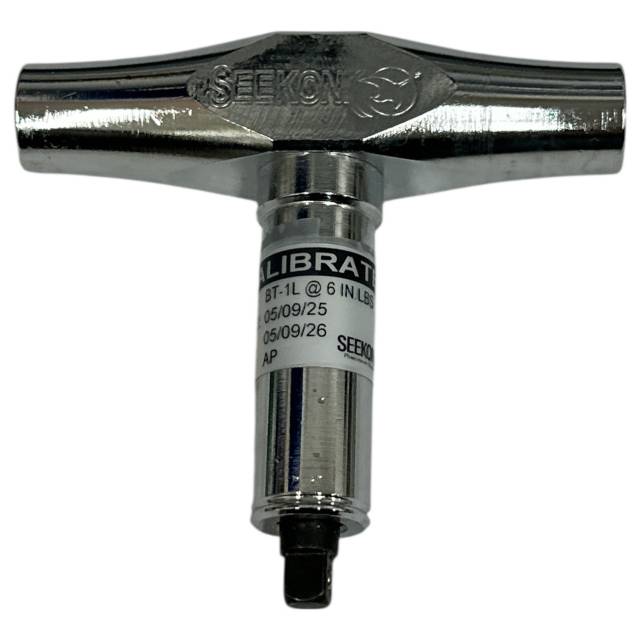
On Cummins diesel engines equipped with mechanical injector adjustment screws, setting injector preload establishes the baseline travel limit of the injector plunger. Because fuel injection pressures exceed thousands of PSI, the mechanical link between the pushrod, rocker arm, and injector plunger must be perfectly calibrated to eliminate lash without loading the internal spring excessively. Technicians who rely on "hand tightness" or un-calibrated screwdrivers inevitably introduce wide torque variances across cylinders. Tightening a setting screw by feel can easily apply 15 to 20 in-lb of torque—over triple the manufacturer spec! This excessive force crushes internal plunger return springs, scores barrel walls, and causes the injector needle to hang open, pouring unburned diesel into the cylinder. Conversely, under-torquing leaves excessive lash, leading to noisy valve train operation, retarded injection timing, and loss of power under load. Utilizing the 1.00-pound ATC20126-A T-Handle Torque Wrench eliminates guesswork completely. The tool fits directly over the adjustment screw, allowing smooth, steady rotation until the internal mechanism clicks and slips at exactly 6 in-lb. This locks in uniform, factory-correct preload across every cylinder in minutes.
The 5-Step Cummins Injector Preload Adjustment Protocol
- Bar Engine to Target Timing Mark: Rotate the engine crankshaft manually to align the timing mark on the accessory drive pulley with the engine front cover pointer for the target cylinder.
- Back Off Lock Nut & Back Out Adjusting Screw: Loosen the lock nut on the injector rocker arm and back out the adjusting screw 2 to 3 full turns to ensure zero tension on the injector plunger.
- Apply ATC20126-A Wrench & Turn Clockwise: Position the ATC20126-A 6 in-lb T-handle torque wrench cleanly onto the adjusting screw driver head. Turn clockwise in a smooth, continuous motion.
- Advance Screw Until Wrench Clicks/Clutches: Continue turning until the internal 6 in-lb torque mechanism slips/clicks cleanly. *Stop turning immediately upon torque breakaway!*
- Hold Adjusting Screw & Torque Lock Nut: Hold the ATC20126-A wrench firmly in place to prevent the adjusting screw from turning, then tighten the rocker arm lock nut to Cummins OEM factory torque specifications using a backup wrench.
PRO-TECH BACKUP HOLD & ZERO-IMPACT MANDATE:
ALWAYS HOLD THE ADJUSTING SCREW STATIONARY while tightening the lock nut! Allowing the screw to turn while torquing the nut WILL alter your 6 in-lb preload! NEVER USE THE ATC20126-A TO BREAK LOOSE SEIZED LOCK NUTS! Use standard hand tools for heavy torque operations!
1.00 lb Precision Factory-Calibrated 6 in-lb T-Handle Wrench. Protect Cummins Engines.
Get the ATC20126-A Wrench Now
overall rating:
my rating:
log in to rate