
Blog
Cummins ISX Injector Leak Test & Cylinder Isolation Steps
Precision fuel system diagnostics and cylinder leak isolation guidelines for commercial diesel mechanics and fleet technicians.
Troubleshooting slow engine shutdown, engine run-on after key-off, or white smoke on a Cummins ISX or Signature engine? Follow this step-by-step professional workshop procedure to mount the ATC3164001 test adapter plate onto the fuel module, route the flexible diagnostic tube to a manometer or water container, bar the engine over, and pinpoint the leaking cylinder using vibration damper set marks.
Why Guessing Which Injector is Leaking Costs Thousands in Unneeded Parts
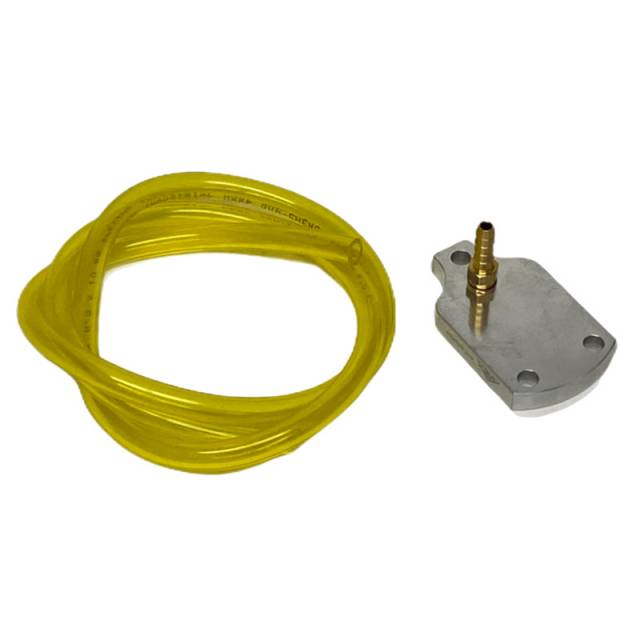
On Cummins ISX and Signature engines with HPI-TP fuel systems, a single worn injector check valve allows fuel to bleed into the cylinder after key-off, causing the engine to keep running or stumble during shutdown. Because all six injectors share common fuel galleries inside the cylinder head, standard electronic cylinder cut-out tests often fail to reveal a mechanical check-valve leak. Mechanics who skip physical leak-down isolation end up pulling all six injectors or replacing an entire set when only one injector is faulty. Utilizing the 2.00-pound ATC3164001 Injector Leak Test Kit (OEM 3164001 Replacement) eliminates guesswork completely. By mounting the test plate in place of the fuel metering actuator and barring the engine over, compression stroke air reveals the exact failing injector via manometer pressure rise or water bubbles.
The 5-Step Cummins ISX Injector Leak Test Protocol
- Clean Fuel Module & Remove Metering Actuator: Clean dirt and road grime off the Integrated Fuel System Module (IFSM). Disconnect the wiring harness and unbolt the fuel metering actuator from the module housing.
- Install ATC3164001 Test Adapter Plate & Tubing: Verify O-ring seals are clean and intact, then bolt the ATC3164001 test adapter plate onto the metering actuator mounting pad. Thread in the brass barb fitting and attach the flexible diesel-resistant tube.
- Connect Tube to Manometer or Clear Water Container: Connect the open end of the flexible tubing to a calibrated manometer—or submerge the tube tip roughly 1 inch below the surface in a clear container of clean water.
- Bar Engine Over & Watch for Pressure Rise or Bubbles: Using an engine barring tool, slowly rotate the crankshaft in the normal direction of rotation through two full revolutions (720 degrees) while watching the manometer or water container for pressure spikes or air bubbles.
- Read Vibration Damper Marks to Identify Faulty Cylinder: The moment air bubbles appear or manometer pressure rises, stop rotating and read the overhead valve set marks (A, B, or C) aligned on the vibration damper to identify which cylinder is on its compression stroke and pinpoint the leaking injector.
PRO-TECH BARRING DIRECTION & CLEANLINESS MANDATE:
ALWAYS CLEAN THE IFSM HOUSING THOROUGHLY BEFORE REMOVING THE ACTUATOR! Any dirt entering open fuel module ports can damage precision fuel metering valves! ALWAYS ROTATE THE ENGINE IN THE NORMAL DIRECTION OF ROTATION when barring over to ensure accurate valve timing and damper mark alignment!
2.00 lbs Precision Cummins ISX & Signature Injector Leak Test Kit. Pinpoint Leaking Injectors Fast.
Get the ATC3164001 Kit Now
overall rating:
my rating:
log in to rate