Blog
Tech Guide: John Deere 4045 / 5075E Rear Crankshaft Seal Installation Procedure
A complete shop-floor walkthrough — from bore prep to flywheel torque — for leak-free rear main installation every time.
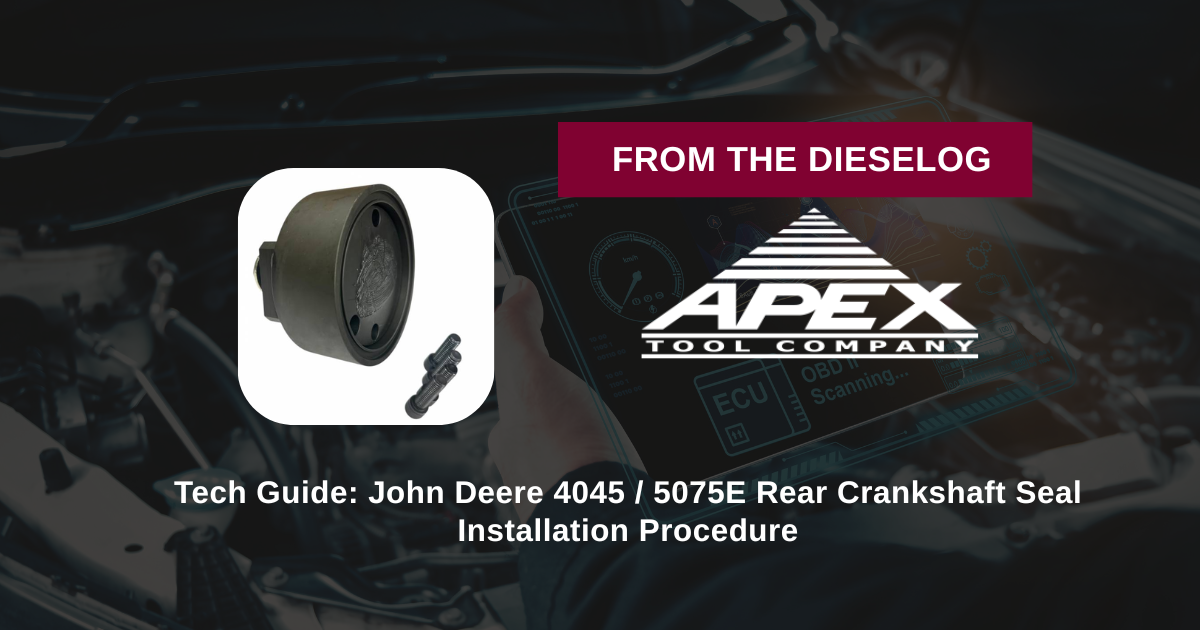
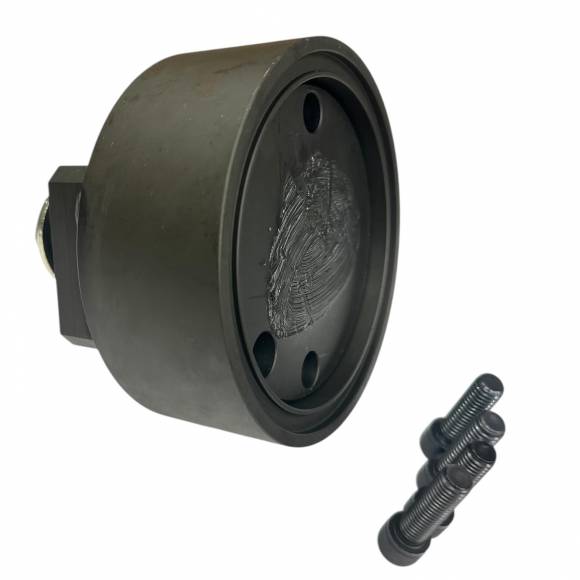
A complete shop-floor walkthrough of rear main seal installation on John Deere 4045 engines and the 5075E tractor platform — using the JT30040B installer for repeatable, leak-free results.
Why the Rear Main Procedure is Non-Negotiable
The rear crankshaft seal on the John Deere 4045 lives in one of the most punishing positions in the entire engine. It sits at the flywheel end of the crankshaft, sealing pressurized crankcase oil against a rotating shaft that's spinning between idle and rated speed for thousands of hours. It's also the seal that, when it fails, causes the most expensive secondary damage of any seal in the engine — clutch contamination on tractor applications, flexplate fouling on industrial powerunits, and bell-housing oil pooling on every variant.
The procedure for installing this seal is not a place to improvise. Every dimension matters: the depth at which the seal lands relative to the crankshaft sealing surface, the squareness of the seal case to the housing bore, and the integrity of the lip as it slides over the crankshaft hub. The JT30040B was engineered specifically to control these three variables and remove technician variability from the equation. What follows is the procedure as it should be performed in a professional shop — every time.
The Rear Main Seal Installation Checklist
- Prepare the Housing Bore and Crankshaft Sealing Surface. Before the new seal comes anywhere near the engine, the housing bore and crankshaft sealing surface must be inspected and cleaned to a forensic standard. Use a clean, lint-free shop rag and a non-residue solvent — brake cleaner is acceptable — to remove every trace of old sealant, oil, and gasket debris from the rear main housing bore. Run a fingertip around the entire bore: any nick, burr, or score line on the inner sealing surface will telegraph through the new seal case and cause a slow weep. On the crankshaft itself, inspect the rear sealing surface where the new seal lip will ride. If the previous seal wore a visible groove, you have two options: install the new seal at a slightly different depth so it rides on fresh metal, or fit a wear sleeve. The JT30040B controls depth precisely, so depth-shift compensation is straightforward when the procedure calls for it. Tools needed: lint-free shop towels, brake cleaner or equivalent solvent, a magnifying inspection light, and an emery cloth (fine grit, used only sparingly and only with the cleanest discipline). Common mistake: leaving residual silicone or gasket maker on the bore — it prevents the seal case from seating tight and causes weeping behind the case rather than through the lip.
- Inspect the New Seal Out of the Box. Open the seal package only when you are ready to install. Verify the part number against the John Deere service manual call-out for the specific 4045 variant you're working on — 4045T, 4045D, 4045HF, or PowerTech versions have minor running differences that can affect the correct seal selection. Check the seal lip for shipping damage: any creasing, embedded debris, or visible deformation of the garter spring means the seal is scrap. Check the case for ovality by sighting across it on a flat surface — a deformed case will not seat square no matter how good the installer is. Apply a thin film of clean engine oil to the seal lip with a fingertip, taking care not to disturb the garter spring. Do not use grease — grease can compromise the lip during initial dry-start-up after rebuild. Tools needed: clean engine oil, a flat reference surface for case inspection, the John Deere service manual or equivalent reference. Common mistake: pre-lubricating with too much oil so it pools inside the case and ends up between the seal and the bore, which prevents proper seating.
- Position the Seal Square to the Bore Before Driving. This is the highest-risk step in the entire procedure and the one where the JT30040B does its most important work. Place the seal at the mouth of the housing bore by hand — case toward you, lip into the engine. The seal should sit naturally square; if it cocks under its own weight, the bore needs another inspection pass. Position the JT30040B against the seal case, full-face contact, with the tool's pilot or alignment feature engaged with the housing or crankshaft as designed. Verify visually from two angles that the tool is sitting flat against the seal — no daylight, no lift on one side. Any cock at this stage will be amplified the moment force is applied. Tools needed: the JT30040B installer, adequate lighting on the work surface, a steady hand. Torque/force specs: hand pressure or a soft-faced dead-blow mallet only — never a steel hammer. Common mistake: starting the seal with the tool already tilted, then trying to "drive it square" with the strike — this only buries a cocked seal deeper.
- Drive the Seal to Final Depth. With the JT30040B in position and verified square, apply force evenly through the tool. On most 4045 applications, the seal will seat with hand pressure and a few light taps from a dead-blow mallet — the JT30040B is engineered so that when the tool bottoms against its dimensional stop, the seal is at the correct factory depth. You will feel the change in resistance: the seal moves smoothly, then stops solidly. Do not continue striking once the tool has bottomed. Over-driving past the bottom-out point can damage the housing bore or distort the seal case. On used crankshafts where you've chosen to shift the seal slightly off the original wear groove, count strikes or measure progress with a depth gauge to control the offset precisely. Tools needed: dead-blow mallet (16 oz to 24 oz typical), depth gauge for offset installations. Common mistake: continuing to strike after the tool has bottomed, on the assumption that "tighter is better." It isn't.
- Verify Installation and Document the Job. Remove the JT30040B and inspect the installed seal. The case should sit flush with — or at the specified depth below — the housing face, evenly all the way around. Run a fingernail or a clean pick around the perimeter of the case to confirm there is no gap, no lift, and no debris caught between case and bore. Check the seal lip for any sign of damage from the installation process — if the lip is rolled or creased, the seal is finished and must come out. On a fleet or warranty job, photograph the installed seal and log the JT30040B as the tool used; documenting tooling on rebuild jobs is increasingly standard practice for warranty defense. Reinstall the flywheel using the correct John Deere torque specifications and sequence — typically tightened in two stages with the final pass torqued in a star pattern to manufacturer spec. Tools needed: inspection light, smartphone or shop camera for documentation, calibrated torque wrench for flywheel reinstallation. Common mistake: skipping post-install inspection and discovering the lip damage when oil starts hitting the bell two weeks later.
🛠 PRO-TIP — The 30-Second Habit That Saves Comebacks
Before you reinstall the flywheel, snap a quick smartphone photo of the seated seal from two angles. If the customer ever comes back claiming a leak, that photo is your documentation that the seal went in correctly. It takes thirty seconds and has settled more than one warranty argument in a fleet shop.
Troubleshooting Common Issues
Symptom 1 — Oil at the Bell Within 100 Hours. A leak appearing within the first hundred operating hours after rebuild is almost always installation-related rather than a defective seal. Likely causes: cocked seat, rolled lip, or contamination behind the seal case. The fix is to pull the driveline, remove the seal, reinspect the bore and crankshaft surface, and reinstall using the JT30040B. Check carefully for housing bore damage that might be the root cause.
Symptom 2 — Slow Weep at 1,000+ Hours. A seal that has run a thousand hours and starts to weep is more likely showing surface wear from a marginal crankshaft journal or a contaminant that's worked its way into the lip. Diagnose by inspecting the crankshaft sealing surface during seal replacement — if there's a deep wear groove, a wear sleeve plus offset installation depth using the JT30040B is the durable fix.
Symptom 3 — Oil Pooling at the Bottom of the Bell. Oil pooling in the bell on a tractor or industrial 4045 is rear main territory until proven otherwise. Confirm by cleaning the bell, running the engine briefly under load, and inspecting again. Other suspects to rule out: the rear main cap-to-block sealant joint, the oil pan rear seal, and the camshaft rear plug.
Symptom 4 — Crooked or Lifted Seal Visible at Inspection. If the seal is visibly cocked or sitting proud on one side after installation, do not run the engine. The seal must be removed and a new one installed correctly. Running a cocked seal even briefly will damage the lip beyond recovery.
Symptom 5 — Repeat Failure on a Specific Engine. If a particular 4045 keeps eating rear main seals, the problem is upstream — likely housing bore damage, a worn crankshaft sealing surface beyond what offset installation can compensate for, or excessive crankcase pressure from blow-by. Diagnose the root cause before installing another seal.
Tool Compatibility & Variations Across the 4045 Platform
The John Deere 4045 is one of the most widely deployed mid-range diesel engines in the world. The same fundamental block architecture appears in compact tractors like the 5075E, in larger row-crop tractors, in skid-steer loaders, in industrial powerunits, in standby and prime-power generators, in agricultural sprayers, and in marine applications. Across this entire range, the rear main seal interface is sufficiently consistent that the JT30040B serves as the standard installer for the platform.
Where you'll see variation is in surrounding components — flywheel housing geometry, flexplate vs. flywheel configuration, transmission interface — but the seal itself, the bore it lives in, and the crankshaft surface it rides on remain dimensionally consistent enough that the JT30040B is the correct installer across the family. For non-4045 engines — 6068, 4039, or non-John Deere platforms — different installers are required and should never be substituted.
Safety & Shop Best Practices
Rear main seal installation on a 4045 is a low-PPE-risk procedure compared to many engine operations, but it is not a low-discipline procedure. Safety glasses are mandatory whenever you're striking a tool. Solvents like brake cleaner require proper ventilation. The crankshaft and flywheel housing have edges that can cut — wear nitrile or mechanic's gloves when reaching into the bell.
From a shop-quality standpoint, the best practice is procedural: every rear main installation on a 4045 uses the JT30040B, no exceptions, no improvisation. When tooling is standardized, training is faster, technician performance is more consistent, and warranty exposure drops. A shop that lets each technician improvise rear main installation is a shop that's quietly accumulating warranty risk.
Cleanliness is the other discipline. The bay should be free of grinding dust and casting debris during seal installation. The rag you use to clean the bore should be new, lint-free, and used once for that purpose only.
JT30040B Tool Care & Storage
The JT30040B is heavy-duty steel and built to last, but professional tools earn their service life through proper care. After every use, wipe the tool down with a clean rag to remove engine oil, solvent residue, and any metallic debris from the contact face. Inspect the working face under good light for nicks, burrs, or surface deformation — the tool's job is to deliver an unblemished impression to the seal case, and any defect on the tool face will be transferred directly to the seal. If a burr is found, address it with fine emery cloth or a careful pass on a stone, then re-inspect.
Storage matters more than most technicians realize. The JT30040B should live in a dedicated location — not loose in a drawer where it can pick up nicks from other tools, and not in a damp corner where surface corrosion can develop on the contact face. A foam-lined drawer insert, a labeled spot in your specialty-tool cabinet, or the original Apex packaging are all acceptable. A light coat of corrosion-inhibiting oil before long-term storage protects the working surfaces in humid shop environments. Treat the JT30040B the way you would a precision measuring tool, because in functional terms, that's what it is — a precision dimensional reference that happens to also transmit force.
Frequently Asked Questions
Q: Can I press the seal in with a shop press instead of using the JT30040B?
A press can apply controlled force, but without an installer that matches the seal geometry, the force still ends up concentrated unevenly on the seal case. The JT30040B distributes force across the full case face, which a generic press platen cannot do. Use the correct installer.
Q: What's the torque spec for the flywheel bolts on a 4045 after I install the seal?
Always reference the John Deere service manual for the specific 4045 variant. Torque values vary slightly between 4045T, 4045D, 4045HF, and PowerTech configurations. Use a calibrated torque wrench and follow the specified sequence.
Q: Should I use any sealant on the seal case?
On most 4045 applications, no — modern rear main seals are designed to seal at the case-to-bore interface without supplemental sealant, and adding silicone can prevent proper seating. Always check the John Deere service manual for the specific application before adding sealant.
Q: How do I know the seal is at the correct depth?
The JT30040B is dimensioned to bottom out at the engineered factory depth. When you feel the tool stop solidly, the seal is at the correct depth. If you're shifting depth to ride on fresh metal on a used crank, measure the offset with a depth gauge.
Q: Can I reuse a rear main seal if it looks intact?
No. A used seal has worn a track on the previous crankshaft and has lost some of its lip pre-load. Always install a new seal during any rear-main service.
Q: What if the housing bore has a small scratch or burr?
Light surface imperfections can sometimes be polished out with fine emery cloth used cautiously, then thoroughly cleaned. Deep scratches or score lines may require machining or housing replacement — install a new seal into a damaged bore and you'll be doing the job again.
Q: How often should I inspect the JT30040B for wear?
Inspect the contact face of the tool annually or every 50 installations, whichever comes first. Any visible damage, deformation, or burrs on the tool face will telegraph onto the seal — replace the tool if damage is found.
Q: Is technical support available if I run into a problem mid-job?
Apex Tool Company technical support is available Monday through Friday, 8 a.m. to 5 p.m. ET at 812-579-5478 or 800-365-2233. Get answers from technicians who know the tools.
Standardize Your 4045 Rear Main Procedure
JT30040B — In Stock — $325.00 — Heavy-Duty Steel — Ships Fast
ORDER THE JT30040B📞 812-579-5478 / 800-365-2233 | Mon–Fri 8 a.m.–5 p.m. ET
overall rating:
my rating:
log in to rate