Blog
Step-by-Step Paccar MX-11 Crankshaft Seal Installation: Professional Procedure Using ATC1903058
Professional crankshaft oil seal removal and installation procedure for Paccar MX-11 engines.
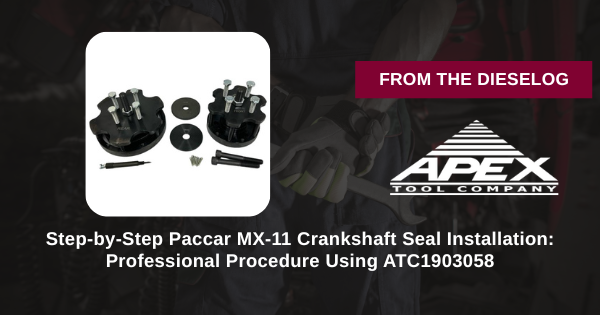
Professional technicians follow this exact procedure for safe removal and accurate installation of front and rear crankshaft oil seals on Paccar MX-11 diesel engines using the ATC1903058 service kit. Proper technique prevents seal damage, oil leaks, and costly rework.
Introduction: Professional Crankshaft Seal Service
Crankshaft oil seal service on Paccar MX-11 engines is a precision procedure that demands accuracy, care, and proper tooling. Improper technique—even small deviations—results in seal damage, oil leaks, and expensive warranty rework. The ATC1903058 kit provides the precision components needed; this procedure ensures they are used correctly to install seals that perform leak-free for the engine's service life.
Phase 1: Engine Access & Seal Removal Preparation
- Disconnect batteries and isolate electrical circuits – Follow Paccar MX-11 safety procedures. No electrical power during seal service work.
- Drain engine oil into clean container – Minimize spillage and save oil for potential reuse if clean. Use appropriate drain pan under crankshaft area.
- Remove engine front cover or timing cover as required by OEM manual – Provide full access to front crankshaft seal location. Secure fasteners and gasket for reassembly.
- Locate rear crankshaft seal access point – Depending on engine configuration, may require transmission disconnection or inspection plate removal. Follow OEM procedure.
- Inspect old seals visually before removal – Document seal condition: oil saturation, lip damage, radial cracks, or installation depth problems. Photograph for warranty documentation.
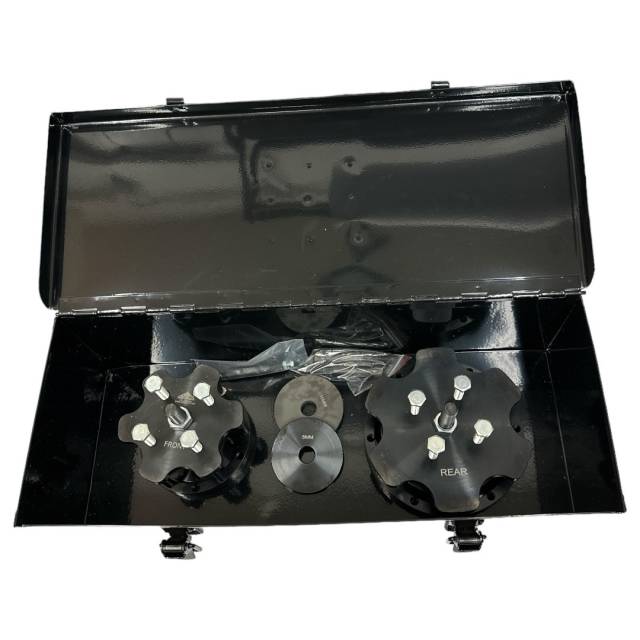
- Gather ATC1903058 kit and verify all components present – Confirm front seal driver/remover, rear seal driver/remover, alignment components, and storage box are available.
Phase 2: Front Crankshaft Seal Removal
- Position front seal remover component from ATC1903058 kit – Tool applies even force to seal without prying or tilting. Prevents damage to seal bore or crankshaft surface.
- Thread remover tool carefully onto front crankshaft seal – Follow OEM tool procedure precisely. Tool must engage seal without damaging sealing lip.
- Apply steady, even tension to extract seal from bore – Work slowly and methodically. Do not jerk or apply shock loads that damage the bore. Extraction should be smooth and deliberate.
- Once seal is extracted, remove remover tool and inspect bore – Bore must be clean and free from damage. Look for metal shavings, corrosion, or scoring that would compromise new seal seating.
- Clean seal bore thoroughly with solvent and clean cloth – Remove all oil residue, debris, and old seal material. Bore must be pristine for new seal installation.
- Inspect crankshaft surface where seal will contact – Surface should be smooth and free from scoring. Minor scoring can be polished; deep damage may require professional crankshaft service.
Phase 3: Front Crankshaft Seal Installation
- Obtain new front crankshaft seal (DAF 1923376 or approved equivalent) – Verify seal part number and confirm it is OEM quality. Do not substitute non-OEM seals.
- Lubricate new seal lip with light engine oil – Thin oil film reduces friction during installation and prevents lip damage during initial seating. Use only engine oil—other lubricants can compromise sealing performance.
- Position front seal driver from ATC1903058 kit on new seal – Driver must engage seal uniformly without tilting or cocking. Check alignment before applying installation force.
- Apply steady, even pressure to install seal to correct depth – OEM specification defines correct installation depth (typically flush or slightly recessed). Do not install seal too shallow (inadequate interference fit) or too deep (excessive compression).
- Monitor driver alignment during installation – Seal must remain concentric with bore. Any tilting or lateral shift indicates misalignment—stop immediately and correct.
- Install seal to full depth as specified by OEM procedure – Verify final seal position with measurement or depth gauge. Document installation depth for warranty records.
- Remove driver and inspect installed seal – Seal should sit evenly in bore without protruding or recessing unevenly. Lip should appear smooth and undamaged.
Phase 4: Rear Crankshaft Seal Removal & Installation
- Access rear crankshaft seal location following OEM manual – Procedure varies by whether transmission is connected, separated, or if inspection plate access is available.
- Position rear seal remover component from ATC1903058 kit – Apply even extraction force without prying or tilting. Rear seal removal requires same care as front seal.
- Extract rear seal slowly and methodically – Document old seal condition (oil saturation, damage, installation depth). Photograph for warranty reference.
- Clean rear seal bore and crankshaft surface – Remove oil residue, debris, and old seal material. Inspect bore and crankshaft surface for damage or scoring.
- Obtain new rear crankshaft seal (DAF 1923380 or approved equivalent) – Verify part number and confirm OEM quality. Do not substitute non-OEM seals.
- Lubricate new rear seal lip with light engine oil – Thin film reduces friction and prevents lip damage during installation.
- Position rear seal driver from ATC1903058 kit on new seal – Driver must engage seal uniformly without cocking. Check alignment before applying installation force.
- Apply steady, even pressure to install rear seal to correct depth – OEM specification defines correct depth (typically flush or slightly recessed from flange). Avoid shallow or excessive installation depth.
- Monitor driver alignment throughout rear seal installation – Seal must remain concentric. Any tilting indicates misalignment—stop and correct immediately.
- Remove driver and inspect installed rear seal – Seal should sit evenly without protruding or recessing unevenly. Lip appearance should be smooth and undamaged.
Phase 5: Component Reassembly & Oil System Preparation
- Reinstall front cover or timing cover with new gasket – Follow OEM torque specification. Apply threadlocker to fasteners as specified.
- Reconnect transmission (if separated) following OEM procedure – Verify all fasteners torqued and alignment dowels seated correctly.
- Verify all covers and inspection plates are secure – Check for loose fasteners or incomplete reassembly that could cause oil leaks.
- Refill engine oil to proper level with new oil (if oil change was performed) – Use OEM-specified oil type and viscosity. Verify proper oil level on dipstick before starting engine.
- Reconnect batteries and electrical circuits – Follow MX-11 electrical connection procedures. Verify no disconnected harnesses remain.
Phase 6: Verification, Testing & Documentation
- Perform visual inspection for oil leaks around seal areas – Check front crankshaft seal area and rear seal access area. No oil seepage should be visible.
- Start engine and allow to warm to operating temperature – Monitor for any oil leaks from front or rear seal locations. Watch for drips or seepage on block surface and pan.
- Run engine at moderate RPM for 5–10 minutes – Allow oil pressure to build and circulate through all passages. Monitor for continued seal integrity.
- Shut down engine and allow to cool for 10 minutes – Let oil drain back to pan. Recheck seal areas for any new leakage.
- Verify oil level remains at proper specification – If oil level has dropped significantly, seal installation may be compromised. Investigate and correct.
- Document seal replacement with part numbers, installation dates, and verification results – Complete warranty records required for future service history and technical support.
- Advise customer to monitor seal performance during initial 100 miles of operation – Any oil leakage or concerns should be reported immediately for correction.
Critical Safety & Procedure Warnings
Never Commit These Mistakes:
- ❌ Never use prying tools to remove seals – Prying damages bore and crankshaft. Always use dedicated removal tools that apply even force.
- ❌ Never tilt or cock seal drivers during installation – Angular installation causes seal cocking, lip damage, and immediate leakage. Maintain perfect alignment.
- ❌ Never install seals without lubricating the lip – Dry installation damages sealing surface. Always apply light engine oil to lip before installation.
- ❌ Never use non-OEM seals (DAF 1923376 front, DAF 1923380 rear) – Substitute seals may have different dimensions or material properties that cause leakage.
- ❌ Never install seals at incorrect depth – Wrong depth compromises interference fit and sealing pressure. Always verify depth matches OEM specification.
- ❌ Never skip bore and crankshaft cleaning before seal installation – Oil residue and debris prevent full seal seating and cause leakage.
- ❌ Never run engine immediately after seal installation – Allow time for components to settle. Verify oil level and check for leaks before extended operation.
- ❌ Never skip final verification and documentation – Complete records required for warranty support and future service history.
Frequently Asked Questions
Q: What is the correct installation depth for MX-11 crankshaft seals?
A: Consult the Paccar MX-11 service manual for exact depth specification. Typically front seal is installed flush or slightly recessed; rear seal depth varies by configuration. Always verify depth before installation completion.
Q: Can I use the ATC1903058 kit on other Paccar engine models?
A: The ATC1903058 is specifically engineered for Paccar MX-11 engines. Do not attempt to use on other engine platforms without confirming seal dimensions and driver compatibility with OEM specifications.
Q: What if the crankshaft surface is scored or damaged?
A: Minor scoring can be polished with fine abrasive. Deep damage or pitting requires professional crankshaft polishing or replacement. Do not install seals on damaged surfaces—they will leak immediately.
Q: How soon after seal installation can I run the engine at full load?
A: Allow engine to warm at idle for 10–15 minutes and verify no oil leakage before running at elevated RPM. Recommend light load (25–50% power) for first 50 miles, then gradual increase. Monitor seal area continuously.
Seal Service Done Right. Oil Leaks Prevented. Warranty Protected.
Get ATC1903058 – $895.00Key Takeaways
- ATC1903058 is essential for professional Paccar MX-11 crankshaft seal service
- Proper procedure prevents $4,400–$13,500 in warranty failures and rework costs
- Front seal (DAF 1923376) and rear seal (DAF 1923380) require same precision care
- Bore and crankshaft cleanliness critical for seal seating and leak prevention
- Seal lip lubrication with engine oil reduces friction and prevents damage during installation
- Installation depth verification ensures proper interference fit and long-term sealing
- One prevented seal failure justifies 5–15X the kit investment vs. rework costs
overall rating:
my rating:
log in to rate