
Blog
Paccar MX-13 Injector Sleeve Replacement Steps
Precision cylinder head reconditioning guidelines for commercial fleet and Class 8 mechanics.
Replacing leaking stainless steel injector cups on a Paccar MX-11 or MX-13 cylinder head off-chassis? Follow this step-by-step professional workshop procedure to set up the ATC 9083 / 450-6331-00 collet remover, clean head bores, apply retaining compound, and press new sleeves dead-square to factory depth.
Why Improvised Sleeve Tools Cause Catastrophic Cylinder Head Failure
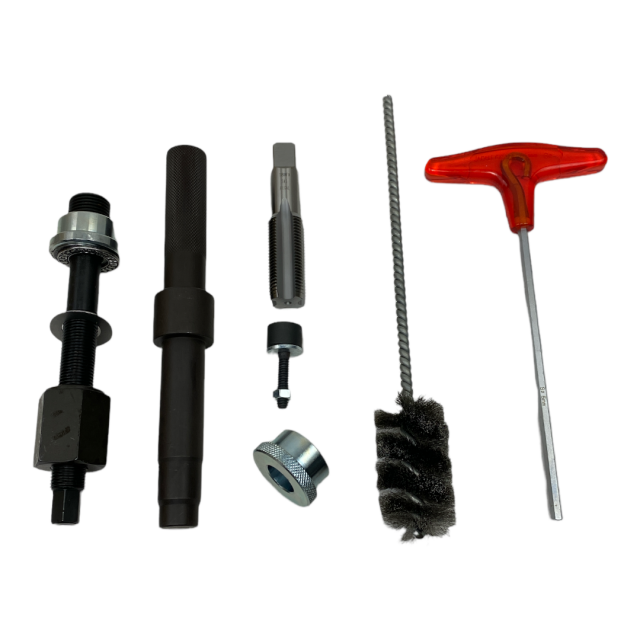
Stainless steel injector sleeves on Paccar MX engines seal high-pressure fuel injectors directly inside engine coolant jackets. When an engine experiences chronic coolant loss into fuel tanks or misfires due to aerated fuel lines, replacing the injector cups is a mandatory service. However, because these sleeves are thin-walled stainless steel pressed tightly into cast-iron head bores, extracting them requires precise linear force. If a technician attempts to collapse or pry out sleeves using cold chisels or crude hook pullers, the hardened tool steel easily gouges the soft cast-iron bore walls. Deep scratches create permanent leak channels that new O-rings cannot bridge. Furthermore, hammering new replacement sleeves in with generic sockets crushes the lower nozzle seat, causing injector mis-alignment and combustion blow-by. Utilizing a dedicated head-off master tool like the 5-pound ATC 9083 locks extraction collets squarely inside the old sleeve wall—drawing it straight out of the casting. When installing, the guided driver mandrel holds the new sleeve dead-parallel, pressing it home until its shoulder contacts the depth stop to guarantee a 100% leak-free seal.
The 5-Step Head-Off Injector Sleeve Replacement Protocol
- Cylinder Head Removal & Bore Inspection: Remove the cylinder head from the engine block and place it flat on a clean workbench. Inspect the target injector bore to confirm zero debris or metal shavings are present around the old sleeve lip.
- Extract Old Stainless Steel Sleeve: Insert the ATC 9083 extraction collet assembly down into the old injector sleeve. Tighten the collet expander nut to lock the removal teeth firmly against the lower sleeve wall. Turn the central forcing nut clockwise using hand wrenches to draw the old sleeve smoothly out of the cylinder head casting.
- Clean & Prep Casting Bore Surface: Thoroughly clean carbon, old anaerobic sealant, and scale off the cast-iron head bore wall using solvent and a brass bore brush. Wipe the bore dry and inspect for scoring. Apply recommended retaining compound (e.g., Loctite 620/640) to the lower sealing land of the fresh replacement sleeve per OEM manual specs.
- Stage New Sleeve & Position ATC 9083 Driver: Slide the new stainless steel sleeve onto the ATC 9083 installer driver mandrel. Align the sleeve squarely over the entrance chamfer of the cylinder head injector bore.
- Press New Sleeve to OEM Depth Stop: Using a dead-blow mallet or mechanical press, apply smooth, parallel driving force to the top of the ATC 9083 installer driver. Drive the new sleeve down into the head casting until the tool shoulder bottoms out solidly against the depth stop. Withdraw the tool, wipe excess retaining compound, and inspect 360-degree flat seating.
PRO-TECH HEAD-OFF WORKFLOW DIRECTIVE:
This tool kit is designed strictly for HEAD-OFF cylinder head reconditioning service! Never attempt to use the ATC 9083 kit with the cylinder head installed on the engine block. Always clean head bore walls thoroughly before installing fresh sleeves to ensure 100% chemical retention bond strength!
Precision Tool Steel Extraction & Driver Mandrels. Protect Paccar MX Overhauls.
Get the ATC 9083 Master Service Kit Now
overall rating:
my rating:
log in to rate