Blog
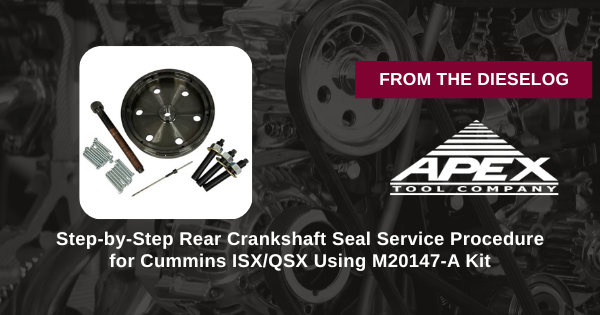
Step-by-Step Rear Crankshaft Seal Service Procedure for Cummins ISX/QSX Using M20147-A Kit
Complete Service Procedure for Cummins Crankshaft Seals
Step-by-Step Rear Crankshaft Seal Service Procedure for Cummins ISX/QSX Using M20147-A Kit
Professional technicians follow this exact procedure to ensure zero-leakage rear crankshaft seal service on Cummins engines. Complete guide with critical warnings.
Introduction: Why This Procedure Matters
Rear crankshaft seal service represents a critical procedure in Cummins ISX and QSX engine rebuilding. The difference between a professional zero-leakage rebuild and a warranty-claim failure often comes down to precise technique and proper tooling. This complete procedure guide covers every step professional diesel technicians follow to deliver OEM-quality rear seal service using the M20147-A kit.
Phase 1: Engine Preparation & Safety Protocol
- Allow complete engine cool-down – Minimum 8 hours since last operation. Never work on hot engines; severe burn hazard.
- Disconnect negative battery terminal – Prevents accidental starter engagement. Essential electrical safety measure.
- Drain engine oil completely – Collect all oil for proper disposal. Access to rear seal requires empty oil pan.
- Position engine safely – Use appropriate lift equipment. Ensure stable, level work surface. Prevent tipping.
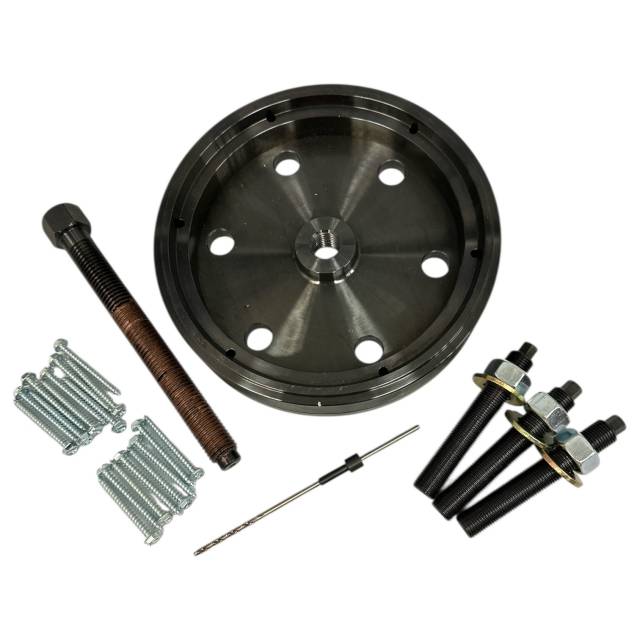
- Gather all tools and M20147-A kit components – Inspect each component before beginning service.
- Consult Cummins service manual – Know exact installation depth specification and fastener torque requirements.
Phase 2: Transmission/Clutch Housing Removal
- Remove all transmission housing fasteners – Document fastener locations for correct reinstallation. Use labeled bags.
- Carefully withdraw housing from crankshaft – Slide housing straight back. Do not tilt. Protect crankshaft nose from contact damage.
- Inspect housing interior – Check for oil weeping, corrosion, or seal failure evidence.
- Place housing on safe, protected work surface – Prevent interior contamination. Avoid tipping or dropping.
- Initial crankshaft nose inspection – Observe surface condition. Note any visible scoring, corrosion, or damage.
- Clean crankshaft nose area with soft cloth – Remove oil residue. Prepare surface for detailed inspection.
Phase 3: Old Seal & Wear Sleeve Removal (Critical Step)
- Inspect M20147-A remover tool – Verify no damage before installation. Check thread engagement surfaces.
- Position remover tool on crankshaft nose – Align precisely per kit instructions. Center engagement is critical.
- Thread remover tool slowly onto crankshaft – Hand-start threads first. Do not force. Gradually tighten with wrench.
- Apply steady pulling pressure – Use controlled force. Jerking or forcing damages crankshaft threads.
- For stuck seals, apply penetrating oil – If seal resists, soak for 15–30 minutes. Resume gentle pulling.
- Extract seal and wear sleeve completely – Remove both components. Separate from remover tool. Inspect condition.
- Deep clean crankshaft nose – Use soft brass brush. Remove all old seal material, corrosion, debris.
- Detailed crankshaft nose inspection – Measure diameter. Check surface texture. Assess for scoring or damage.
⚠️ CRITICAL WARNING: If crankshaft nose shows deep scoring or severe corrosion, do not proceed. Professional machine shop evaluation may be required. Damaged crankshaft surfaces guarantee seal failure.
Phase 4: Crankshaft Surface Preparation
- Final crankshaft nose cleaning – Soft cloth with mineral oil. Ensure completely clean, dry surface.
- Apply light protective oil coating – Thin film prevents oxidation and aids seal installation.
- Prepare new wear sleeve if required by OEM – Some procedures mandate new sleeve installation.
- Install wear sleeve using M20147-A installer (if required) – Follow OEM procedure for proper seating.
- Verify wear sleeve alignment – Sleeve must be centered. No gaps or rocking movement.
Phase 5: New Rear Crankshaft Seal Installation (Most Critical Phase)
- Obtain OEM-correct new rear crankshaft oil seal – Verify correct part number for ISX/QSX application.
- Inspect new seal for any defects – Check seal lip condition. Verify integrity before installation.
- Position M20147-A installer tool on crankshaft – Center alignment is absolutely critical. Per kit instructions.
- Install new seal on installer tool guide – Careful positioning. Verify lip orientation (critical for function).
- Apply light motor oil to seal lip – Thin coating aids installation. Prevents lip damage during seating.
- Thread installer tool slowly onto crankshaft – Hand-start. Gradually advance tool. Steady, controlled pressure.
- Continue threading until seal bottoms on shoulder – Verify proper seating. Apply final installation torque per OEM spec.
- Remove installer tool carefully – Withdraw slowly. Verify seal remains seated. No shifts or movement.
- Visual verification of seal installation – Seal should be flush. No gaps. No rocking. Perfect alignment confirmed.
✓ VERIFICATION CHECKLIST: Seal is flush with crankshaft surface • No visible gaps • Seal does not rock • Installation depth matches OEM specification • Lip orientation is correct
Phase 6: Housing Reassembly & Final Verification
- Prepare transmission/clutch housing for reinstallation – Clean interior. Ensure undamaged. Apply sealant if OEM-required.
- Position housing against engine carefully – Align with crankshaft and mounting surfaces. Prevent contact damage.
- Install housing fasteners in correct sequence – Hand-start all bolts first. Then tighten in OEM-specified pattern.
- Apply final torque to all fasteners – Use calibrated torque wrench. Verify against OEM specification.
- Verify housing flush seating – No gaps. No rocking. Perfect contact against engine surface.
- Refill engine oil to correct level – Use OEM-specified oil grade and quantity. Verify proper level.
- Reconnect negative battery terminal – Restore electrical power for engine operation.
- Start engine and monitor seal area – Observe rear area during startup. Watch for any oil weeping.
- Allow engine to idle briefly – Monitor oil pressure. Listen for abnormal sounds. Verify normal operation.
- Stop engine and final leak inspection – Check rear seal area. Zero oil weeping is required. If leakage visible, investigate immediately.
- Document all service performed – Record seal part number, installation date, observations, technician name.
Critical Safety & Quality Warnings
Never Commit These Mistakes:
- ❌ Never work on hot engine – Severe burn risk. 8+ hours cool-down minimum.
- ❌ Never skip oil drainage – Oil prevents proper inspection and installation.
- ❌ Never force seal removal – Controlled pressure prevents crankshaft damage.
- ❌ Never reuse old seals – Damaged seals must be replaced with new OEM components.
- ❌ Never install seal backwards – Lip direction is critical. Verify orientation carefully.
- ❌ Never over-torque fasteners – Excessive torque damages threads and housing.
- ❌ Never skip housing seating verification – Improper seating guarantees oil leakage.
- ❌ Never skip leak testing before releasing engine – Test at idle. Zero leakage required.
Frequently Asked Questions About Rear Seal Service
Q: How long does rear crankshaft seal service typically take?
A: Professional technicians using proper tools complete the service in 2–3 hours. Without correct tooling, 6+ hours is common, with higher risk of errors.
Q: What's the warranty on newly installed rear seals?
A: OEM seals typically carry engine warranty (24 months/unlimited miles typical). Proper installation using M20147-A ensures zero warranty claims.
Q: Can I service rear seals without removing the transmission housing?
A: No. Transmission housing removal is essential to access the rear crankshaft seal properly. This cannot be bypassed.
Q: What if crankshaft nose is scored?
A: Minor scoring is acceptable. Deep grooves require professional machine shop service. Scored surfaces guarantee seal leakage if not repaired.
Professional Seal Service Prevents Warranty Claims
Get M20147-A Kit – $352.08Key Takeaways
- Proper rear crankshaft seal service requires precision tools and careful technique
- The M20147-A kit replaces OEM tool 3164780 and delivers professional results
- Following this exact procedure prevents warranty claims and protects your reputation
- Crankshaft surface condition determines seal success—assess carefully before proceeding
- Final leak testing is non-negotiable—zero oil weeping is the only acceptable outcome
- One prevented seal failure pays for the M20147-A kit over 6 times
overall rating:
my rating:
log in to rate