Blog
Solenoid Valve Replacement on the TR-1001
The following is the proper procedure for replacing the solenoid valve on the Apex TR1001 high idle govenor (formerly Teleflex PTO governor). This procedure will solve the following problems:
leaking fuel
non-operational
unit cutting out
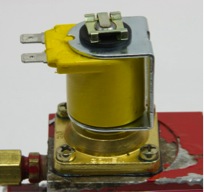
If your coil is black and working, this is normal over the course of the coil's life. It will darken and does not need to be replaced until failure.
This procedure can be done in chassis. If you remove the governor from the truck, carefully mark the location of the lines.
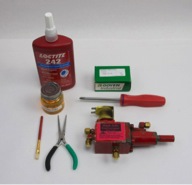
Tools required:
#2 Phillips screwdriver
Needle nose pliers (if coil needs to be removed)
Threadlocker
Diesel fuel & small brush
Step 1:
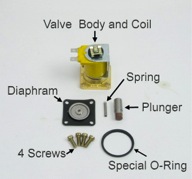
Unpack your new solenoid valve. You should have all the parts indicated. Other than the coil, these parts are not available individually.
Step 2:
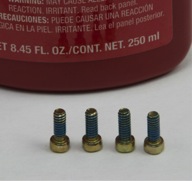
Apply a think coating of thread locker to your new screws and set aside.
Step 3:
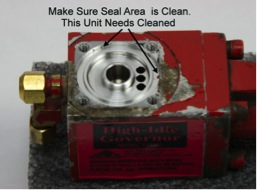
Remove the old solenoid valve from the governor. It may be necessary to remove the coil from the unit to access the screws. Most times you can just turn the coil to allow access to the screws. Carefully clean the valve area, making sure not to allow foreign matter to enter the governor.
Step 4:
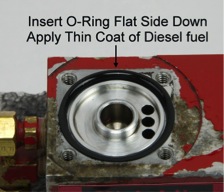
Insert the special 0-ring flat side down. Lightly coat the o-ring in diesel fuel before installing.
Step 5:
Double check the enclosed diaphragm. The center hole must be free and clear of any obstructions.

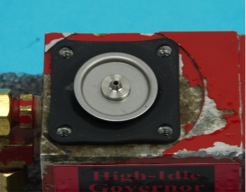
Step 6:
Position the diaphragm on the governor metal side up.
Step 7:
This is the step that causes the most problems. Carefully assemble the plunger. The spring goes in the top of the plunger and is inserted spring side up. The rubber end of the plunger must be down to contact the steel plate on the diaphragm. This causes a seal when the unit is off and cuts fuel flow through the small hole.
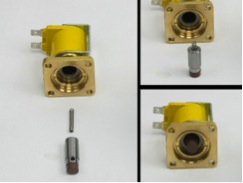
Step 8:
Apply the solenoid to the top of the diaphragm and use the screws that were set aside in step #1. Slowly tighten the solenoid valve down by cross tightening. Be careful to not over-tighten.
If you have any questions or problems feel free to contact us.
Apex Tool Company
10957 E State Road 7
Columbus, INÂ 47203
800-365-2233
812-579-5478
©2013 Apex Tool Company
overall rating:
my rating:
log in to rate