Blog
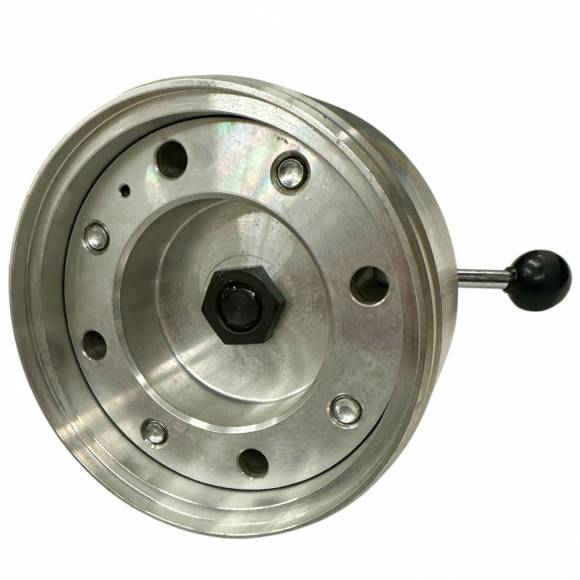
Tech Guide: Volvo/Mack MP7, MP8, D11 & D13 Front Crankshaft Oil Seal Installation — Step by Step with the ATC 88800501
A 5-step shop procedure for flawless front seal installs on MP7, MP8, D11 & D13 engines.

A complete shop-floor procedure guide for installing the front crankshaft seal on Volvo D11/D13 and Mack MP7/MP8 engines using the ATC 88800501 dedicated installer. Written for diesel technicians, by people who have re-done one too many leaking front seals.
Why Correct Front Seal Installation is Non-Negotiable
On the Volvo D11, D13, Mack MP7, and MP8 platforms, the front crankshaft oil seal sits inside the timing gear housing and rides directly on the crankshaft hub or a dedicated wear sleeve. It is the last line of defense between high-pressure oil galleries and the entire front-of-engine accessory drive. Get it wrong and you don't just have an oil drip — you have belt contamination, harmonic damper damage, premature accessory bearing failure, and a customer who tells everyone about it.
The most common reason these seals fail prematurely isn't the seal itself. It's installation method. Hammering with a punch, using mismatched seal drivers, or pushing the seal in with a socket all introduce one or more of three killers: lip damage, cocked installation, or incorrect depth. The ATC 88800501 Front Crankshaft Oil Seal Installer is engineered specifically to remove all three failure modes from the equation.
The Front Crankshaft Seal Installation Checklist
- Pre-Install Inspection and Bore Prep. Before unpacking the new seal, inspect the front cover seal bore for nicks, burrs, or aluminum smear from the previous seal removal. Any imperfection on the bore wall becomes a leak path. Use a clean, lint-free shop towel and a non-abrasive solvent (brake cleaner or isopropyl alcohol) to wipe the bore. Inspect the crankshaft hub or wear sleeve surface where the seal lip will ride. Look for: circumferential grooves from the previous seal, pitting, corrosion, or shipping/handling dings. If a wear sleeve is specified for that engine and mileage, install one — the front seal will not save a worn crank surface. Tools needed: inspection light, lint-free towels, brake cleaner, micrometer (optional, to verify hub diameter against spec).
- Position the Seal and the ATC 88800501 Square to the Bore. Remove the new seal from its packaging and inspect for shipping damage to the lip. Do not stretch the lip over your finger to "check" it — handle by the outer case only. Place the seal squarely against the bore opening with the lip oriented toward the engine (lip faces the oil). Lower the ATC 88800501 onto the seal's outer case so its bearing surface contacts the steel case, not the lip. Verify the tool is sitting flat across the seal — visually check 360 degrees. If the tool is canted, the seal will go in cocked. Common mistake: reversing seal lip direction. Always confirm lip orientation against the engine's service manual diagram before pressing.
- Drive the Seal Using Controlled, Even Force. Using a soft-faced hammer (dead-blow or brass-faced), strike the ATC 88800501 with controlled, moderate force directly along the centerline of the tool. Do not strike at an angle. Alternate strike position around the top of the tool every two to three blows to maintain even progression. The tool's geometry will distribute force around the full 360 degrees of the seal case, but striking off-center introduces side load that no installer can fully cancel. Continue until the tool's shoulder bottoms out against the front cover face — you'll feel and hear the change in impact tone, from a "ringing" strike to a solid, dampened "thud." That is your installation depth indicator. Common mistake: continuing to strike after the tool has bottomed. This does nothing useful and can stress the timing gear housing.
- Verify Installation Depth and Square Seating. Remove the ATC 88800501 and visually inspect the seal. The outer case should be flush with or slightly recessed below the front cover face, exactly per OEM specification (consult the Volvo or Mack service literature for the engine you're servicing). Measure depth at four points around the seal — 12, 3, 6, and 9 o'clock — using a depth micrometer or straight edge. Variation should be within OEM tolerance, typically 0.1mm or less. If you see noticeable variation, the seal went in cocked and must be removed and replaced. Yes, the new seal — never reinstall a seal that came out cocked. Common mistake: assuming "looks square" is good enough. Measure.
- Reassemble the Front End and Document. With the seal verified, reinstall the harmonic damper, any associated dampener bolt and washer, and torque the dampener fastener to OEM specification — typically a multi-stage torque-to-yield procedure on these engines (consult service literature; values vary by engine year and configuration). Reinstall the serpentine belt, tensioner, and any front-end accessories removed for access. Start the engine, allow it to reach operating temperature, and inspect the seal area for weeping at idle and at 1,500 RPM. Document the repair, the use of the ATC 88800501, and the seal lot number in the work order. This documentation matters if a warranty question ever comes up. Common mistake: skipping the warm-cycle leak check. Cold seals don't always leak — warm ones do.
Troubleshooting Common Front Seal Issues
Symptom 1: Oil weeping from the front cover within 1,000 miles of install. Most likely cause: cocked or damaged seal lip. Pull the front damper, remove the seal, inspect the bore and crank surface, and reinstall a new seal using the ATC 88800501. Do not attempt to "rotate" or "re-seat" a leaking seal in place — it will not seal again.
Symptom 2: Seal appears installed at uneven depth. Indicates either the tool was struck off-axis or the bore had debris. Remove and replace the seal. Re-clean the bore. Verify the ATC 88800501 sits flat before the next attempt.
Symptom 3: Oil leak returns within 5,000–10,000 miles after a "clean" install. Likely a worn crankshaft hub or wear sleeve surface. The seal cannot ride on a grooved or corroded surface and maintain a seal. Replace the wear sleeve (if applicable) or address the hub before reinstalling.
Symptom 4: Oil leak after damper reinstallation but seal area is dry. Check the damper itself for cracking or rubber failure, and verify the dampener bolt was torqued to spec. The seal isn't always the source — the damper hub or fastener can mimic a front seal leak.
Symptom 5: Whistling or chirping from front end after seal R&R. Usually unrelated to the seal itself — indicates contaminated belt or tensioner that should have been replaced during the original repair. Replace belt and tensioner; verify the seal is dry.
Tool Compatibility & Engine Variations
The ATC 88800501 is engineered for the Volvo D11 and D13 platforms and their Mack-badged equivalents, the MP7 and MP8. These engines, while marketed under separate Volvo and Mack brands, share the same fundamental architecture — they are built in the same Volvo Group platform family. The front crankshaft seal bore dimensions, depth specification, and seal type are common across all four engine designations within their service-life production range.
If you are working on a different Volvo Group engine — for example, the D16 or older D12 platforms — the ATC 88800501 is not the correct tool. Always verify engine designation off the data plate before tool selection. For the MP7 and MP8 in particular, verify with the Mack engine family number, as some mid-life updates introduced front cover variations.
🔧 PRO TIP: Bore Temperature Matters
If the front cover and timing gear housing have been sitting in a cold shop overnight (below 50°F), let the assembly come up to room temperature before installing the seal. Cold aluminum bores are slightly tighter, and the seal's outer case rubber coating doesn't compress as cleanly. A warm bore plus the ATC 88800501 gives you the cleanest, most consistent install every single time.
Safety & Shop Best Practices
Eye protection during seal installation is non-negotiable — old seals can release pressurized oil during removal and the new seal install can launch debris if a hammer strike glances. Wear cut-resistant gloves when handling seal cases (the steel edges are sharp). Keep the work area clean: dropped seals are contaminated seals. Never reuse a seal that has been started into a bore and removed — even if "it looks fine," the lip has been compromised. Store the ATC 88800501 in a dry, organized tool drawer; surface corrosion on the bearing face of the tool can transfer to the next seal you install.
For shops running multiple techs across multiple bays, consider tagging the ATC 88800501 to a specific tool box and logging its checkout. This tool sees high-value, low-frequency use, and a misplaced installer at 2 PM on a deadline job creates exactly the conditions that lead to "just tap it in with a socket" decisions. That is exactly the decision the tool exists to prevent.
Technician FAQ
Q1: Can I install the seal cold and let the engine warm it up?
You can, but it's not best practice. A bore at room temperature gives the most consistent press fit. Engine warm-up evens out residual stress in the seal but does not correct a cocked installation.
Q2: Should I use a wear sleeve every time on a high-mileage MP/D engine?
If the crankshaft hub shows a visible groove from the prior seal — yes, install a wear sleeve. If the hub is mirror-clean, a sleeve isn't required, but at 500K+ miles, sleeves are cheap insurance.
Q3: Can I use the ATC 88800501 with an air hammer?
No. Air hammers introduce uncontrolled, high-frequency strikes that can damage the seal lip even with the right installer. Use a hand-operated dead-blow.
Q4: How do I know when the tool has bottomed?
The strike tone changes from a ringing impact to a solid, dampened thud. You'll also feel the rebound through the hammer change.
Q5: Do I need to lubricate the seal lip before installing?
Follow the seal manufacturer's specification on the seal box. Many modern PTFE-style seals on these engines are installed dry. Lip-style seals may call for a thin film of clean engine oil. Never use grease.
Q6: What if the seal goes in cocked — can I press it the rest of the way in?
No. Pull the seal, inspect the bore, and install a new seal correctly. A cocked seal will leak. Period.
Q7: Is this tool worth it for a one-truck owner-operator job?
For a one-time install, weigh tool cost vs. comeback risk vs. the value of doing it right the first time. Most owner-operators rent or borrow this class of tool from a shop. For a fleet shop doing this job more than twice a year, the ROI is obvious.
Q8: Can the ATC 88800501 be used on the rear main seal of these engines?
No. The rear main seal has different bore dimensions, depth specs, and a different seal architecture. Use the appropriate rear main installer for that procedure.
Install It Right. Once.
The ATC 88800501 is the dedicated front crankshaft oil seal installer for Volvo D11/D13 and Mack MP7/MP8. No comebacks. No guesswork. No "tap it in with a socket."
ORDER ATC 88800501 — $550.00In Stock • Free Shipping Over $500 (US Continental)
overall rating:
my rating:
log in to rate