Blog
Tech Guide: Eaton/Spicer Drive Axle Pinion Seal Installation — The Right Way
A technician's procedure for getting the install right the first time

A step-by-step procedure for installing pinion seals on Eaton and Spicer heavy-duty drive axles using the ATCSPI401 driver kit — written for technicians, not catalogs.
Why Pinion Seal Installation is Non-Negotiable
The pinion seal on an Eaton or Spicer drive axle is the last line of defense between your differential lube and the outside world. When it leaks, you lose lubricant volume, you contaminate brake components, and you turn a routine PM inspection into a warranty conversation. There is no acceptable margin of error on this install. A seal that's seated 0.030" off-axis will leak. A seal pressed in 0.050" too deep will leak. A seal driven home with a brass punch will leak. The only way to consistently get this job right — across the dozen-plus pinion seal variants Eaton and Spicer have used over the last two decades — is to use application-specific drivers. That's what the ATCSPI401 Pinion Seal Install Driver Kit exists to do.
The Pinion Seal Installation Checklist
- Identify the axle model and select the correct driver.
Before you touch the truck, confirm the axle model number from the data tag on the differential carrier. Eaton typically stamps a model number like DS404, DSP40, or 38DS into the housing. Spicer uses designations such as DD404, DSH40, or DSP41. Match that model against the driver chart that ships with the ATCSPI401 kit. Pull the correct driver from its slot in the steel case and verify the OD matches the new seal by setting it lightly against the seal — it should contact the outer case across the full circumference with no overhang. Tools needed: axle model reference, the SPI401 case, the new OEM pinion seal, a clean shop rag. - Remove the driveshaft, yoke, and old seal — without damaging the bore.
Mark the driveshaft and yoke for phasing before disassembly. Back off the pinion nut while holding the yoke (Eaton spec on most heavy-duty axles is in the 600–900 ft-lb range — confirm against the service manual). Pull the yoke with a proper puller, never with a pry bar against the housing flange. Once the yoke is off, extract the old seal using a seal puller or slide hammer attachment. Do not gouge the carrier bore — any nick deeper than about 0.005" becomes a leak path the new seal cannot bridge. Inspect the bore for corrosion, dirt, and old sealant; clean it with a non-abrasive solvent. Tools needed: torque wrench, yoke puller, seal puller, solvent, lint-free shop rags. - Inspect the yoke wear surface and install a wear sleeve if required.
Run a fingernail or feeler across the yoke's seal contact surface. Any groove deep enough to catch a nail will defeat the new seal within hours. If you find one, install an OEM wear sleeve following the manufacturer's instructions before proceeding. Skipping this step is the second-most-common cause of repeat leaks after incorrect driver selection. A new seal on a grooved yoke is a guaranteed comeback. Tools needed: wear sleeve (if needed), light hammer, wear sleeve installer. - Pre-lubricate the seal and start it square in the bore.
Wipe a thin film of clean differential lube onto the seal lip and the outer case. This reduces friction during the press-in stroke and helps the lip survive its first revolutions before the gear oil reaches it. Set the seal squarely into the carrier bore by hand — open side facing into the housing, sealing lip facing out toward the yoke side. Press it in just far enough that it stands on its own (typically 1/16" to 1/8"). At this point, look straight down on the seal: it must sit dead square in the bore. If it's cocked, pull it out and start over. Tools needed: clean differential lube, lint-free rag. - Drive the seal home with the correct ATCSPI401 driver.
Place the selected driver over the seal. The driver's contact face will rest flush on the outer case, and its shoulder will determine final installation depth. Using a 2–3 lb dead-blow hammer, deliver firm, evenly-spaced strikes directly on the back of the driver. Do not strike at an angle. Continue until you feel — and hear — the driver shoulder bottom out against the carrier face. That metallic, solid contact is your depth stop. Do not overstrike past that point. Remove the driver and confirm the seal is flush or recessed per OEM specification. Reinstall the yoke (lightly oil the splines), torque the pinion nut to OEM spec while holding the yoke, then reinstall the driveshaft in the marked phasing. Refill differential lube to the correct level and check for leaks on a road test. A short test loop of 5–10 miles at varied speeds will reveal a problem install faster than any bench inspection — and gives the seal a chance to warm up, the lip to redistribute lubricant, and any installation defect to begin weeping where you can see it. Tools needed: selected SPI401 driver, dead-blow hammer, torque wrench, OEM-spec differential lube, clean-up rags, road test route.
🔧 PRO-TIP
After the seal bottoms against the driver shoulder, give one final, lighter tap and stop. Over-driving past the shoulder won't seat it deeper — it'll deform the seal case. The shoulder is your hard stop. Trust it.
Troubleshooting Common Issues
Symptom 1: New seal leaks within 500 miles of installation.
Almost always a yoke surface issue, not a seal defect. Pull the yoke and inspect for a wear groove; install a wear sleeve. Less commonly, the seal lip was nicked during installation — usually because the seal was started crooked and the lip caught the housing on the way in. If you've used the correct ATCSPI401 driver and the seal still leaks, the yoke is the culprit nine times out of ten. Before reinstalling, confirm the wear sleeve sits fully home on the yoke, check that the sleeve OD is appropriate for the seal lip diameter, and use a fresh seal — never a previously-installed seal that was removed for inspection. Once a seal lip has been disturbed and re-seated, its sealing reliability is permanently compromised.
Symptom 2: Seal weeps slowly but doesn't fully leak.
The seal OD-to-bore interference fit is compromised. Check for corrosion in the bore, scratches from a previous seal puller, or a deformed seal case from over-driving. A weep usually indicates a path around the outer case rather than past the lip — meaning the seal didn't seat square or the bore is damaged.
Symptom 3: Seal makes a chirping or whining noise.
The lip is dry. Either it wasn't pre-lubricated before installation, or the differential lube level is too low to reach the seal during initial rotation. Top off the lube to OEM specification and re-evaluate after a short road test. Persistent chirping after lube reaches the seal indicates a lip-spring problem from installation damage.
Symptom 4: Pinion nut won't hold torque.
Not a seal problem, but commonly noticed during seal replacement. Inspect pinion bearing preload, the crush sleeve (if equipped), and yoke spline fit. Replace the crush sleeve if disturbed. A loose pinion nut allows shaft runout to increase, which will destroy even a perfectly-installed seal in short order.
Symptom 5: Driver won't fully bottom against the housing.
Either the wrong driver was selected (likely undersized in OD or oversized in shoulder diameter) or there's debris in the bore preventing full seating. Stop, remove the driver, verify the part number against the axle model, and inspect the bore again. Never force a driver past binding — that's how cases get cracked.
Tool Compatibility & Axle Variations
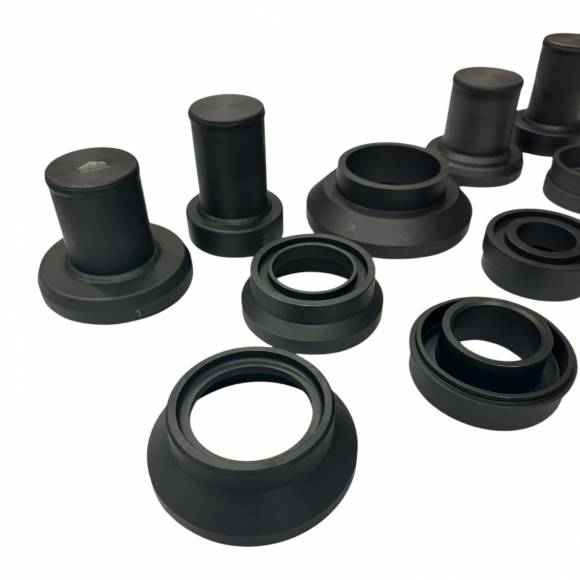
The ATCSPI401 covers the pinion seal diameter and depth combinations used across Eaton and Spicer heavy-duty drive axles for roughly the last two decades. That includes single-reduction and two-speed axles in the DS, DT, DSP, DSH, and DD family designations, along with their tandem-axle variants where the forward and rear carriers share pinion seal sizing. Because Eaton and Spicer have made running changes to seal designs over the years — sometimes within the same model number across model years — having all 11 drivers in one case means you're not blindsided by a same-day repair on an older or transitional axle.
This kit is specific to drive axle pinion seals. It is not the correct tool for transmission output seals, transfer case seals, or steer axle wheel seals — those are different specifications entirely and require dedicated installation tools. If your shop services multiple driveline systems, this kit handles the pinion side of the differential cleanly and pairs with axle-bearing and yoke service tooling for full drivetrain coverage.
One detail worth flagging for shops servicing mixed fleets: when an Eaton or Spicer axle has been remanufactured or rebuilt by a third party, the seal pocket may have been honed or sleeved during the rebuild. Most quality rebuilds preserve the original seal specification, but it's worth confirming before installation. A bore that's been opened up beyond OEM tolerance will not give the new seal the interference fit it needs, regardless of which driver you use. If your inspection finds bore damage or evidence of repair sleeving, address that condition before installing the seal — not by force-fitting the closest tool.
Reading the Old Seal: What Failed and Why
Before you install the new seal, take 30 seconds to inspect the old one. The condition of a removed pinion seal tells you exactly what went wrong and what to watch for on the install. A seal that came out with a worn, polished lip and otherwise intact case had a typical service-life failure — install the new one and proceed. A seal with a torn or rolled lip was likely damaged at the original installation, meaning whoever was last in there used the wrong driver or pressed it in crooked; you'll want to inspect the yoke carefully because it may have run on a damaged seal long enough to score the surface. A seal with an oil-soaked outer case but a clean inner lip leaked around the OD rather than past the lip, indicating either bore damage or a deformed seal case from over-driving. Each pattern points to a specific root cause, and addressing it on the new install is how you prevent the next comeback.
Safety & Shop Best Practices
Pinion seal work happens under or near the truck, often with the driveshaft removed and the differential exposed. Always block the wheels, set the parking brake, and support the chassis on rated jack stands — never on a hydraulic jack alone. Wear eye protection: dead-blow hammers won't typically shed material, but old seals can release pent-up oil under pressure when extracted. Keep gear oil drip pans positioned during yoke removal. And keep the SPI401 drivers in their steel case when not in use — a precision-machined face nicked from a tool-drawer rattle becomes a damaged seal in the bay.
One often-overlooked best practice: photograph the data tag and the axle model before disassembly. If a comeback ever happens, you'll want to verify that the seal you installed matched the axle model on file. It's a 30-second habit that ends a lot of "which seal was in there" debates.
Another habit worth building: keep a dedicated drip pan and a fresh roll of shop towels at the bay before you crack the yoke. Differential lube doesn't drip elegantly — it flows, and it flows onto whatever is below. A clean work surface during disassembly makes inspection of the old seal easier, prevents cross-contamination of the new seal, and saves cleanup time at the end of the job. If your shop bills time-and-materials, the cleanup minutes you save here add up.
Finally, label the driver you used on the work order. On a fleet with mixed axles, knowing which SPI401 driver went into which truck is useful diagnostic data if anything ever does come back. It also helps the next tech on a repeat visit go straight to the correct tool without rechecking the model number. Small process discipline like this is what separates shops that grow from shops that just stay busy.
Pinion Seal Service: A Standing Operating Procedure
If your shop services Eaton/Spicer axles regularly, build the SPI401 into a written SOP. The procedure should call out: axle model identification before disassembly, driveshaft phasing marks, pinion nut torque spec verification from the service manual, mandatory yoke inspection with replacement criteria, seal pre-lubrication, dead-blow hammer specification, and post-install leak check after road test. A written SOP turns the kit from "a tool the senior tech uses well" into "a process every tech follows correctly." That's how the kit pays back its $600 — not just on one job, but on every Eaton/Spicer axle the shop touches for the next decade.
Frequently Asked Questions
Q: Can I install a pinion seal without removing the driveshaft?
No. The yoke has to come off to access the seal, and the yoke can't come off with the driveshaft attached. Mark your phasing before disassembly so the driveshaft goes back exactly where it came from.
Q: How tight should the pinion nut be torqued on reinstall?
Always follow OEM specification for the specific axle model. On most heavy-duty Eaton/Spicer axles the range is 600–900 ft-lbs, but verify against the service manual. If a crush sleeve was disturbed, replace it and set bearing preload by rotational torque rather than fastener torque.
Q: Is RTV or sealant required on the seal OD?
Generally no. The metal-cased seal is designed for a press fit against the bore. If the bore is corroded or out of spec, a sealant won't fix it — install a sleeve or replace the carrier. RTV on a properly-machined bore is a workaround, not a solution.
Q: What lubricant should I put on the seal lip before installation?
Use the same differential lubricant the axle runs. A thin film on the lip is enough — heavy grease can prevent proper sealing during the first revolutions.
Q: How do I know which driver to pull from the case?
The kit is organized by application. Match your axle model to the driver chart, then set the driver against the new seal — full circumferential contact with no overhang confirms the right tool.
Q: Does the kit come with a hammer?
No. A 2–3 lb dead-blow hammer is the standard companion tool but is not included. Avoid steel ball-peen hammers — they can damage the driver face over time.
Q: How long does a pinion seal install typically take with this kit?
Once the driveshaft is out and the bore is clean, the actual seal installation step is under five minutes. The kit shortens the job mostly by eliminating trial-and-error driver selection.
Q: Can I buy individual drivers from the kit?
The ATCSPI401 ships as a complete 11-driver kit with steel case. Contact Apex at 812-579-5478 to discuss any availability questions on specific applications.
Do It Right the First Time. Every Time.
ATCSPI401 Eaton/Spicer Pinion Seal Install Driver Kit — 11 drivers, steel case, $600.00. In Stock.
SHOP ATCSPI401 NOW📞 812-579-5478 / 800-365-2233 | Mon–Fri 8 a.m. – 5 p.m. ET
overall rating:
my rating:
log in to rate