Blog
Complete Caterpillar 3406 Jacobs 349A Trigger Adjustment Procedure: M10150 Step-by-Step
Step-by-step Jacobs 349A trigger adjustment procedure for Caterpillar 3406B/C ATAAC engines.
Professional technicians follow this exact 12-phase procedure using the M10150 Trigger Adjustment Kit to restore OEM-spec trigger valve travel on Caterpillar 3406B/C ATAAC Jake Brakes. Proper adjustment prevents weak braking, component wear, and safety failures.
Phase 1-3: Preparation & Jake Brake Disassembly
- Engine at TDC compression stroke on cylinder requiring service – Verify #1 cylinder at TDC using crankshaft markings
- Remove valve rocker cover & inspect Jake Brake mounting – Document condition of lash caps, rockers, and solenoid
- Disconnect Jake Brake solenoid electrical connector – Tag wires for reassembly. Remove solenoid mounting bolts
- Remove Jake Brake assembly from rocker carrier – Use proper lifting technique (4lb assembly). Place on clean workbench
- Disassemble trigger group from Jake Brake housing – Remove trigger cover, spring retainer, and trigger plunger assembly
Phase 4-6: Trigger Mechanism Cleaning & Inspection
- Clean all trigger components with brake cleaner – Remove all carbon, oil, and wear debris from plunger, bore, and valve
- Inspect trigger plunger for scoring or wear – Measure plunger diameter (replace if < OEM spec by 0.001")
- Check trigger bore for wear or ovality – Use precision bore gauge (replace housing if >0.002" out-of-round)
- Inspect trigger return spring for weakness – Replace if free length < OEM specification or shows coil damage
- Verify plunger travel by hand (pre-adjustment) – Should move smoothly with consistent spring resistance
Phase 7-9: M10150 Precision Adjustment Setup
CRITICAL: M10150 Setup for OEM Accuracy
- Secure Jake Brake housing in M10150 holding fixture – Ensures zero movement during adjustment measurement
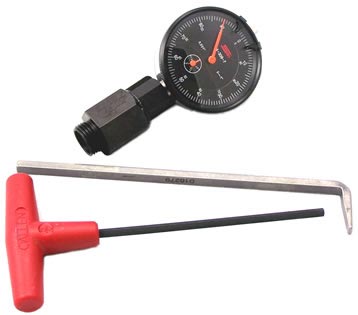
- Install M10150 trigger plunger gauge fixture – Precision alignment tool positions gauge exactly at OEM measurement point
- Zero M10150 digital trigger travel gauge – Calibrate to 0.000" at plunger bottomed position per Jacobs specification
- Install clean trigger plunger into bore – Verify smooth operation before spring installation
- Install M10150 spring compression tool – Applies exact OEM spring preload during travel measurement
Phase 10-12: Final Adjustment, Verification & Reassembly
- Compress spring using M10150 tool to OEM preload spec – Exact spring force ensures accurate travel measurement
- Measure trigger plunger travel using M10150 gauge – OEM spec: 0.085"–0.095" (record exact measurement)
- Adjust trigger stop using M10150 adjustment wrench – Rotate precisely until travel reads center of spec range (0.090")
- Verify adjustment 3X (repeatability test) – Travel must remain consistent ±0.002" across 3 measurement cycles
- Disassemble M10150 fixtures, reassemble trigger group – Torque all fasteners to Jacobs specification
- Final visual inspection & bench functional test – Manual actuation confirms smooth operation
Phase 13-15: Engine Reinstallation & Road Verification
- Reinstall adjusted Jake Brake to rocker carrier – Torque mounting bolts to Caterpillar specification (55 ft-lbs)
- Reconnect solenoid electrical connector – Verify secure connection, no pinched wires
- Reinstall valve rocker cover with new gasket – Torque cover bolts in proper sequence
- Engine start & Jake Brake activation test (no load) – Verify smooth engagement, no unusual noise
- Road test under load (5%+ grade recommended) – Confirm full retardation power, smooth operation, no surging
Critical Warnings: Adjustment Procedure Safety
MUST AVOID THESE FATAL ERRORS:
- ❌ Never adjust trigger without M10150 precision gauges – Guesswork creates 40–60% performance loss
- ❌ Never skip trigger disassembly & thorough cleaning – Carbon prevents accurate travel measurement
- ❌ Never adjust without proper spring preload – Incorrect spring force creates false travel readings
- ❌ Never exceed 0.002" travel tolerance – Out-of-spec destroys Jake Brake performance
- ❌ Never reinstall worn trigger components – Worn plungers/bore create immediate adjustment failure
- ❌ Never skip road load verification test – Bench adjustment doesn't guarantee road performance
Professional Results Documentation
Record these M10150 measurements for warranty & service history:
- Pre-adjustment trigger travel: ___ inches
- Post-adjustment trigger travel: ___ inches (target 0.090")
- Trigger plunger diameter: ___ inches (new/old)
- Trigger bore diameter: ___ inches (check ovality)
- Spring free length: ___ inches (new/old)
- Verification cycles (3X): Pass/Fail
- Road test retardation force: Full/Partial/None
Adjust Precisely. Brake Powerfully. Service Professionally.
Get M10150 Kit – $497.96
overall rating:
my rating:
log in to rate