
Blog
Cummins C8.3 & ISL Front Crankshaft Wear Sleeve Installation Steps
Precision front crankshaft repair sleeve installation and oil containment guidelines for commercial Cummins mechanics.
Installing a front crankshaft repair wear sleeve during a front main oil seal replacement on a Cummins C8.3, ISC, or ISL engine? Follow this step-by-step professional workshop procedure to inspect and clean the crankshaft snout, apply retaining compound inside the sleeve bore, mount the M20135-A (3165112) installer, and press the sleeve squarely to factory depth.
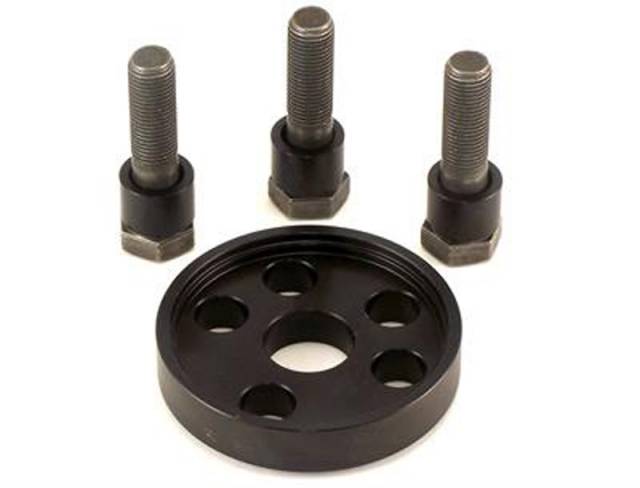
Why Hammers & Improvised Drivers Ruin Thin-Wall Crankshaft Wear Sleeves
On Cummins C/C8.3 and ISL engines, front crankshaft wear sleeves are precision-ground, thin-walled steel sleeves engineered to restore a flawless sealing land over a grooved crankshaft snout. Technicians who attempt to tap these delicate sleeves onto the crankshaft nose using hammers, punches, or pipe couplings encounter immediate failure: uneven hammer blows cock the sleeve sideways, buckling the thin steel wall or raising a sharp burr on the outer diameter that shreds the new front crankshaft oil seal within minutes of engine startup. Utilizing the 3.00-pound M20135-A Front Crankshaft Wear Sleeve Installer (Direct Cummins 3165112 Replacement) eliminates impact distortion by bolting directly to the crankshaft snout and pressing the sleeve straight on with smooth mechanical screw force.
The 5-Step Cummins C8.3 & ISL Front Crankshaft Wear Sleeve Protocol
- Remove Vibration Damper & Old Front Seal / Worn Sleeve: Remove the drive belt, vibration damper, and worn front crankshaft oil seal; if a previous wear sleeve is installed, carefully split/remove it without nicking the crankshaft journal.
- Clean, Polish & Degrease Crankshaft Snout: Smooth any minor burrs on the crankshaft snout with fine crocus cloth, then clean and degrease the sealing land completely with brake/parts cleaner and a lint-free rag so zero oil film remains.
- Apply Sealant & Position New Wear Sleeve Squarely: Apply a thin, continuous bead of Cummins-approved retaining sealant (such as Loctite 609/620 or Permatex equivalent) to the inside leading edge of the new wear sleeve (or crankshaft snout per service manual) and start the sleeve squarely onto the crank nose.
- Mount M20135-A Installer & Press Sleeve to Factory Depth: Thread the M20135-A guide stud/bolts into the crankshaft snout, slide the installer cup over the wear sleeve, and tighten the forcing nut smoothly with a hand wrench until the installer bottoms squarely against the crankshaft face/depth stop.
- Remove Installer, Wipe Excess Sealant & Install Front Seal: Unbolt and remove the M20135-A installer, wipe away any squeezed-out retaining compound from the sleeve outer surface before it cures, allow sealant to set, and install the new front crankshaft seal cleanly.
PRO-TECH SLEEVE SEATING & SEALANT WIPE-DOWN MANDATE:
NEVER USE AN IMPACT WRENCH ON THE M20135-A INSTALLER! Always advance the forcing nut smoothly by hand so the thin wear sleeve seats squarely without galling! ALWAYS WIPE EXCESS RETAINING SEALANT OFF THE SLEEVE OUTER DIAMETER IMMEDIATELY—dried sealant ridges on the running surface WILL destroy the new front main seal lip!
3.00 lbs Precision Cummins C/C8.3 & ISL Front Crankshaft Wear Sleeve Installer (3165112). Seat Sleeves Concentrically.
Get the M20135-A Installer Now
overall rating:
my rating:
log in to rate