Blog
Front Crankshaft Seal Installation: Complete Workflow for 6.0L Ford Powerstroke – ATC ZTSE4516
Complete front seal workflow: 6.0L Powerstroke

Front Crankshaft Seal Installation: Complete Workflow for 6.0L Ford Powerstroke – ATC ZTSE4516
Front crankshaft seal installation on 6.0L Ford Powerstroke engines is straightforward when you have the right tool and procedure. This complete workflow guide covers the ATC ZTSE4516 Front Crankshaft Seal and Wear Ring Installer (Ford 303-761 equivalent) for all E-Series vans, Super Duty trucks (F-250–F-750), and Excursion models equipped with 6.0L Power Stroke Diesel from 2003–2010. From harmonic balancer removal through final seal verification, follow these steps for leak-free results every time.
GET FRONT SEAL INSTALLER NOW
Complete Installation Coverage • ZTSE-4516 Replacement
Phase 1: Harmonic Balancer Removal & Inspection
- Disconnect negative battery terminal – Safety first.
- Remove serpentine belt – Follow OEM procedure; mark position.
- Remove harmonic balancer bolt – Use impact wrench with correct socket.
- Remove balancer carefully – Use harmonic balancer puller if stuck (never pry).
- Inspect balancer nose surface – Check for scoring, pitting, or damage.
- Clean crank nose completely – Remove all oil, debris, old sealant with solvent.
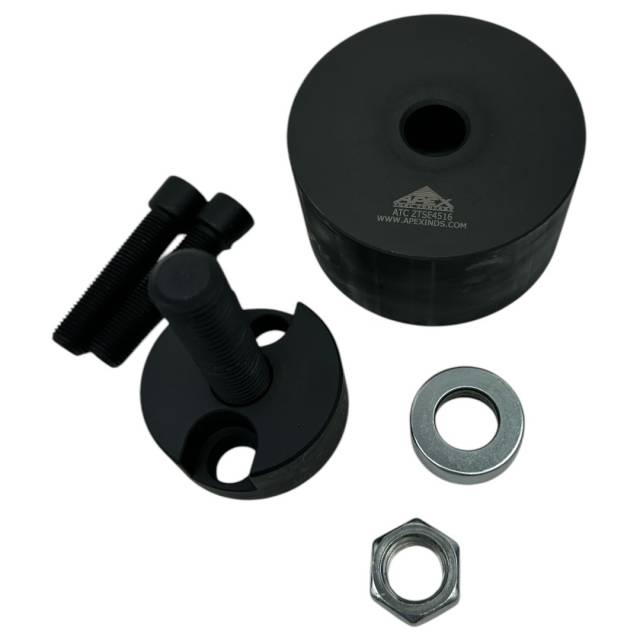
Phase 2: ATC ZTSE4516 Setup & Preparation
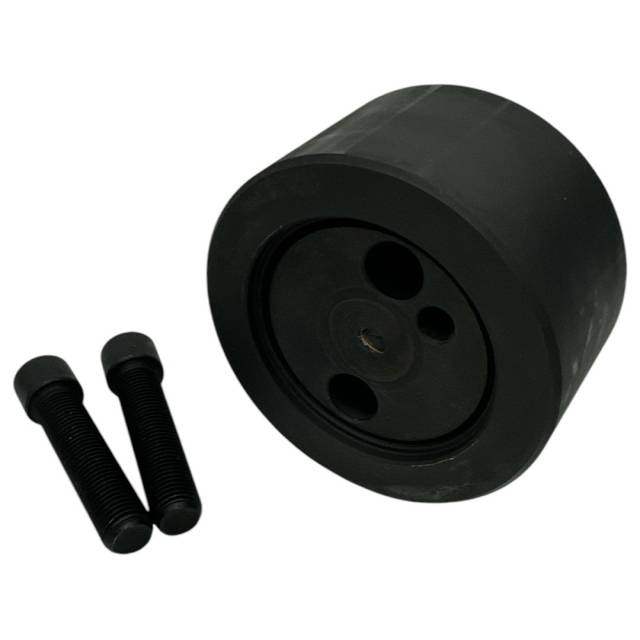
- Prepare installer components – Lay out hub, wear ring, seal, and driver.
- Install wear ring on hub – Ensure proper seating; verify no debris.
- Place new seal on wear ring – Keep seal and wear ring together (critical).
- Apply light lubrication – Use 50/50 detergent/water mixture only.
- Position installer on crank nose – Align hub with crankshaft centerline.
Phase 3: Seal Installation & Depth Setting
- Install seal carefully – Use installer driver to push seal to correct depth.
- Verify wear ring seating – Inspect that wear ring is fully seated.
- Check seal straightness – Ensure seal is installed square (not cocked).
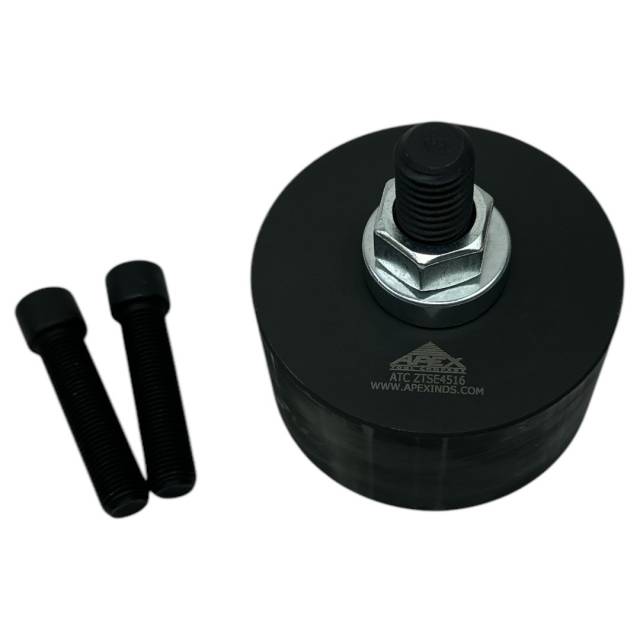
- Install balancer installation sleeve – Protects new seal during balancer reinstallation.
- Remove installer tool – Carefully extract installer assembly.
Factory-Correct Seal Depth = Zero Leaks
ORDER ATC ZTSE4516 →Phase 4: Harmonic Balancer Reinstallation & Final Verification
- Slide installation sleeve onto balancer – Protects seal during installation.
- Install balancer on crank nose – Align keyway; slide balancer straight on.
- Install balancer bolt – Torque to OEM specification (typically 90-110 ft-lbs).
- Install serpentine belt – Follow OEM routing; tension per specification.
- Reconnect battery terminal – Safety restoration.
- Start engine and verify – Check for leaks at seal location; listen for unusual noise.
- Inspect for leaks after idle – Allow 5-10 minutes of idle time; check again.
- Test drive and final check – Run at highway speeds; verify no oil leaks.
Critical Warnings: Avoid These Mistakes
- ❌ NEVER pry on harmonic balancer – Damages crankshaft nose permanently
- ❌ NEVER separate seal from wear ring – Destroys seal integrity
- ❌ NEVER install without sleeve – Balancer edge will cut new seal
- ❌ NEVER skip crank nose cleaning – Debris causes immediate leak
- ❌ NEVER use oil for lubrication – Causes seal swell and premature failure
- ❌ NEVER over-torque balancer bolt – Can crack crank nose or balancer
Every Front Seal Job Needs This Precision Tool
ADD TO CART • ATC ZTSE4516Shop Time Savings & ROI Comparison
Professional Installation = Customer Satisfaction
The Front Seal Tool Every 6.0L Shop Needs
BUY ATC ZTSE4516 NOW → $145
✅ 6.0L Powerstroke • E-Series/Super Duty
✅ Ford 303-761 Equivalent
✅ 20-Minute Installation • Zero Leaks
✅ Ford 303-761 Equivalent
✅ 20-Minute Installation • Zero Leaks
overall rating:
my rating:
log in to rate