Blog
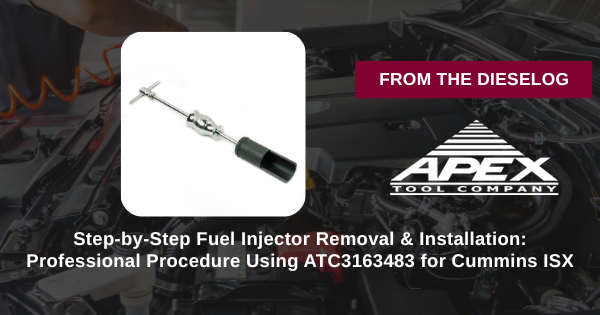
Step-by-Step Fuel Injector Removal & Installation: Professional Procedure Using ATC3163483 for Cummins ISX
Complete Service Procedure for Cummins Fuel Injector Removal
Step-by-Step Fuel Injector Removal & Installation: Professional Procedure Using ATC3163483 for Cummins ISX
Professional technicians follow this exact procedure for safe, controlled fuel injector removal and installation on Cummins ISX engines. Complete guide with critical safety and precision warnings.
Introduction: Professional Fuel Injector Service
Fuel injector removal and installation on Cummins ISX engines requires precision technique, proper tooling, and rigorous attention to detail. Modern fuel injectors operate at 30,000+ psi and cost $800–$1,500 each. The difference between a successful injector replacement and expensive component damage often comes down to following exact procedures and respecting precision tolerances.
Phase 1: Engine Preparation & Safety Protocol
- Allow complete engine cool-down – Minimum 2–4 hours since last operation. Never work on hot engines; severe burn hazard.
- Disconnect negative battery terminal – Prevents accidental fuel pump activation. Essential electrical safety.
- Relieve fuel system pressure – Follow Cummins service manual pressure relief procedure. Safety critical.
- Remove fuel rail covers and heat shields – Allows safe access to injector connections.
- Identify target injector(s) – Label fuel return/supply hoses if removing multiple injectors.
- Gather all tools and ATC3163483 kit components – Inspect each component for damage before beginning service.
Phase 2: Fuel System Depressurization & Disconnection
- Follow OEM fuel pressure relief procedure exactly – Improper depressurization = fuel spray hazard = burn risk.
- Disconnect fuel supply line at fuel rail – Use proper line wrenches. Prevent fuel spillage with catch pan.
- Disconnect fuel return line – Capture any spillage. Prevent fuel contamination.
- Disconnect electrical connector from injector – Push release tab. Wiggle connector before pulling. Prevent terminal damage.
- Remove O-ring seals from fuel rail connection – Inspect condition. Replace if worn or damaged (required for reinstallation).
- Place catch pan beneath injector location – Prevents fuel spillage into engine bay.
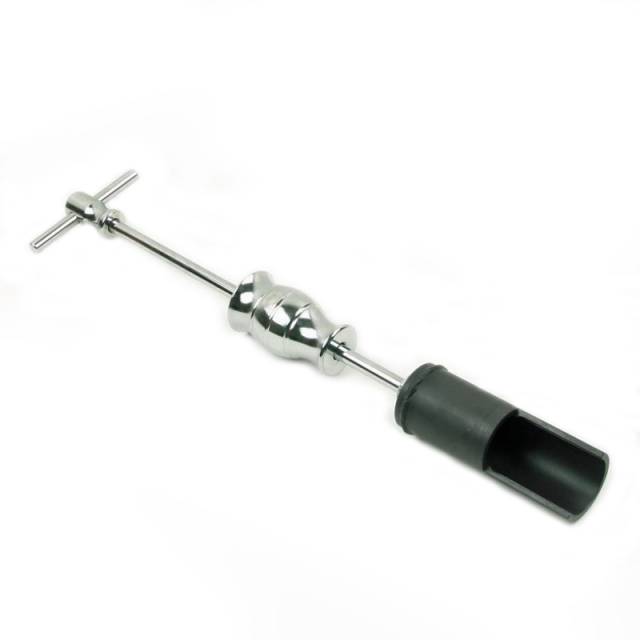
Phase 3: ATC3163483 Puller Setup & Installation
- Inspect ATC3163483 puller for damage or wear – Check threads and gripping mechanism. Verify no cracks.
- Verify puller jaw design matches target injector – ATC3163483 is ISX-specific. Confirm correct part.
- Position puller jaws around injector body carefully – Jaws must grip evenly on both sides. No tilting.
- Hand-tighten puller jaws – Firm grip, but not forced. Ensure symmetric contact on injector body.
- Verify injector is fully seated in jaws – No contact with fuel injector tip or electrical connector area.
- Apply gradual, steady pulling force – No jerking or sudden force. Let the tool do the work. Constant, even pressure.
- Continue pulling slowly until injector begins to move – Once movement begins, remove tool and extract injector by hand.
Phase 4: Injector Removal & Inspection
- Carefully remove injector from cylinder head bore – Straight vertical extraction. No tilting or twisting.
- Place removed injector on clean, protected surface – Prevent damage to injector tip or electrical components.
- Inspect removed injector condition – Check for deposits, erosion, damage. Document findings.
- Inspect cylinder head bore for damage – Check threads for stripping. Inspect bore walls for damage.
- Remove old O-ring seals from injector or bore – Discard old seals. Never reuse seals.
- Clean bore with soft cloth and mineral oil – Remove debris, deposits, old seal material. Ensure clean seating surface.
- Verify bore threads are intact – Minor damage can be addressed. Major stripping requires helicoil repair.
⚠️ CRITICAL WARNING: If cylinder head bore threads are stripped or damaged, do not proceed with standard injector installation. Professional machine shop evaluation required. Improper installation in damaged threads guarantees seal failure and leakage.
Phase 5: New Injector Preparation & Installation
- Obtain OEM-correct new fuel injector – Verify correct part number for ISX application. Never substitute or use alternative injectors.
- Inspect new injector for any defects – Check body, tip, and electrical connector. Verify integrity before installation.
- Install new O-ring seals on injector – Use OEM-specified seals only. Apply light coating of mineral oil to seals (aids installation).
- Position ATC3163483 installer on new injector – Align injector with bore using installer guide (if provided). Verify straight alignment.
- Lower injector slowly into cylinder head bore – Guided insertion prevents tilting and thread damage.
- Continue pushing until injector bottoms in bore – Verify injector is fully seated. No gaps between injector and bore.
- Remove installer tool carefully – Verify injector remains fully seated in bore. No movement.
- Visual verification of injector installation – Injector should be flush with bore. No tilting. Proper alignment confirmed.
Phase 6: Fuel System Reconnection & Pressurization
- Reconnect fuel supply line to fuel rail – Use proper line wrench. Verify tight seal. Check for leaks.
- Reconnect fuel return line – Proper connection. Verify tight seal.
- Reconnect electrical connector to new injector – Align connector. Push until click is heard. Verify secure fit.
- Reconnect negative battery terminal – Restore electrical power to engine.
- Prime fuel system per OEM procedure – Follow fuel system priming steps from service manual.
- Check for fuel leaks at all connections – Start engine briefly. Observe injector area and connections for any fuel weeping.
- Allow fuel pressure to stabilize – Verify normal fuel pressure reading per OEM specification.
Phase 7: System Testing & Verification
- Start engine and listen for abnormal sounds – Monitor for misfire, roughness, or fuel injector noise.
- Allow engine to reach operating temperature – Verify normal operation. Check for fuel leaks.
- Monitor fuel pressure under idle and load – Verify normal pressure range. Note any fluctuations.
- Observe exhaust smoke or emissions – Verify normal operation. No excessive smoking or smell.
- Check injector spray pattern (if equipped with test apparatus) – Verify proper spray geometry and atomization.
- Final leak inspection – With engine running, observe injector location. Zero fuel weeping acceptable only.
- Shut down engine – Allow cool-down. Final inspection of all fuel connections and electrical connectors.
- Document all service performed – Record injector part number, installation date, observations, test results.
Critical Safety & Quality Warnings
Never Commit These Mistakes:
- ❌ Never work on pressurized fuel system – Fuel spray hazard. Proper depressurization required.
- ❌ Never use force during injector removal – Controlled, steady pulling only. Let ATC3163483 do the work.
- ❌ Never tilt injector during removal or installation – Vertical extraction/insertion only. Tilting damages bore threads.
- ❌ Never reuse old O-ring seals – Always replace with new OEM seals. Used seals guarantee leakage.
- ❌ Never skip fuel leak verification – Engine running leak test is mandatory before releasing engine.
- ❌ Never substitute different injector models – Use OEM-correct injectors only. Alternatives cause performance and reliability issues.
- ❌ Never install without proper O-rings – Missing or improper seals = immediate leakage + fuel system contamination.
- ❌ Never skip service documentation – Complete record required for warranty and compliance tracking.
Frequently Asked Questions
Q: How long does injector removal and replacement typically take?
A: Professional service with ATC3163483: 10–15 minutes per injector. Manual methods: 45+ minutes per injector, with higher damage risk.
Q: What is the warranty on newly installed injectors?
A: OEM injectors typically carry 24-month/unlimited-mile warranty. Proper installation using ATC3163483 ensures zero warranty claims.
Q: Can ATC3163483 be used on other Cummins engines?
A: No. ATC3163483 is ISX-specific only. Other Cummins engines require different puller/installer tools. Always verify correct tool for application.
Q: What if cylinder head bore threads are damaged?
A: Minor damage is acceptable. Deep thread stripping requires professional machine shop repair. Never force injector into damaged bore.
Professional Injector Service Protects Your Fuel System
Get ATC3163483 – $175Key Takeaways
- ATC3163483 is essential for safe Cummins ISX fuel injector removal and installation
- Proper tool and procedure prevents $7,800–$8,500+ in component damage per incident
- OEM-specification design ensures perfect injector seating and zero leakage
- Controlled puller mechanism protects injector body and cylinder head threads
- Following exact procedure prevents warranty claims and protects fuel system integrity
- One prevented injector damage incident justifies 44–49X the tool investment
- Professional service time: 10–15 minutes per injector vs. 45+ minutes without proper tools
overall rating:
my rating:
log in to rate