Blog
Step-by-Step: How to Replace Paccar MX-13 Crank Seals with the ATC1453185 Tool
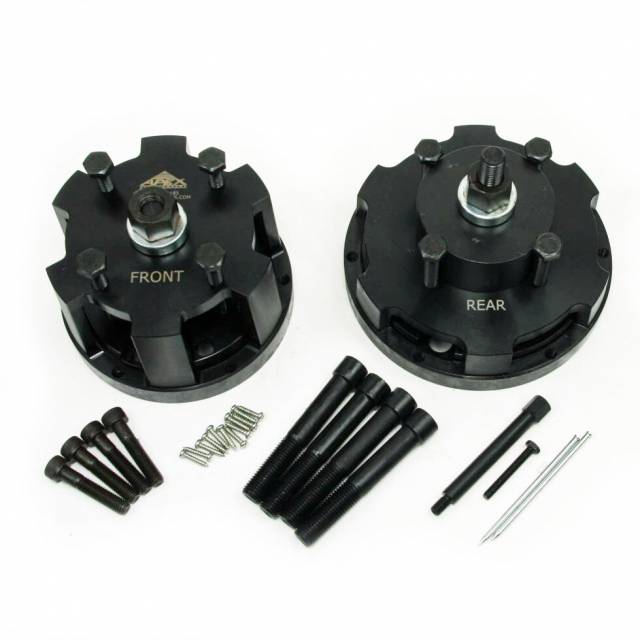
MX-13 Seal R&R Tutorial • 1453185PE • $900
Step-by-Step: How to Replace Paccar MX-13 Crank Seals with the ATC1453185 Tool
Replacing front or rear crankshaft seals on a Paccar MX-13? The ATC1453185 makes it fast, safe, and leak-free. Follow this OEM-approved step-by-step guide for 2011–2016 MX, MX PMCI-2, MX-13 PCI engines.
SHOP ATC1453185 NOW – $900.00
In Stock • Ships Same Day
|
Shipping Weight: 37.00 lbs • Heavy Item – No Free Freight
Step 1: Prep the Engine
Drain oil. Remove oil pan (rear) or timing cover (front). Clean mating surfaces. Rotate crank to access seal.
Step 2: Remove Old Seal
Thread ATC1453185 remover into seal. Turn clockwise to extract. No prying — prevents crank damage.
Step 3: Install New Seal
Apply light oil to new seal. Use ATC1453185 installer with alignment plate. Press evenly until flush. No hammering.
Pro Tip
Always check crank runout before reinstall. Max 0.002" or seal will fail prematurely.
Step 4: Reassemble & Test
Reinstall pan/cover with new gasket. Fill oil. Prime system. Run engine — zero leaks.
SHOP ATC1453185 NOW – $900.00
In Stock • Ships Same Day
|
Specs at a Glance
Tags: atc1453185 tutorial, paccar mx13 seal replacement, mx-13 front seal install, mx rear seal removal, 1453185pe guide, kenworth mx13 seal, peterbilt mx engine, paccar mx pmci-2, diesel crank seal, apex tool tutorial
overall rating:
my rating:
log in to rate