Blog
Tech Guide: Cummins ISX12 & ISX15 Front Crankshaft Seal Replacement Using the M20185
Full Bay-and-Bench Procedure for ISX12 and ISX15 Front Seal Service
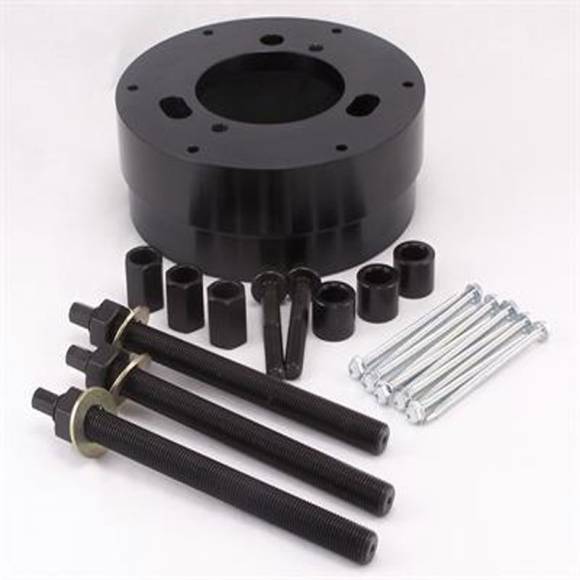
A full bench-and-bay procedural walkthrough for diesel technicians servicing front crankshaft oil seals on Cummins ISX12 and ISX15 engines with the M20185 Front Crankshaft Seal Remover / Installer — the OEM-equivalent of Cummins 4918991.
Why This Procedure Is Non-Negotiable
Front crankshaft seal replacement on a Cummins ISX engine is not a job where "close enough" is good enough. The sealing surface between the elastomer lip of the seal and the polished journal of the crank nose operates at engine RPM in the presence of hot, pressurized oil. Any deviation in installation — depth, concentricity, lip integrity, or surface preparation — becomes a leak path the moment the engine runs. And because the leak point is hidden behind the harmonic balancer, by the time the customer notices, the damage radius has already expanded to belts, accessories, and the front cover gasket area.
The M20185 enforces correctness through geometry. It physically prevents the most common installation errors by piloting the seal square to the crankshaft centerline and driving it to the correct depth without contacting the sealing lip. That is the entire reason OEM-equivalent tools exist for this job — and the entire reason this guide exists to walk through using it correctly.
The Front Crankshaft Seal Replacement Checklist
- Stage the Engine and Access the Front Cover.
Position the truck with the engine cold or near-ambient. Disconnect the negative battery cable per shop safety procedure. Remove the front grille, charge air piping, and any accessory components blocking access to the front of the engine — fan shroud, fan clutch assembly, serpentine belt, and accessory drive components as specified in the Cummins ISX service publication for your specific model year. Tools required at this stage include a properly rated jack stand setup if working under-hood, a quality torque wrench in the appropriate range, a belt tension release tool, and a clean catch pan for any residual oil drips. The single most common mistake at this stage is rushing the accessory removal and damaging a charge air boot, a wiring harness, or an A/C line. Take the time to label connectors and route components carefully — a leak-free seal job ruined by a torn charge air boot is still a comeback. - Remove the Harmonic Balancer / Damper.
Remove the damper retaining hardware per OEM torque sequence — typically requiring a heavy-duty impact or breaker bar setup. Use a proper damper puller; never pry behind the damper with a screwdriver or hammer it from the rear, as this will damage the elastomer ring and ruin the damper. Inspect the damper as it comes off: check the elastomer ring for cracking, separation, or oil saturation, and check the front face for evidence of leak migration. Set the damper on a clean bench, face-up, on a soft surface. This is the inspection moment that separates real technicians from parts-changers — note any damper concerns now, before they become a follow-up job. - Remove the Existing Front Crankshaft Seal With the M20185.
Configure the M20185 for seal removal per the tool instructions. The M20185 is engineered to extract the old seal without contacting or damaging the crank sealing surface — this is critical because any nick, gouge, or groove on the crank nose becomes a permanent leak path the new seal will not be able to overcome. Apply steady, controlled force through the tool to draw the seal out of its bore. Do not improvise with a seal pick, a screwdriver, or a sheet metal screw — these techniques look harmless but routinely scratch the crank surface in ways that aren't visible until the new seal leaks. Once the seal is out, set it aside for inspection (looking at the failed seal can tell you a lot about why the original failed — heat damage, lip wear pattern, contamination). - Inspect and Prepare the Sealing Surfaces.
With the seal out, inspect the crankshaft sealing surface for grooves, scoring, pitting, or contamination. A worn crank nose may require a wear sleeve to restore a sealable surface; this should be addressed before the new seal is installed, not after. Inspect the seal bore in the front cover for burrs, debris, or sealant residue from prior service. Clean both surfaces with a lint-free shop rag and a small amount of brake clean or approved solvent — never use scotch-brite or abrasive on the crank surface, as this destroys the surface finish required for a long-term seal. Apply a thin film of clean engine oil to the new seal's outer surface and the crank nose to ease installation; do not pre-saturate the lip with sealants unless explicitly specified by Cummins for your application. - Install the New Seal With the M20185 to Correct Depth and Concentricity.
Position the new seal squarely on the crank nose with the sealing lip oriented per the OEM specification (lip facing the engine oil side). Configure the M20185 for installation — the tool's pilot will index the seal concentric to the crank centerline. Apply controlled, even force through the tool until the seal seats to the correct depth as indicated by the tool's positive stop. Do not over-drive the seal past the stop; do not lateral-tap or use a hammer on the seal itself. The M20185 is the entire installation force path — the tool seats the seal correctly, full stop. Once the tool reaches its stop, the seal is installed. Reinstall the damper, accessory drive, belts, and front-end components in reverse order, torqued to OEM specification at every step. Refill any lost fluids, reconnect the battery, and run the engine through a thermal cycle while monitoring the front of the engine for leaks.
🔧 PRO-TIP from the Shop Floor
Before you reinstall the damper, take a clean shop rag and wipe the crank nose, the new seal face, and the inner bore of the damper one final time. Microscopic shop debris on any of these surfaces is the single most common cause of a "good job that leaks anyway" the next morning. Twenty seconds of final-wipe discipline saves a Monday morning comeback.
Troubleshooting Common Issues
Symptom 1 — Oil leak returns within hours of restart.
This almost always points to a damaged sealing lip during installation — most often from improvised tooling or from contamination on the crank surface. Pull the damper, inspect the seal lip for cuts or rolling, inspect the crank surface for new scratches, and re-do the job with the M20185 and a fresh seal. Do not attempt to "reseat" a leaking seal — once a lip is damaged, the seal must be replaced.
Symptom 2 — Oil leak appears slowly over the first 500 miles.
Typically indicates a cocked or partially seated seal that the M20185 would have prevented. May also indicate a worn crank sealing surface that needs a wear sleeve. Pull the damper, inspect for uneven seal seating, inspect the crank surface with a fingernail across the sealing area for grooving, and address before reinstalling.
Symptom 3 — Damper makes contact with the new seal during install.
Almost always a depth issue — the seal was driven too far into the bore (or, less commonly, not far enough). The M20185's positive stop is designed to prevent this. If it occurs, pull the seal, check the bore for damage from over-drive, and reinstall a new seal with the tool used correctly.
Symptom 4 — Damper bolt won't reach correct torque.
Indicates damper position or thread issue, not seal issue — but it's worth checking the damper bore for cleanliness and verifying the seal isn't interfering with damper seating. Inspect the damper-to-crank index features for damage or contamination.
Symptom 5 — Belt squeal or accessory drive issue post-repair.
Check whether residual oil from the original leak contaminated the serpentine belt or the accessory pulleys. Oil-contaminated belts must be replaced, not cleaned. Wipe down all pulley faces and the front of the engine before declaring the job complete.
Tool Compatibility & Variations
The M20185 is engineered specifically for the Cummins ISX12 and ISX15 front crankshaft seal application, replacing the OEM Cummins 4918991. It is not intended for use on unrelated Cummins platforms such as the X15 architecture variants outside its specified application range, the ISB family, the ISL family, or non-Cummins engines. Always verify the tool against the specific service publication for the engine you are working on. For Apex's complete line of Cummins-specific service tools — front and rear seal tools, cam gear tools, injector service tools, valve train tools, and overhaul-specific tooling — visit apexinds.com for the full catalog.
Within the ISX12 and ISX15 service envelope, the M20185 is the dedicated front crankshaft seal tool. The rear main seal is a different application requiring its own dedicated tooling, and shops servicing both ends of the crankshaft on these engines will typically own both tools. The M20185 does not replace rear seal tooling and is not designed for use at the rear of the engine. Within its designed application, however, it is the complete solution — both remover and installer for the front crank seal — meaning a single tool handles the full service cycle without needing to swap between separate extraction and installation devices.
Pre-Job Tool and Parts Checklist
Before beginning the procedure, stage the following on a clean shop bench or rolling tool cart within reach of the bay: the M20185 Front Crankshaft Seal Remover / Installer (verified clean and inspected); a new OEM front crankshaft seal sized for your specific ISX12 or ISX15 engine; an OEM front cover gasket if any front cover work is being performed; brake clean or approved cleaning solvent; lint-free shop rags; a torque wrench in the appropriate range for damper hardware; a properly rated damper puller; a belt tension release tool sized for the serpentine belt system on the engine; clean engine oil for seal lubrication; and shop-rated eye protection and gloves. Confirm the engine is at safe handling temperature before disassembly — work on a hot ISX is a burn hazard and increases the risk of thermal mismatch problems during seal installation. Confirm the truck is supported correctly with properly rated stands if any under-hood work requires it. Disconnect the negative battery cable per shop safety procedure before beginning electrical or accessory disassembly.
Post-Repair Verification & Documentation
After reassembly, the job isn't finished until the repair is verified. Start the engine and let it idle to operating temperature while monitoring the front cover area for any signs of oil migration. Bring the engine through a full thermal cycle — operating temperature, then cooled, then operating temperature again — to confirm the seal is performing through expansion and contraction. Inspect the area around the damper, the belt path, and the lower front cover for any wet spots. A truly successful job leaves the front of the engine completely dry after thermal cycling.
Document the repair in the shop's service records, noting the M20185 was used, the new OEM seal part number, and any adjacent components inspected during the procedure (damper condition, belt condition, accessory drive condition). This documentation has two purposes: it protects the shop from warranty disputes by establishing that the correct procedure and the correct tooling were used, and it builds a service history that informs future work on the same truck. For fleet customers, this kind of documentation is often a contractual requirement and a reason fleets stay loyal to shops that take their procedures seriously.
Safety & Shop Best Practices
Wear shop-rated eye protection and gloves throughout the procedure. Ensure the engine is at safe handling temperature before disassembly — front cover work on a hot engine is a burn hazard and increases the risk of seal damage during installation due to thermal mismatch. Use only properly rated lifting and support equipment; never trust a jack alone with a vehicle in service. Keep the work area clean and well-lit — front cover work is detail work, and contamination control is half the procedure. Store the M20185 in a dry environment, lightly oiled on any precision contact surfaces, and inspect it before each use for damage or wear that could compromise its function.
Technician FAQ
Q1: Can I install the new seal dry, or should I lubricate it?
Apply a thin film of clean engine oil to the seal's outer diameter and the crank nose. Do not pack the lip with grease unless specifically called for by Cummins for your application — over-lubricating the lip cavity can interfere with proper seal function during the engine's first thermal cycle.
Q2: Do I need to replace the damper every time I do the seal?
No — but inspect it carefully every time. Replace it if the elastomer ring shows cracking, separation, or significant oil saturation, or if the damper itself shows runout when checked on a dial indicator. A failing damper is a separate engine-protection issue that gets surfaced during this exact job.
Q3: What if the crank sealing surface is grooved?
A grooved or worn crank nose requires a wear sleeve installed over the original surface, with a seal sized to fit the sleeved diameter. This is a known service path for high-mileage ISX cranks. Address it during the same service interval — installing a new seal on a grooved crank guarantees a leak.
Q4: Can the M20185 be used in field repairs, not just shop work?
Yes. The tool is engineered for both bench and on-vehicle service. Its 13-pound shipping weight makes it field-portable for mobile diesel service operations, fleet field shops, and roadside repair scenarios.
Q5: What's the right torque sequence on the damper bolt?
Always reference the current Cummins service publication for your specific engine year and model. Damper torque is a multi-stage process on the ISX platform and is not a value that should be approximated.
Q6: Do I need a special seal protector to slide the seal over the crank nose?
The M20185 includes the indexing geometry needed to install the seal correctly without lip damage. Some technicians prefer to use a manufacturer-specified seal protector sleeve in addition; check the current Cummins service literature for the exact procedure recommended for your engine.
Q7: How do I know I've driven the seal deep enough?
The M20185's design includes a positive stop indicating correct installation depth. When the tool stops advancing under controlled force, the seal is at the correct depth. Do not attempt to drive further.
Q8: Is there a way to test the repair before reassembling everything?
The most reliable test is a full thermal cycle of the engine after reassembly with the front of the engine wiped clean. Run the engine to operating temperature, let it cool, and inspect the front cover area for any new oil migration. Any sign of wetness is a sign the job needs to be re-evaluated before the truck leaves the bay.
Get the Right Tool for the Right Job — Every Time
The M20185 is built to do exactly one job — flawlessly. OEM-equivalent of Cummins 4918991. Ready to ship from Apex Tool Company.
$372.65 — In Stock — Free Shipping on Orders $500+
Order the M20185 Today →📞 812-579-5478 | Mon–Fri 8 a.m.–5 p.m. ET
overall rating:
my rating:
log in to rate