Blog
Navistar Cylinder Head Pressure Testing Procedure: ZTSE4289A Professional Guide
Detailed cylinder head pressure testing procedure using ZTSE4289A adapter plates.

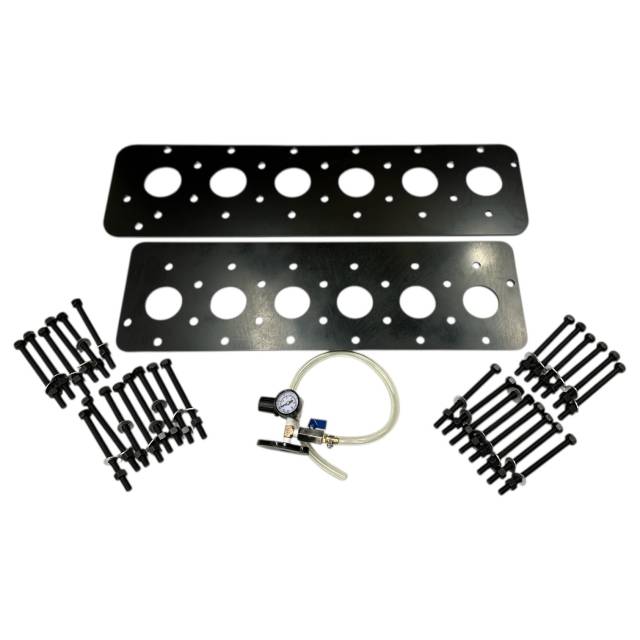
This 12-phase procedure uses the ZTSE4289A adapter plates kit to pressure test cylinder heads on Navistar DT466, MaxxForce DT/9/10, N9/N10 engines. Detects cracks & porosity before installation.

Introduction: Essential Cylinder Head Pressure Testing for Navistar Engines
Pressure testing reveals hidden cracks & porosity. The ZTSE4289A kit seals passages for controlled testing—critical for reliable rebuilds.
Phase 1-3: Preparation & Head Setup
- Clean cylinder head – Remove debris
- Inspect visible surfaces – Note cracks
- Install block-off plates – Seal coolant ports
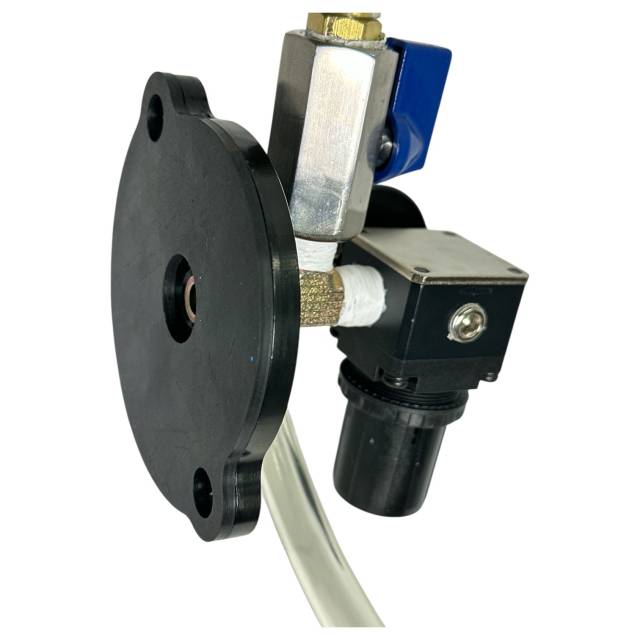
- Attach thermostat plate – Complete seal
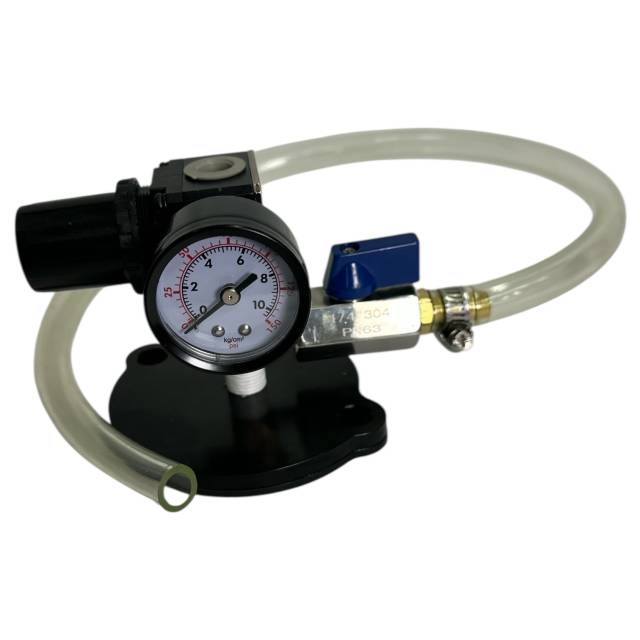
- Connect pressure regulator – Gauge ready
Phase 4-6: Pressurization & Leak Check
- Apply controlled pressure – Typically 30 psi
- Monitor gauge – Hold steady
- Check for pressure drop – Listen for leaks
- Inspect all passages – Spray soapy water
- Hold pressure 5–10 minutes – Verify stability
- Document results – Photos/pressure log
Phase 7-9: Depressurization & Disassembly
CRITICAL: ZTSE4289A Pressure Testing Setup
- Slowly release pressure – Safety first
- Remove plates carefully – No damage
- Clean head again – Remove residue
- Mark head status – Pass/fail tag
- Store kit properly – Clean & dry
- Record test data – For warranty
Phase 10-12: Final Evaluation & Next Steps
- Evaluate results – No drop = pass
- Proceed to machining if needed – Or install
- Final head inspection – Ready for service
- Schedule follow-up – Post-install check
Critical Safety Warnings: Pressure Testing Procedure
MUST AVOID THESE FATAL ERRORS:
- ❌ Over-pressure – Plate failure
- ❌ No regulator – Excessive psi
- ❌ Skip hold time – Miss slow leaks
- ❌ Ignore PPE – Eye/face protection
- ❌ Poor sealing – False pass
Professional Service Documentation
Why ZTSE4289A Outperforms Basic Pressure Tests
Risky Basic Methods:
- ❌ Improvised seals → Leak bypass
- ❌ No gauge control → Over-pressure
- ❌ Short hold → Miss slow leaks
- ❌ No documentation → Warranty issues
- ❌ No kit → False pass
ZTSE4289A Advantages:
- ✅ Precision sealing
- ✅ Controlled 30 psi
- ✅ Full hold time
- ✅ Detects hidden defects
- ✅ Protects $14,700–$44,000
- ✅ Heavy-duty
- ✅ Professional results
- ✅ Shop ready
Pressure Test Navistar Heads Professionally. Ensure Integrity. Maximize Rebuild Reliability.
Get ZTSE4289A – $985.00
overall rating:
my rating:
log in to rate