Blog
Torquing Restricted Metric Flare Fitting Loops
Precision powertrain fluid line reconditioning guidelines for commercial fleet yards.

Dealing with hard-to-reach fuel lines or tight steering pump fittings behind the block? Learn the proper technical sequence to leverage shouldered crowfoot sockets safely.
Why Open-Face Flexing Skews High-Pressure Torque Calculations
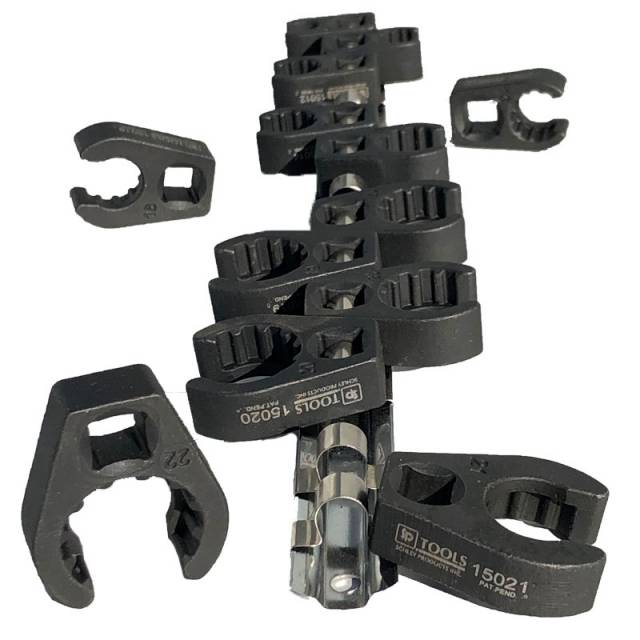
When building high-pressure fluid circuits, tightening fittings to strict factory torque specs is essential to prevent hydraulic tracking leaks. However, when a line tech applies torque using an un-shouldered, generic open crowfoot extension, the open jaws tend to flare outward under tension. This flexing causes the tool to ride upward along the fitting, shifting the force off-center. This tool deflection alters your actual torque multiplier factor, under-tightening the joint. Furthermore, it easily slips and mars the hex faces. Utilizing a solid blind-stop shouldered socket like the SP15000 keeps the tool centered on the hex flats, ensuring complete force transfer through your torque wrench with zero off-axis deflection.
The 5-Step Restricted Line Torquing Protocol
- Fastener and Flange Port Auditing: Inspect the target metric flare nut for residual corrosion or road grime crust. Spray the threads down with a penetrating solvent and clear out the hex flats with a brass wire brush to maximize tool seat contact.
- Match the Target SP15000 Socket Size: Select the correct metric socket profile from your SP15000 rail (sizes ranging from 10mm to 22mm). Slide the shouldered opening straight over the hydraulic line until the built-in blind stop hits the top lip of the hex nut.
- Configure Your Torque Wrench Geometry: Snap your 3/8" drive torque wrench or breaker bar into the crowfoot drive square well. *CRITICAL RULES: Always position the crowfoot adapter at an exact 90-degree perpendicular angle relative to the wrench handle axis to maintain a true 1:1 torque calibration factor.*
- Execute Smooth Mechanical Tightening: Place your hand centered on the wrench grip and pull with smooth, steady momentum. The 12-point inner profile will engage multiple hex corners simultaneously, while the integrated shoulder plate locks the socket square onto the fastener face.
- Verify Thread Seating: Remove the shouldered socket smoothly. Inspect the flare joint visually for parallel seating alignment and run a quick pressure check to ensure a dry, leak-free fluid seal.
PRO-TECH 90-DEGREE TORQUE ALIGNMENT DISCLOSURE:
Never align a crowfoot socket inline straight or extended 180 degrees with your torque wrench axis unless you mathematically re-calculate and change the torque value setting! Running a crowfoot inline artificially extends the lever length of the tool, causing you to over-torque and strip out the threads. Keep your tools set at 90 degrees to maintain factory-calibration metrics.
3/8″ Drive System Integration. Stop Tool Slippage on Soft Fittings.
Get the SP15000 Shouldered Crowfoot Rail
overall rating:
my rating:
log in to rate