Blog
Metric Dowel Pin Removal — Step-by-Step with the ATCCATS0260
The Complete Technician's Procedure for 6 mm to 16 mm Metric Dowel Pin Extraction
The complete shop-floor procedure for safely extracting 6 mm to 16 mm metric dowel pins from engine blocks, heads, flywheels, and machinery — without damage, without drama.
Why Proper Dowel Pin Extraction is Non-Negotiable
Dowel pins set the alignment of every critical machined interface in an engine. Head to block. Bell housing to block. Flywheel to crankshaft. Timing cover to block face. If a dowel pin is bent, torched, or extracted with side load that opens up the pin hole, every subsequent alignment is compromised — gasket failures, oil leaks, timing scatter, and warpage on torque-down. You can't shortcut this step. Either the pin comes out clean and the new head goes on true, or it doesn't and the job comes back through the door 3,000 miles later.
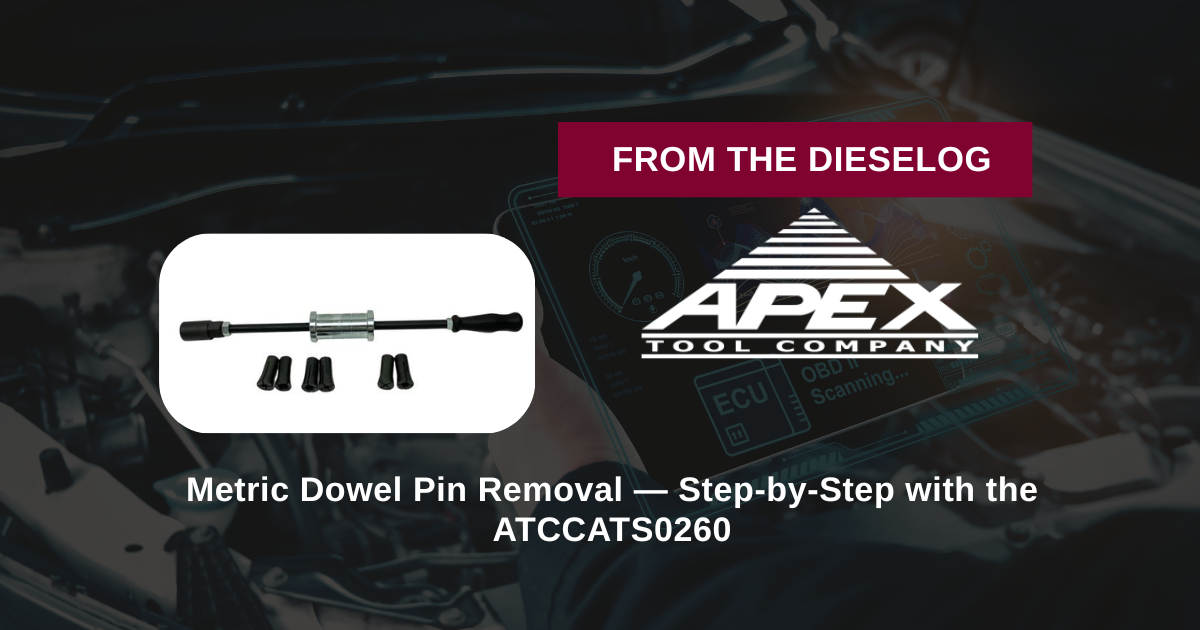
The ATCCATS0260 Metric Dowel Pin Puller Kit is the procedure-correct tool for this job. The technique below is the controlled, repeatable sequence that every diesel shop should standardize on for any metric dowel pin in the 6 mm to 16 mm range.
The Metric Dowel Pin Extraction Checklist
-
Identify the dowel pin diameter accurately.
Before you touch the puller, measure the dowel pin with a metric vernier or digital caliper. Reading off the OEM service manual is a starting point, but always confirm at the part itself — aftermarket repairs, supersession kits, and prior reman work can mean a non-standard pin in place. The ATCCATS0260 covers 6, 8, 10, 12, 14, and 16 mm. If your reading falls between sizes (rare — usually means a worn or distorted pin), go down a size, not up. The collet has to enter the pin freely without binding on the pin's outer edge. -
Clean the pin and the surrounding area thoroughly.
Carbon, gasket residue, RTV silicone, and coolant scale around the dowel will all increase the breakaway force. Use a wire brush, brake cleaner, and a pick to clear the visible surface. If the pin sits in a deck that has been removed from the engine, blow out the pin hole with shop air. On aluminum castings, do not use a steel pick on the sealing surface around the pin — use brass or plastic to avoid scratch marks that could compromise the next gasket. Tools needed: brass pick, brake cleaner, shop air, lint-free shop rag. -
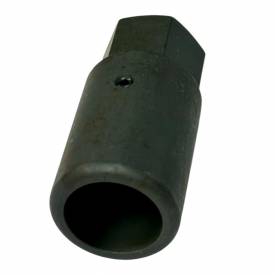
Select and thread on the correct collet for your pin size.
Match the collet to the measured pin diameter. The six collets in the kit are labeled by metric size: M6×1.0, M8×1.25, M10×1.25, M12×1.25, M14×1.5, and M16×1.5. Thread the chosen collet onto the slide hammer puller shaft. Snug by hand — no need for a wrench at this stage. The threads should be clean and lightly oiled with a drop of penetrating oil. A dry, gritty thread is the most common reason a collet sticks to a pulled pin and won't release later. -
Mount the collet onto the dowel pin and lock it with downward motion.
Place the collet over the exposed pin head. With the puller body vertical, apply firm downward pressure. This drives the collet's internal jaws onto the pin and creates the mechanical lock. You'll feel the collet "bite" — there's a distinct snap of engagement when the grip is solid. If the collet feels loose or slides off, stop. Either the pin size is wrong, the pin is too short to grip, or the collet jaws need a wipe-down. Common mistake at this step: angling the puller body off-axis. Keep it perfectly perpendicular to the pin. -
Slide-hammer the weight upward in firm, controlled strokes.
With the collet locked, grip the puller shaft and drive the slide hammer weight upward against the top stop. Use firm, full-travel strokes — not light tapping. The shock load is what breaks the corrosion bond between pin and bore. On lightly stuck pins, one or two strokes will free it. On heavily corroded pins, expect 5 to 10 strokes. Between strokes, listen and feel — when the pin breaks free, the shock character changes from a dead thud to a sharper ring. Once the pin is moving, continue striking until it lifts fully clear of the bore. To release the pulled pin from the collet, unscrew the collet head or tap the hollow surface — the pin drops free.
Troubleshooting Common Issues
Symptom: The collet won't bite — it just slides off the pin.
This is almost always a size mismatch. Re-measure the pin. If the pin's exposed head is mushroomed, deformed, or corroded round, file or dress the head lightly with a fine file before attempting again. Also check that the collet jaws are clean — old galled material or paint can prevent full engagement. If after re-measuring and cleaning the collet still won't engage, the pin may have been shortened by prior service work; in that case, the collet has no surface to grip on, and you'll need to expose more pin material first using a careful drill-and-tap approach.
Symptom: Slide hammer strokes feel dead — no shock transmission.
Three possible causes. First, the puller shaft may not be perpendicular to the pin axis — re-align. Second, the collet may not be fully locked onto the pin — re-seat by pressing down hard before hammering. Third, the slide hammer weight may not be reaching full upper travel — make sure your stroke length is genuinely full-throw. A half-stroke transmits roughly a quarter of the available shock energy.
Symptom: Pin moves a few millimeters and then stops.
The corrosion bond has broken but the pin is now binding on a deformed or eroded section of the bore. Apply penetrating oil at the joint, let it wick down for 5 minutes, then resume slide-hammering. Do not switch to side-leverage to free a partially extracted pin — that's the move that cracks castings. Just keep up the axial shock loading. If the pin truly will not come, you may need to drill the pin out — but that's a last resort after at least two penetrant cycles.
Symptom: The collet won't release the pulled pin.
Two ways to release. First, try unscrewing the collet head — the jaws relax and the pin falls out. If the pin has galled into the collet (rare, but happens on corroded pins), tap the hollow surface of the collet against a wood block to shock the pin free. Do not use a vise to crush the collet — you'll deform the jaws and ruin a $20 part. With clean threads and a drop of oil at every reassembly, the collets will release cleanly every time.
Symptom: Pin extracted, but the bore is now oval or oversized.
This is a pre-existing condition, not a tool failure — the bore was already damaged before extraction, usually from prior corrosion or from a previous improper pull. Measure the bore. If it's within service limits, a new pin will press in fine. If the bore is opened up beyond spec, you'll need to ream and bush, or use an oversize replacement pin. Document the finding before the customer call.
Tool Compatibility & Engine Platform Coverage
The 6, 8, 10, 12, 14, and 16 mm range covers the standard dowel pin sizes used across virtually every modern metric-pinned engine platform. On the European side, that includes Mercedes-Benz OM-series diesels (OM904, OM906, OM457, OM460, OM471, OM473), Volvo D-series (D11, D12, D13, D16), MAN D-series, Scania DC engines, and Iveco F-series. On Japanese platforms, the same kit handles Isuzu 4HK, 6HK, and 6WG1, Hino J-series and A-series, Mitsubishi 4M and 6M engines, and Komatsu industrial diesels. On the North American side, Detroit Diesel DD13, DD15, and DD16, Cummins ISX (metric-pinned models), and the metric-spec PACCAR MX engines all use dowels in this range.
Beyond engines, the kit is equally at home on metric transmissions (Eaton, Allison metric-spec, ZF, Mercedes), transfer cases, marine outdrives, hydraulic manifold blocks, industrial gearcases, and CNC machine tool fixtures. Anywhere a press-fit metric dowel locates a precision assembly, this kit is the right tool.
Safety & Shop Best Practices
Slide hammer work is safe when done correctly, but inattention causes injuries. Always wear ANSI-rated safety glasses — when a pin breaks free under shock load, fragments of corrosion or rust can fly. Keep the puller body vertical and the slide hammer travel in a clean, unobstructed line — a fingertip pinched between the slide weight and the top stop is the most common shop injury with these tools. Don't slide-hammer with hydraulic lines, fuel lines, electrical harnesses, or other components in the strike path; the recoil energy can damage adjacent components. Always block the workpiece securely so the casting doesn't rock during extraction — a moving workpiece absorbs shock energy that should be going into the pin.
Post-Extraction Inspection: What to Check Before Pressing the New Pin
The job isn't done when the old pin is out. Before pressing in a replacement, run through a brief inspection sequence — five minutes of checking that prevents the comeback call.
Bore diameter. Measure the pin bore with a telescoping gauge and micrometer, or with a pin gauge set. Compare against the OEM service spec — typically the bore should be within 0.02 mm of nominal. If the bore is opened up beyond service limit, the new pin won't hold the press fit and you'll have the same alignment problem on the next teardown. An oversize bore means either machining and bushing, or sourcing an oversize replacement pin from the OEM parts catalog.
Bore surface condition. Inspect the bore visually with a flashlight and a bore scope if you have one. Look for galling, deep scoring, or corrosion pits that extend into the bore wall. Light surface oxidation can be cleaned out with a bore brush and brake cleaner. Deep damage means the bore needs to be machined to a clean dimension and bushed back to nominal.
Surrounding casting integrity. Check the casting around the pin boss for hairline cracks — especially on aluminum heads where prior improper extraction may have stressed the boss. A dye penetrant test is the gold standard, but a clean visual inspection with strong lighting and magnification catches most issues. If you find a crack, the head or block is condemned at that location; document it before the customer call.
Mating surface flatness. Verify the deck surface around the pin is still flat. A straight edge and feeler gauge will catch any local raised area from the previous improper extraction attempt — those raised areas have to be machined flat before the new gasket goes down.
Pin selection. Choose the correct replacement pin — match the original OEM spec for diameter, length, and material. Don't reuse a pin that was seized during extraction. The cost of a new dowel pin is trivial compared to the cost of doing the head job twice.
Standardizing the Procedure Across Multiple Technicians
For shops with more than one technician working diesel rebuilds, the real value of the ATCCATS0260 is that it standardizes a procedure that otherwise varies wildly by individual experience. Write up a one-page shop standard that includes: (1) the five-step procedure above, (2) the troubleshooting matrix, (3) the safety checklist, and (4) the post-extraction inspection sequence. Laminate it. Keep it at the dowel pin tool station. Every tech follows the same procedure, every time.
The benefits of standardization compound. New techs ramp up faster because the procedure is documented and the tool is purpose-built. Senior techs stop having to bail out junior techs in the middle of a stuck-pin situation. Comebacks drop because every extraction is done the same correct way. And when a shop manager reviews labor recovery, the dowel pin line item becomes predictable instead of a black hole of variable time.
Apex Tool Company stocks the full kit plus all individual replacement collets and a replacement puller body — meaning a shop standard built on the ATCCATS0260 is sustainable for the long term. If a collet wears or gets lost, the replacement is one order away, not a forced re-purchase of the whole kit.
🔧 PRO TIP — The Penetrant Cycle
For any dowel pin that's been in service more than 100,000 miles or 5,000 hours, apply a penetrating oil (PB Blaster, Kroil, or equivalent) to the pin joint 15 to 30 minutes before extraction. Reapply every 5 to 10 minutes. The penetrant wicks into the corrosion bond and dramatically reduces breakaway force. Skipping this step is the number-one reason technicians struggle with stuck pins — and the number-one cause of damaged castings during extraction.
Frequently Asked Questions — From the Shop Floor
Q: How long should a single pin extraction take with the ATCCATS0260?
Light corrosion: 30–60 seconds once the collet is installed. Moderate corrosion: 2–3 minutes including penetrant cycle. Heavy corrosion: up to 10 minutes with multiple penetrant applications and full slide-hammer cycles. Compare that to 30–60 minutes for a torch-and-weld manual extraction, plus the risk of damage.
Q: Can I use heat to assist extraction?
Mild heat to the casting around the pin (not the pin itself) using an induction heater or focused heat gun can help expand the bore slightly and break the corrosion bond. Do not torch aluminum castings — the metallurgical risk is real. On cast iron, propane-level heat is acceptable. The slide-hammer technique works without heat in nearly all cases.
Q: What's the maximum stroke force on a 16 mm pin?
The slide hammer is rated for full professional service on the largest pin in the kit. Reasonable arm-driven slide strokes produce more than enough shock load to defeat even heavily corroded 16 mm pins in cast iron blocks.
Q: Should I replace the dowel pin after extraction or reuse it?
Best practice: replace any dowel pin that was seized at extraction. The fact that it was seized means there's been corrosion at the joint, and reinstalling a corroded pin in a freshly cleaned bore sets you up for the same problem next time. New dowel pins are inexpensive and they're the correct choice for any rebuild.
Q: Can I extract dowel pins with the engine still in the chassis?
Yes, as long as you have vertical clearance for the slide hammer travel. On in-frame head jobs, this is the standard method. Verify the strike path is clear of fuel lines, coolant lines, wiring, and the firewall before starting.
Q: What about dowel pins that are flush or below the deck surface?
If at least 2 mm of pin is exposed above the deck, the collet can grip. Below that, you'll need to expose more pin material first — usually by drilling and tapping for a screw-extraction approach, then transitioning to the slide hammer.
Q: Are individual collet replacements available?
Yes — every size from M6×1.0 through M16×1.5 is individually stocked at Apex Tool Company, and a replacement puller body is also available. The kit is fully serviceable for the life of the shop.
Q: How should I store the kit between jobs?
Wipe down the puller body and collets with a light coat of preservation oil after each use. Store in the kit case in a dry location. Light surface rust on a slide hammer is cosmetic, but corrosion in the collet threads will make pulls harder — a quick oil and wipe after each job prevents that.
Standardize Your Shop's Dowel Pin Procedure
ATCCATS0260 Metric Dowel Pin Puller Kit — Hardened, Reusable, Shop-Ready
ORDER THE ATCCATS0260 — $180.00 →📞 812-579-5478 / 800-365-2233 | Mon–Fri 8 a.m.–5 p.m. ET | Free shipping on orders over $500
overall rating:
my rating:
log in to rate