Blog
Caterpillar C-10 / C-12 / C-15 / 3406E Injector Cup Repair
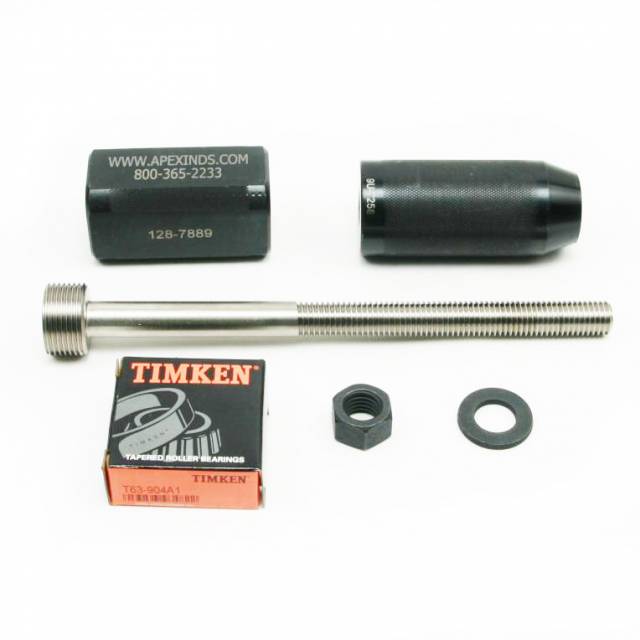
Step-by-step mechanical installation layout of an engine internal expansion puller tool inside a diesel cylinder head well

Dealing with combustion blow-by past the fuel injectors or a diesel-contaminated cooling loop? Learn the professional technical sequence to pull and press assemblies cleanly with the ATC6010 fixture.
Why Off-Axis Prying Destroys Cylinder Head Valve Castings
The injector well cavity on a Caterpillar C15 engine block is tight, making freehand extraction exceptionally risky. When a line mechanic attempts to drive a cold chisel down the side of a brass cup to crush it out, the high-impact energy travels sideways. This asymmetrical load gouges the soft cast iron seating land. Once the casting wall is scarred, a brand-new sleeve will never seat uniformly, leading to recurring coolant leaks. Utilizing a threaded, pilot-aligned expansion mandrel like the ATC6010 draws the cup straight up along a concentric centerline, shielding the cylinder block from structural damage.
The 5-Step Injector Sleeve Renovation Sequence
- Drain and Clean the Fuel Rails: Isolate the vehicle batteries. Drain the cooling system and the cylinder head oil/fuel rails completely. Pull the electronic fuel injectors and clear out all standing fluid from the injector wells to establish a clean, dry work zone.
- Lock and Extract the Copper Core: Insert the mechanical puller mandrel of the ATC6010 tool deep into the worn copper sleeve. Tighten the central expansion nut to lock the tool jaws firmly into the cup walls. Turn the primary force nut clockwise smoothly—the vertical tension will cleanly break the old seal bond and draw the cup straight out.
- Bore Land Conditioning: Polish the internal cylinder head receiver bore land with a non-marring abrasive pad until bright metal is achieved. Clean out all loose material and residual scale using a shop vacuum. Wipe the entire surface down with a quick-drying solvent.
- Apply Retaining Sealant Protection: Apply a clean, uniform bead of a high-temperature anaerobic retaining compound around the upper and lower seating lands of your fresh copper sleeve. Avoid over-applying to prevent excess sealant from blocking critical fuel delivery ports.
- Drive the New Sleeve Home: Position the new sleeve squarely onto the tip of the ATC6010 installation driver. Lower it into the bore and tap the driver handle with a dead-blow hammer until it bottom-seats flatly against the lower machining shoulder. Inspect the landing area to verify parallel fitment.
PRO-TECH SEALANT MATURATION ALERT:
After driving a fresh copper injector sleeve home with the ATC driver mandrel, you must let the anaerobic retaining compound cure completely for a minimum of 12 to 24 hours before filling the cooling system or installing injectors. Rushing this window allows high-pressure fluids to wash away un-polymerized adhesive, causing immediate failure.
Flawless In-Chassis Extraction. Absolute Drivetrain Protection.
Order the ATC6010 Master Cup Tool Set
overall rating:
my rating:
log in to rate