Blog
Step-by-Step Camshaft Timing Setup on Detroit DD13/DD15/DD16 & GHG17 with ATC1897
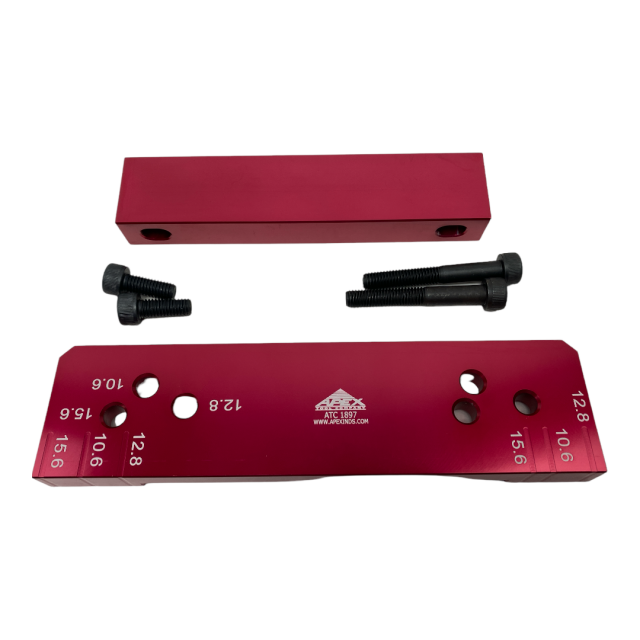
Practical camshaft timing setup workflow for newer Detroit DD13, DD15, DD16 and GHG17 engines using the ATC1897/W470589062300 plate.

This guide walks through a professional, high-level procedure for using the ATC1897 / W470589062300 camshaft timing tool on newer Detroit Diesel DD13, DD15, DD16 and GHG17 engines built March 23, 2016 and later.
When to Use the ATC1897 Timing Tool
- Camshaft replacement on DD13/DD15/DD16 or GHG17 engines built March 23, 2016 or later.[web:1]
- Major engine overhaul or in-frame rebuild requiring timing verification.[web:1]
- Cylinder head removal where cam timing has been disturbed.[web:1]
- Timing complaints after prior incorrect service with old-style fixtures.[web:1]
Important: Always confirm engine build date and that the engine is using the updated camshaft and idler gear design before using this new-style timing plate.[web:1]
Phase 1: Engine Identification & Preparation
- Verify engine model (DD13, DD15, DD16 or GHG17) and build date, confirming March 23, 2016 or newer with updated timing components.[web:1]
- Disconnect batteries and follow Detroit Diesel safety guidelines before working near the front gear train.
- Remove any front covers, accessories, and components required by the OEM manual to access the camshaft and timing gears.
- Rotate engine to the specified reference position (usually #1 cylinder at TDC on compression) using the crankshaft barring tool as directed by OEM procedures.
Phase 2: Installing the New-Style Cam Timing Tool
- Inspect the ATC1897 / W470589062300 timing plate and spacer surfaces to ensure they are clean and free from damage.[web:1]
- Position the camshaft to the OEM timing reference marks on the updated cam and idler gears, as specified in Detroit Diesel documentation.
- Install the timing tool on the cylinder head or front housing using the designated locating points so the plate sits flush and square.
- Engage the plate with the camshaft alignment features so that the cam is locked in the correct timing position for the updated design.
Phase 3: Timing Verification During Assembly
- With the timing plate holding the camshaft, install or torque the camshaft gear, idler gear and related components according to OEM torque specs.
- Re-check alignment between the camshaft gear marks and idler/crank gear marks to confirm that nothing shifted during tightening.
- Verify that the timing plate still seats correctly and that the camshaft cannot move independently of the timing gear set while locked.
- Only remove the timing tool once the cam gear fasteners are fully torqued and timing alignment has been visually confirmed.
Phase 4: Final Checks Before Start-Up
- Rotate the engine by hand through at least two full crankshaft revolutions to confirm there is no mechanical interference and that valve timing feels normal.
- Reinstall front covers, seals and accessories following Detroit Diesel service procedures.
- Perform any required electronic calibrations or relearns if specified by OEM documentation after timing work.
- On first start, monitor for abnormal noises, rough running, or timing-related fault codes and correct immediately if detected.
Critical Warnings
- Do not use legacy/old-style DD timing tools on GHG17 and post-March 2016 engines—they do not match updated cam and idler gear designs.[web:1]
- Never attempt to “eyeball” timing on these platforms; always use a dedicated timing plate to avoid long-term reliability issues.
- Always follow the official Detroit Diesel service manual for exact torque, angle, and sequence specifications.
overall rating:
my rating:
log in to rate