
Blog
PACCAR MX Series Front & Rear Seal Service Steps
Precision engine seal maintenance guidelines for commercial diesel mechanics and fleet overhaul rebuilders.

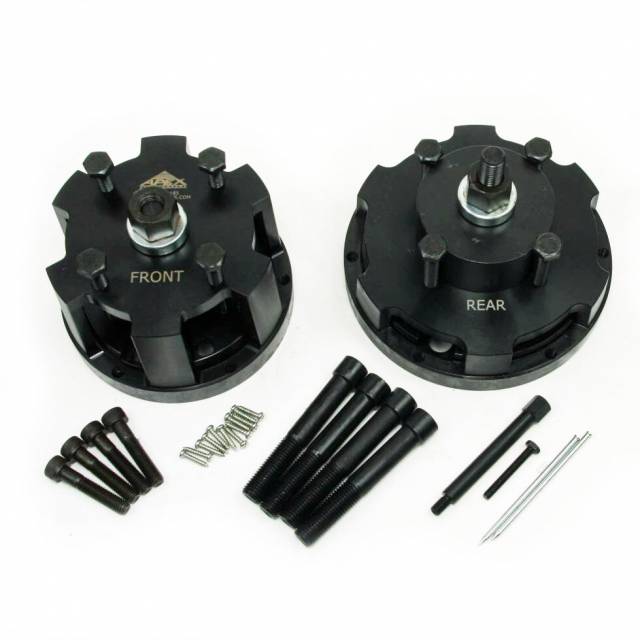
Replacing front or rear main crankshaft oil seals on 2011–2016 PACCAR MX, MX PMCI-2, or MX-13 engines during in-frame or out-of-frame overhauls? Follow this step-by-step professional workshop procedure to mount the ATC 1453185 master guide plate, extract old front and rear seals cleanly, prepare dry crankshaft journals, position new PTFE seals, and advance press plates to positive mechanical stops.
Why "Hammering & Screwdriver Prying" Seals Causes Costly Fleet Rework
On PACCAR MX series commercial diesel engines, the front gear housing seal and rear main crankshaft seal prevent oil from escaping under high crankcase pressures. Because both front and rear seal locations surround large-diameter crankshaft flanges, installing new seals perfectly square is virtually impossible using hammers or wood blocks. Tapping around the outer casing cocks the steel shell in its cover housing bore, folding or tearing the internal PTFE sealing lip against the crankshaft edge. Once the engine reaches operating temperature, oil streams past the damaged lip—contaminating harmonic dampener belts on the front end or soaking clutch friction discs on the rear. Furthermore, attempting to pry old seal casings out using screwdrivers or cold chisels gouges the precision crankshaft wear sleeve. Scratched journal surfaces act like files, shredding new seal lips within miles of service. Utilizing the 37-pound ATC 1453185 Master Tool System eliminates these service failures entirely. The kit bolts securely to front or rear shaft threads, holding installer plates perfectly perpendicular while advancing seals smoothly to positive depth stops for 100% leak-free results.
The 5-Step PACCAR MX Front & Rear Seal Replacement Protocol
- Disassemble Cover Access & Mount ATC 1453185 Guide Plate: Remove the front vibration damper (for front seal) or flywheel (for rear seal). Bolt the ATC 1453185 base guide plate directly to the crankshaft flange bolt threads.
- Extract Old Seal Assembly Cleanly: Engage the removal collet/screws into the outer steel casing of the worn front or rear seal. Turn the central forcing screw clockwise to draw the old seal straight off the shaft without contacting the journal surface.
- Clean & Inspect Crankshaft Sealing Journal: Wipe the crankshaft sealing flange completely clean with dry solvent. Inspect the shaft and wear sleeve for grooves or burrs. *CRITICAL: PTFE seals MUST be installed on completely DRY crankshaft surfaces—never apply oil or grease to the PTFE lip!*
- Position New PACCAR PTFE Seal & ATC 1453185 Press Plate: Slide the new OEM PACCAR seal onto the pilot adapter sleeve of the ATC 1453185 tool. Position the heavy driver press plate and forcing nut assembly over the guide stud.
- Advance Forcing Nut to Mechanical Positive Stops: Turn the forcing nut clockwise using a hand wrench to drive the press plate forward. Continue advancing smoothly until the driver plate seats flush against the physical positive depth stops. Remove tooling and reassemble engine components.
PRO-TECH DRY PTFE INSTALLATION & POSITIVE STOP MANDATE:
NEVER APPLY OIL OR GREASE TO PACCAR PTFE SEAL LIPS! PTFE seals require a 100% dry crankshaft journal to transfer a microscopic PTFE sealing layer during initial startup! Oil lubrication WILL cause high-pressure oil leaks! ALWAYS TURN FORCING NUTS TO FULL POSITIVE STOPS to guarantee exact OEM depth seating!
37.00 lbs Master Guided Front & Rear Crankshaft Seal Remover & Installer Kit. Protect PACCAR Overhauls.
Get the ATC 1453185 Master Kit Now
overall rating:
my rating:
log in to rate