
Blog
Paccar MX13 Front & Rear Seal Service Steps
Precision crankshaft service and main oil seal replacement guidelines for commercial diesel mechanics and fleet technicians.

Replacing leaking front or rear main crankshaft seals on a Paccar MX13, MX-13 PCI, or MX PMCI-2 engine during an in-frame overhaul, clutch replacement, or front gear housing repair? Follow this step-by-step professional workshop procedure to mount the ATC 1453185 extraction plate, draw worn seals cleanly, prepare crankshaft journals, position the driver mandrel, and press new seals to exact OEM depth.
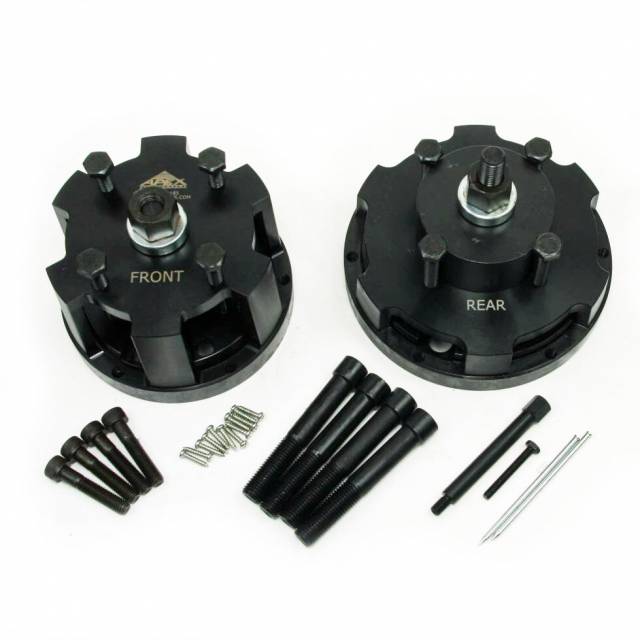
Why Prying & Freehand Driving Ruin Paccar Crankshaft Assemblies
On Paccar MX13 engines, front and rear crankshaft seals utilize modern PTFE sealing lips engineered to run directly against hardened crankshaft snouts or integrated wear sleeves. When technicians attempt to extract old seals using pry bars, slide hammers with sheet metal screws, or cold chisels, they take massive risks: slipping tools gouge micro-finished crankshaft sealing surfaces. Any scratch on a crankshaft snout creates a permanent oil leak path that ruins new seal lips immediately. Furthermore, driving new seals in with hammer punches or unguided blocks cocks the seal ring inside the housing bore, tearing the delicate PTFE lip and deforming the steel casing. An improperly installed rear main seal causes immediate oil contamination inside the flywheel housing, ruining expensive clutch friction discs. Utilizing the 37-pound ATC 1453185 Tool Kit (OEM 1453185PE Equivalent) completely eliminates installation hazards. The tool bolts directly to crankshaft threads, applying pure axial forcing screw pressure to extract old seals cleanly and press new seals dead-center to factory depth.
The 5-Step Paccar MX13 Crankshaft Seal Service Protocol
- Expose Crankshaft Seal & Clean Housing Area: Remove front damper/pulley for front seal service or flywheel for rear seal service. Spray shop solvent to clean oil scale and road dirt off seal housings and crankshaft snouts.
- Mount ATC 1453185 Extraction Fixture & Pull Old Seal: Bolt the ATC 1453185 extraction plate to the crankshaft face. Engage the puller legs into the old seal casing and turn the central forcing nut clockwise with a hand wrench to draw the old seal straight out without touching crankshaft journals.
- Clean & Inspect Crankshaft Sealing Surface: Inspect the crankshaft sealing surface for grooves or burrs. Thoroughly clean the journal with solvent and lint-free towels. Ensure crankshaft sealing surfaces are completely dry (PTFE seals must be installed dry).
- Position New Seal & ATC 1453185 Driver Mandrel: Place the new OEM Paccar seal assembly onto the crankshaft end. Slide the ATC 1453185 installer plate over the seal and thread the tool guide spindle into the crankshaft center.
- Press New Seal Dead-Flat to OEM Depth: Apply clean engine oil to tool forcing screw threads. Turn the forcing nut smoothly with a hand wrench to press the new seal into the housing until the tool driver bottoms firmly against its built-in depth stop. Unbolt the tool and inspect the installed seal.
PRO-TECH DRY INSTALLATION & HAND WRENCH MANDATE:
ALWAYS INSTALL PACCAR PTFE CRANKSHAFT SEALS COMPLETELY DRY! Never apply oil or grease to PTFE sealing lips! Lubricating PTFE lips WILL cause premature seal failure and immediate oil leakage! ALWAYS TURN FORCING SCREWS WITH HAND WRENCHES OR RATCHETS—never use pneumatic impact wrenches on seal installer tools!
37.00 lbs Master Paccar MX13 Front & Rear Crankshaft Seal Remover & Installer Kit. Protect Engine Crankshafts.
Get the ATC 1453185 Kit Now
overall rating:
my rating:
log in to rate