Blog
Initializing the Apex TP-2021 Governor Solenoid
Precision industrial powertrain speed component reconditioning guidelines for fleet service centers.

Pulling apart a premium engine governor loop to clear up a sluggish throttle tracking fault? Learn the precise mechanical spring rules and spring configurations needed to rebuild assemblies safely with the Apex TP-2021 kit.
Why Reversing Plunger Springs Triggers Catastrophic Throttle Binding
The diaphragm-free actuator layout inside a Teleflex TR-2001 engine governor operates within incredibly tight dimensional limits. Because the solenoid plunger rides directly submersed inside the fuel stream, it relies on an unyielding mechanical return spring balance to push against the internal governor tracking valve. The precision return spring is wound with a distinct directional taper—the tight-wound, high-density portion of the coils must face completely upward inside the plunger so it remains clearly visible during installation. If an un-trained line technician cocks the spring upside down or jams it into the shaft out of index, the looser open coils will twist sideways under magnetic pull, catching on the internal shaft sleeve walls. This localized mechanical lockup paralyzes the plunger, causing the governor to stick wide open or drop throttle response entirely during critical load cycles. Utilizing the dedicated Apex TP-2021 component and following flat finger-bounce testing rules guarantees friction-free vertical movement.
The 5-Step Governor Actuator Restoration Sequence
- 场地Isolate Electrical Links & Deep Clean Cover Face: Cut power to the machinery's 24VDC electrical distribution bus. Clean the top of the governor module block aggressively with solvent to strip away fuel film, dust crust, and grease accumulation before breaking any line seals.
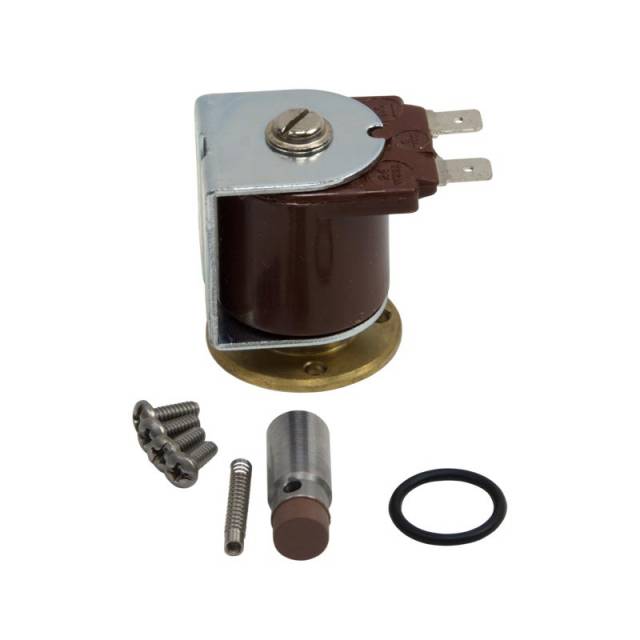
- Unbolt Core Housing and Audit Bore Seats: Carefully back out the mounting fasteners and lift the old solenoid valve sleeve straight off the governor base plate. Extract the floating plunger and spring. Wipe out the internal actuator shaft tracking sleeve with a lint-free cloth to clear any hardened fuel varnish.
- Index the Plunger Return Spring Direction: Take the fresh return spring from your Apex TP-2021 kit. Locate the tightly wound coil end. Slide the open end of the spring down inside the plunger tube so that the tightly wound portion faces completely up and out toward the viewer.
- Insert Plunger and Execute Finger-Bounce Verification: Guide the pre-assembled plunger and spring directly down into the central solenoid tracking shaft, ensuring the soft rubber contact tip faces downward to meet the governor valve face. *CRITICAL SHOCK TEST: Press the plunger down lightly with your fingertip—when installed correctly, it must bounce back instantly and smoothly under internal spring load with zero sticking or scratching.*
- Mount Housing and Re-Establish Data Power: Set the fresh Apex TP-2021 solenoid body down squarely over your validated plunger stack. Secure the mounting hardware firmly in a balanced cross pattern to prevent housing cocking. Connect your 24VDC control lead terminals, run a low-pressure fuel leak check, and initiate a full diagnostic governor speed load cycle.
CRITICAL DIAPHRAGM-FREE REBUILD ADVISORY:
Remember that the Teleflex TR-2001 system does not utilize a rubber isolating diaphragm like the older TR-1001 modules! The entire internal actuator shaft fills completely with pressurized diesel fuel during normal operation. Always verify that your mounting face O-rings are seated perfectly flat within their machined block grooves before running the housing down—any pinched or twisted seal will cause an immediate fuel blowout under engine speed pressure.
24VDC Heavy Machinery Speed Stabilization. Lift Your Repair Velocity.
Get the Apex TP-2021 Repair Valve Set
overall rating:
my rating:
log in to rate