
Blog
Cummins ISX Fuel Injector Extraction & Installation Steps
Precision top-end service guidelines for commercial fleet and Class 8 mechanics.
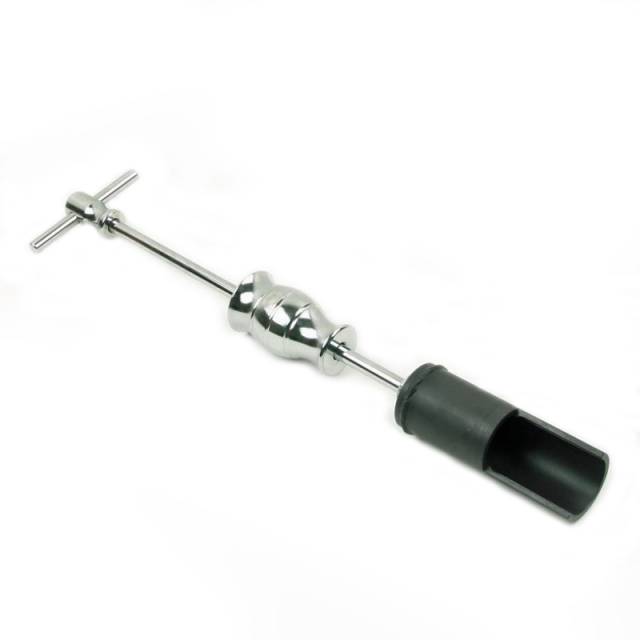
Servicing or replacing high-pressure fuel injectors during an overhaul or tune-up on a Cummins ISX, ISX15, or X15 engine? Follow this step-by-step professional workshop procedure to set up the ATC 3163483 bridge puller, extract carbon-baked injectors straight upward, clean head bore landings, and driver-seat fresh injectors without damaging sealing O-rings.
Why Heel Bars & Slide Hammers Cause Costly Cylinder Head Damage
On Cummins ISX series commercial engines, fuel injectors seat deep within narrow cylinder head wells. Because these injectors operate under extreme thermal conditions, carbon soot and oil varnish bake the lower nozzle body tightly to the cylinder head sleeve. When mechanics attempt removal using heel bars or slide hammers, the off-center pulling angle forces the hard steel body of the injector against the wall of the head bore. Dragging a seized injector out at an angle carves deep gouges into the copper or brass sleeve landing. When a new injector is installed over a gouged landing, combustion gases leak past the lower seal washer, cooking the injector body in carbon deposits and causing misfires. Furthermore, forcing new injectors down into bores without a guided installer tool can nick or roll the upper fuel sealing O-rings. A nicked O-ring allows diesel fuel to dilute engine oil, destroying rod and main bearings. Utilizing the 5-pound ATC 3163483 tool kit completely eliminates these service risks. The kit’s bridge frame sits flat over the cylinder head, aligning the forcing screw directly along the injector center axis. Turning the screw draws the injector straight upward cleanly, preserving bore walls and allowing fresh injectors to be seated smoothly with even, parallel pressure.
The 5-Step Cummins ISX Injector Extraction & Installation Protocol
- Area Prep & Hold-Down Clamp Removal: Remove valve covers and fuel lines. Clean oil sludge and carbon debris from around the target injector well. Unbolt and remove the factory injector hold-down clamp.
- Mount ATC 3163483 Puller Assembly: Thread the puller adapter from the ATC 3163483 kit securely into the top body threads of the target injector. Position the bridge frame flat across the cylinder head deck face and align the central forcing screw.
- Extract Injector Straight Upward: Apply clean motor oil to forcing screw threads. Turn the central forcing screw clockwise using a manual socket wrench to draw the carbon-sealed injector straight up out of the cylinder head bore without side-loading.
- Scrub Bore Well & Replace Sealing Washer: Lift out the old injector and remove the used copper sealing washer from the bore bottom. Scrub the injector bore landing thoroughly using a brass bore brush and solvent, ensuring all carbon scale is removed. *Verify the old copper washer was removed before proceeding.*
- Driver-Seat Fresh Injector & Re-Torque Clamp: Install a new copper washer and lubricated fuel O-rings onto the fresh injector. Lower the injector into the head bore by hand. Position the ATC 3163483 installer mandrel over the injector top and tap gently with a dead-blow hammer until the injector seats flush. Reinstall the factory hold-down clamp and torque to Cummins OEM specifications.
PRO-TECH WASHER REMOVAL & MANUAL WRENCH MANDATE:
ALWAYS VERIFY THE OLD COPPER WASHER IS REMOVED from the bottom of the cylinder head bore! Double-stacking copper washers prevents proper injector projection and destroys combustion pattern alignment! Always advance the puller forcing screw using manual hand tools; never use high-speed pneumatic impact wrenches!
5 lbs Precision Structural Tool Steel Dual-Function Kit. Protect Cummins ISX Overhauls.
Get the ATC 3163483 Service Tool Now
overall rating:
my rating:
log in to rate