Blog
How to Build a Perfect Seal, Bushing Bearing Driver

The T&E series of universal Bushing, Bearing & Driver kits solves the problem of not having the correct driver for every application. Each kit comes with an array of different size disk and a driver handle. In this article we are using the T&E 9012 mid size driver kit.
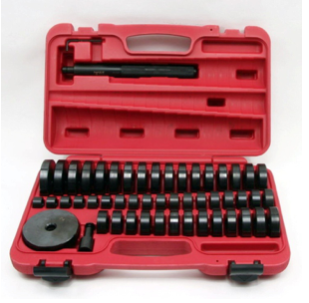
T&E 9012 Mid size bearing driver kit. This kit goes from 23/32€ up to 2 9/16€ This is a really great all around kit and allows for over 2450 different driver combinations.
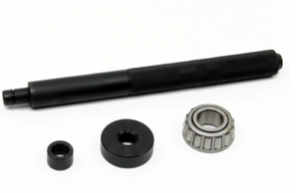
Step one is to take your bushing, bearing or seal and determine which disk best fits both the inner diameter and outer diameter of the item you are working with.
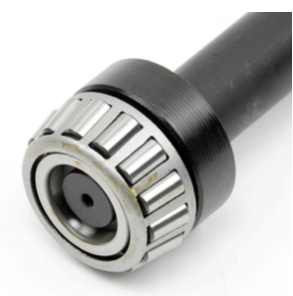
Just snap them on the driver handle and securely attach with the holding screw. You now have a perfectly fitted driver. If you follow our blogs you have seen that I do a lot of restoration work. To some it may not be important to do the job correctly the first time. I mean why spend $300 on a driver kit - the most I can do is ruin a $5 part, right? But you have to figure the time and possibly a slightly upset customer if you have to tear it down and re-do a bad install. If you are doing restoration work, that little bearing may have set you back $100 or taken a year to locate. I always like to do the job once and do it correctly.
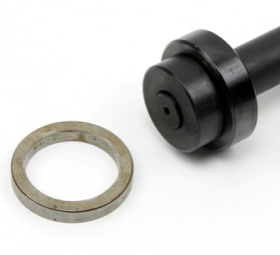
When you are installing a sleeve or seal it is imperative that you determine the correct depth. Is this needing to fit flush or be recessed against a stop.

The inside disk will remain the same for both but you will need to change the backing disk. This disk is just slightly smaller than the bushing that need driven in below the edge of the block.
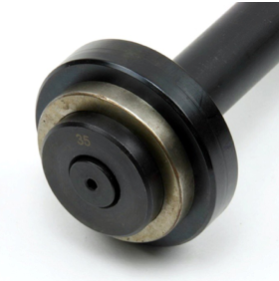
If you are needing to flush mount the bushing just change your backing plate to be larger than the item being driven. This will give you a positive stop and allow the bushing to be driven in perfectly flush.
We always strive to bring you the best tools we can. It is much easier to do the job correctly the first time than to do it fast 2 or more times.
I hope everyone enjoyed this article. Sorry, I thought I had a seal in my office, but I think everyone can figure out how to substitute a different part when making your custom driver.
This blog is done, so now for a bit of humor:
I had a friend ask me the other day why I mess around with old cars that can not even run the speed limit. My reply was that I have to keep them running. You see, Great-Great-Grandfather, while being the nicest man in the world, was not the brightest when it came to financial matters. He went in to the nearest Ford dealership and told them he wanted to buy his wife a new car and he was interested in that used pickup out front. Times were starting to get tough so he wanted the lowest payment possible. I just love Gramps 29 Pickup and the 31 rumble seat coupe is sure an eye catcher. I just hope that I can keep them running long enough for my grandchildren to take over the $2 a week payment.
overall rating:
my rating:
log in to rate