No Drill Modern Gas Shock Installation on a 1931 Ford Model A Coupe

Today we are not going to cover something new but just a little insider info in to what we do during our time off at Apex Tool Company. I purchased a new to me 1931 Model A Coupe just after the first of the year and on it's maiden voyage home, I hit a dip in the road. You know the kind - one of those 'they can replace the pipe across the road but never seem to fix the road again'. Well, the car jumped sideways about 2-3 feet so I knew even before getting it home that my internet purchase needed some work on the Houdaille shock. Much to my surprise it did not have any shocks mounted on it, so this was a perfect excuse to upgrade to modern gas shocks. My deepest apologies to the purest, but this car is going to be a driver.
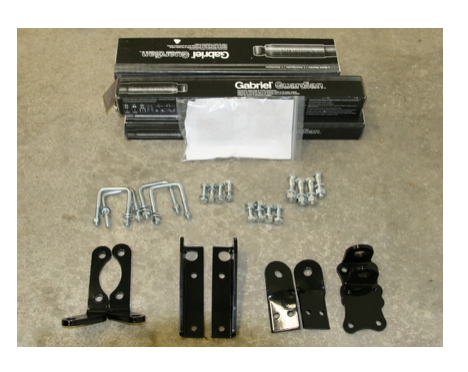
First, I ordered a shock kit off of the internet from this seller on ebay. I liked this kit a little better as it came from a small machine shop and the kit is a 'no drill' and uses gas shocks.
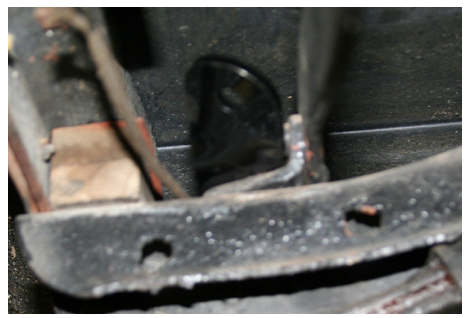
The first step is locating the 2 holes in the frame where the original shocks should have been mounted. If you have old rusted out Houdaille Friction shocks, they will need to be removed.
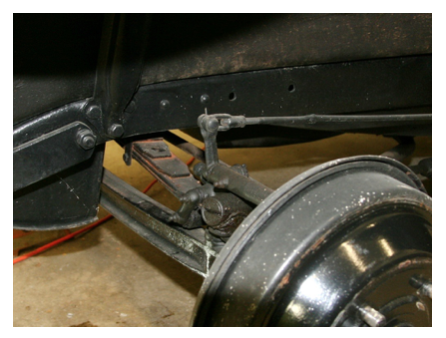
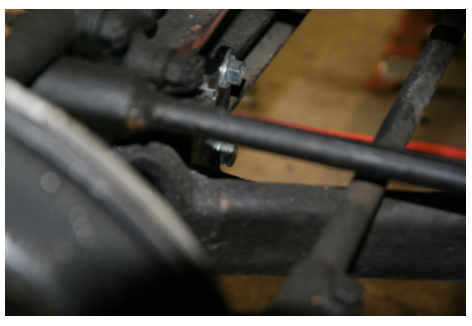
You will have to forgive my poor photography skills but this is the top bracket installed. I did add loctite medium strength to the bolts. The instructions did not call for it, but let's err on the side of caution.
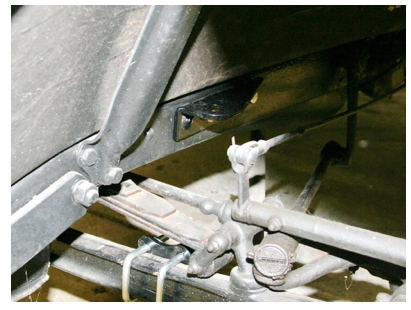
Now that the top bracket is installed it is time to install the lower bracket. It is held on by just a couple of U Bolts. Really this is a clever way to not mess up the front axle.
Grind off the excess U Bolt. Just a note - these really need to be as flush as you can get them. I left about 1/16 thread showing on my first one and had to remove the shock and grind totally smooth because the shock bound against it.
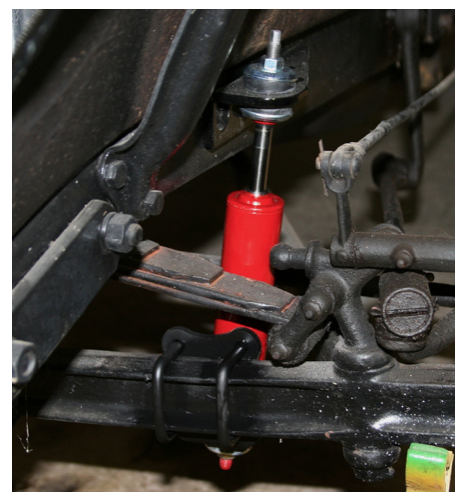
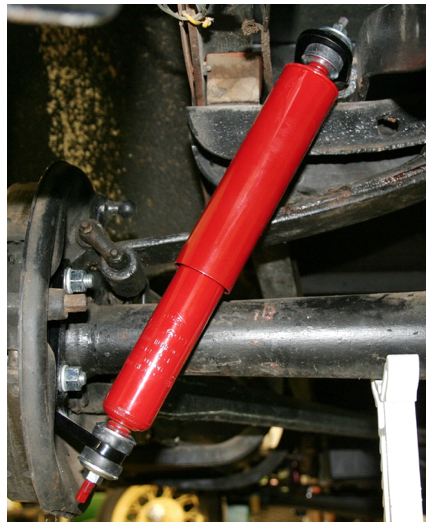
Just a fast shot of paint on the U Bolt and mount the shock. I found it was necessary to slightly jack up the body a few inches to allow the shock to slip in the holes. Once again this is very tight clearances on this very small shock. Now as they say: "Wash, Rinse, Repeat". Do the passenger side and then we move to the rear.
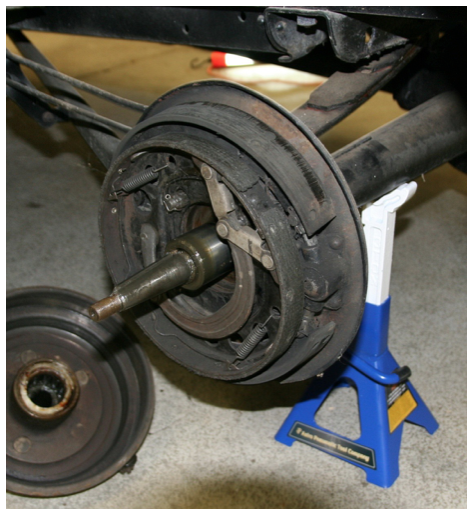
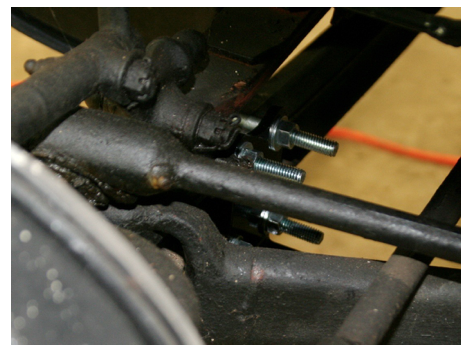
To install the lower shock mount, you must remove two of the brake mounting studs. For those of you not familiar with Model a brakes, the inner band is your actual brake and the outer band is the emergency brake. Being that they are purely manual brakes and not very great, I have thought about a adding a parachute or an anchor to throw out the window. This reminded me of the old saying: "Henry Ford's Model A will run all day but not stop for nothing." Never knew what that meant until I got the brakes hot on one of these. Perfectly clean now.
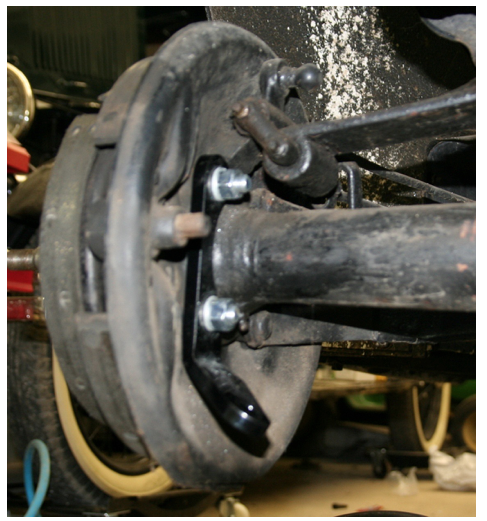
The lower rear mounting bracket is installed. Make sure you tighten this well. On the '31 the bolts were a little oversized for the holes. They fit my '29 perfectly. They did manage to pull tight and seem to work ok.
The upper bracket goes in the bumper mount holes. Forget it if you have a pair of meat hooks. This side of the car had a little tweaking in it and I think I spent more time getting these two bolts replaced than the rest of the job. Absolutely no access would be a polite way to describe this procedure. The bore scope came in very handy.
Once again repeat on the passenger's side and we are done. It is a night and day difference on how the car rides and drives. My 1929 Ford Model A Pickup had half working friction shocks and what a difference it made on it. This coupe went from almost unsafe to drive to as much as a pleasure driving a car with manual steering and brakes can be.
All in all this was a fun project. It was accomplished with a hand full of Genius hand tools, cut off grinder, bore scope and tapered punch. If you are wondering what all the white specks are in about every photo, come out and drive up and down my 1/2 mile gravel driveway and the underside of your car will look the same.
If you are looking for the kit I mentioned up above, please contact the seller directly on ebay as we do not sell these kits. Here's the link to his ebay store: shock kit
Fred Neff