
Blog
Tech Guide: Piston Ring Compression & Cylinder Bore Insertion Steps
Precision short-block assembly guidelines for automotive, diesel, and performance mechanics.

Installing pistons into an engine block during a short-block build or rebuild? Follow this step-by-step professional workshop procedure to stagger ring gaps, lubricate skirts, adjust the ATCRNGCOMP205 universal band compressor, and guide pistons smoothly into cylinder bores without ring distortion.
Why Improper Ring Band Setup Causes Scored Cylinder Walls & Low Compression
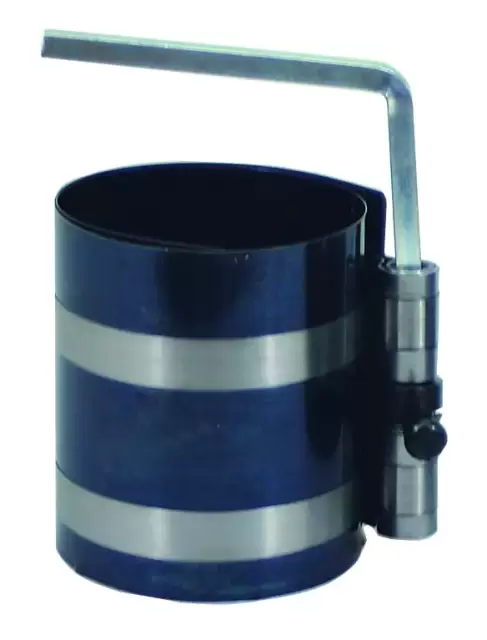
Assembling an engine short block requires precision at every step. One of the most common assembly errors occurs when a technician forces a piston into the cylinder bore using an improperly tensioned or tilted ring compressor. If a band compressor is adjusted too loosely, the bottom oil ring expander springs outward and catches on the top chamfer of the cylinder block deck. If the technician hits the piston crown with a heavy mallet to force it down, the caught ring will shear off or bend, instantly ruining the ring pack and scratching the honed cylinder wall. Conversely, if a single narrow band is used on a tall piston skirt, the band can cock sideways, tilting the piston and galling the ring lands. Utilizing the dual-band ATCRNGCOMP205 universal compressor ensures that the band remains completely parallel and square to the block deck. Wrapping securely around pistons from 3 1/2″ to 7″ in diameter, its fine-pitch ratchet mechanism clamps the ring pack tightly flush with the piston lands. When seated flat against a lubricated block deck, the piston slides straight downward with light hand or wooden mallet pressure, protecting cylinder walls, rings, and rod bearings.
The 5-Step Piston Ring Compression Protocol
- Stagger Ring End Gaps to OEM Specs: Inspect ring land clearances. Rotate ring end gaps to specified angular offsets (typically 120° apart for 3-ring packs, keeping gaps away from the wrist pin axis and thrust surfaces).
- Lubricate Piston, Rings & Band Interior: Apply clean engine assembly lube or heavy motor oil liberally to piston skirts, ring grooves, cylinder bore walls, and the inner surface of the ATCRNGCOMP205 spring steel band.
- Fit ATCRNGCOMP205 Band around Piston Assembly: Wrap the two-band compressor around the piston skirt and ring pack. Tighten the ratcheting key drive until the band compresses all rings completely flush into their piston lands.
- Position Piston Assembly Flush on Deck: Lower the connecting rod into the target cylinder bore (protecting rod bolt threads with rubber boots). Seat the bottom edge of the ATCRNGCOMP205 band firmly and square against the cylinder block deck face.
- Tap Piston Down & Verify Smooth Entry: Hold the compressor band flat against the block deck. Tap the top center of the piston dome smoothly using a clean wooden or plastic mallet handle. The piston should slide smoothly into the bore without high resistance. Remove the band, inspect the top deck, and repeat for remaining cylinders.
PRO-TECH DECK FLUSH & MALLET MANDATE:
Always hold the bottom edge of the ATCRNGCOMP205 band pressed completely flat against the cylinder deck while tapping! If high resistance is felt while tapping, STOP immediately! Never force a piston down—remove the band and inspect for a caught or twisted ring!
3 1/2″ to 7″ Universal Coverage. Protect Engine Rebuild Overhauls.
Get the ATCRNGCOMP205 Compressor Band Now
overall rating:
my rating:
log in to rate