
Blog
Safe Piston Ring Compression & Installation Steps
Precision engine assembly and piston ring compression guidelines for commercial diesel mechanics and automotive engine builders.

Installing pistons into cylinder bores during an automotive, performance, or diesel engine rebuild? Follow this step-by-step professional workshop procedure to stagger ring end gaps, lubricate piston skirts, adjust the Apex Universal Ring Compressor Band, align connecting rod journals, and tap pistons into cylinder bores without breaking rings or scoring cylinder walls.
Why "Single-Band & Screwdriver Methods" Cause Engine Rebuild Disasters
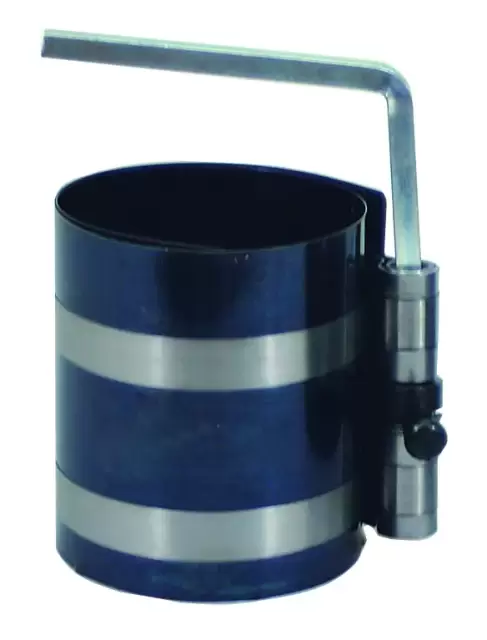
On any internal combustion engine, piston rings must move freely within their grooves to seal high-pressure combustion gases and scrape excess oil off cylinder walls. Installing a piston assembly into a cylinder bore requires compressing the expanded rings flat against the piston lands so they slide past the top bore chamfer. Technicians who use screwdrivers, zip ties, or single-band pliers risk severe mechanical damage. A screwdriver can nick delicate aluminum piston skirts, bend oil ring expanders, or scratch the precision cross-hatch finish of the cylinder wall. Worse yet, single-band tools can cock sideways under tension; as the piston is driven down, a ring pops out of the bottom of the tool and catches on the block deck face. Driving a caught ring down snaps the ring instantly and gouges deep gouges into the cylinder wall. Utilizing the 1.00-pound Apex Universal Two-Band Ring Compressor (ATCRNGCOMP285) completely prevents installation damage. Its dual steel bands hold rings flush across 360 degrees, sitting dead-flat against the block deck so pistons glide into cylinder bores smoothly.
The 5-Step Piston Installation & Ring Compression Protocol
- Clean Bore, Stagger Ring Gaps & Lubricate Assembly: Clean cylinder bores with clean shop towels and engine oil. Stagger piston ring end gaps according to engine manufacturer specifications (e.g., 120 or 180 degrees apart). Liberally coat ring packs, piston skirts, and cylinder walls with clean engine assembly lube.
- Fit Apex Two-Band Compressor Over Piston Pack: Expand the Apex Universal Ring Compressor Band and slide it over the piston skirt and ring pack. Ensure both steel bands cover all compression and oil control rings completely.
- Tighten Tension Drive Flush Against Skirt: Tighten the ratcheting tension mechanism until the bands compress all rings flush into the piston grooves. Verify the bottom edge of the compressor band is flush and square with the lower piston skirt.
- Position Piston Assembly Over Cylinder Bore Deck: Rotate the crankshaft so the target rod journal is at bottom dead center (BDC). Guide the connecting rod into the cylinder bore, sitting the bottom edge of the Apex compressor band dead-flat against the engine block deck.
- Tap Piston Crown Gently into Cylinder Bore: Hold the compressor band firmly down against the deck. Use the wooden handle of a hammer to tap the center of the piston crown gently. The piston should slide smoothly into the bore. If resistance is felt, STOP IMMEDIATELY, remove the tool, and check for a caught ring!
PRO-TECH STOP-ON-RESISTANCE & DECK FLUSH MANDATE:
ALWAYS HOLD THE COMPRESSOR BAND DEAD-FLAT AGAINST THE BLOCK DECK! Never allow the tool to lift or tilt during installation! IF THE PISTON STOPS OR BINDING IS FELT, DO NOT FORCE IT WITH HEAVY HAMMER BLOWS! Heavy blows WILL snap piston rings and gouge cylinder walls! Remove the piston and re-compress!
1.00 lbs Universal Two-Band Precision Piston Ring Compressor. Protect Engine Overhauls.
Get the Apex Ring Compressor Band Now
overall rating:
my rating:
log in to rate