
Blog
Why Shallow Perimeter Tapping Fails to Seat Rigid Teflon Oil Lip Barriers
Precision lower-block structural reconditioning guidelines for freight maintenance terminals.

Overhauling a leaking front timing cover on a medium-duty fleet truck or transit bus? Learn the professional technical sequence to press fresh Teflon main seals squarely using the ATC 88840407 fixture.
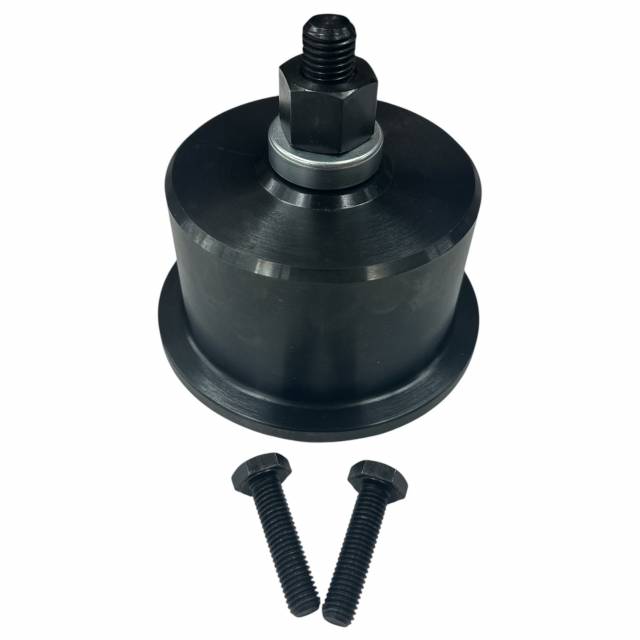
Why Shallow Perimeter Tapping Fails to Seat Rigid Teflon Oil Lip Barriers
The front timing cover housing on a Volvo D8K engine block demands absolute alignment truth. When a line mechanic attempts to drive a fresh pre-assembled seal assembly into the cover plate using universal socket cups or perimeter hammers, the striking forces act unevenly. This minor deflection tilts the rigid, dry-spec PTFE seal shell sideways. Unlike classic rubber oil seals that deploy a loose garter spring to conform to out-of-round journals, premium Teflon seals rely purely on the plastic's cross-sectional material memory to wrap the crank steel. Any tiny fold or edge catch introduced during a cocked installation creates a permanent tracking path, causing immediate engine oil weep tracks the moment the motor hits operating temperature. Utilizing a heavy pilot-supported mechanical tool like the 6.6-pound ATC 88840407 enforces a completely parallel, centralized mechanical draw, driving the seal completely flush without casing warp.
The 5-Step Front Main Sealing Protocol
- 场地Front Accessory Teardown and Crank Cleaning: Disconnect the vehicle primary battery links. Disengage the front engine accessories, drive belts, and the harmonic balancer pulley assembly. Wire-brush the crankshaft snout land and timing cover receiver aggressively with solvent to strip away hard carbon varnish and road sludge.
- Enforce a Completely Oil-Free Environment: Wipe down the crankshaft journal surface with quick-drying brake cleaner down to bare, dry metal. *CRITICAL CONTROL DISCLOSURE: Never apply oil, grease, or assembly lubricant to a dry-spec PTFE seal lip or to the crank snout flange! Liquid grease prevents the Teflon material from properly memory-shrinking onto the steel axis, causing immediate post-start failures.*
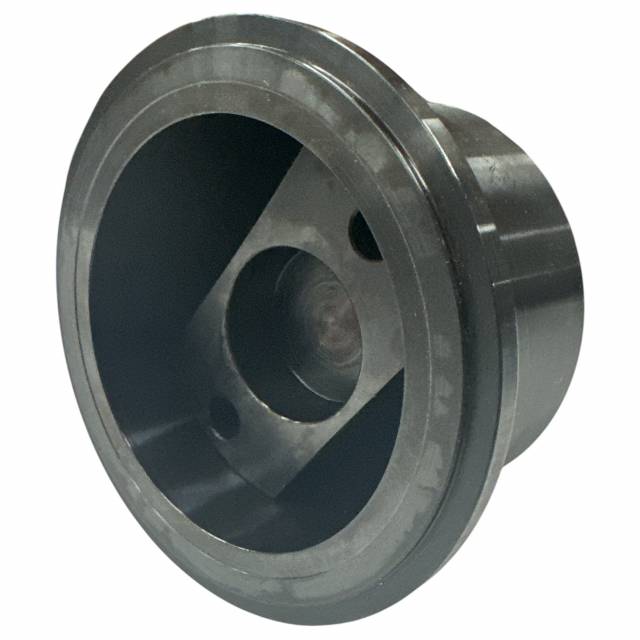
- Bolt Down the Pilot Mandrel Sleeve: Anchor the inner pilot guide mandrel of your ATC 88840407 kit flatly against the front crankshaft flange nose using the high-strength kit bolts. This sets up an absolute concentric entry ramp that guides the seal casing onto the shaft snout without catching.
- Staging the Seal and Forcing Cup: Slide the fresh pre-assembled front main seal over the guide mandrel sleeve. Slide the large outer driver cup collar over the primary central force bolt thread. Thread down the heavy mechanical force nut by hand until the assembly settles flatly against the tool rim.
- Execute Controlled Mechanical Pressing: Lock the outer plate with a backup wrench, and slide a manual 1/2" drive socket or breaker bar over the center forcing hex head. Turn clockwise with smooth, steady leverage. The parallel mandrel will guide the seal perfectly square into the timing cover bore. Continue turning until the tool flange bottoms flat against the cover casing rim face, locking in factory depth limits.
PRO-TECH MATERIAL RETYLING COMPRESSION WINDOW:
Once you press the fresh front main seal home with the ATC 88840407 tool, you must allow the engine block to rest completely dry and undisturbed for a minimum of 2 to 4 hours before firing the engine or barring the crankshaft! This relaxation window is strictly mandatory to let the expanded Teflon plastic memory-shrink back down tightly and lock a flawless hydraulic seal around the rotating crankshaft axis.
Concentric Guide Pilot. Stop Front Harmonic Pulley Removals Rework.
Buy the Volvo 88840407 Front Driver Now
overall rating:
my rating:
log in to rate