Blog
Complete Broken Exhaust Stud Removal: Professional Procedure Using ATC6V-9050 Caterpillar Stud Removal Kit
Broken Exhaust Stud Removal Procedure | Caterpillar Complete Guide
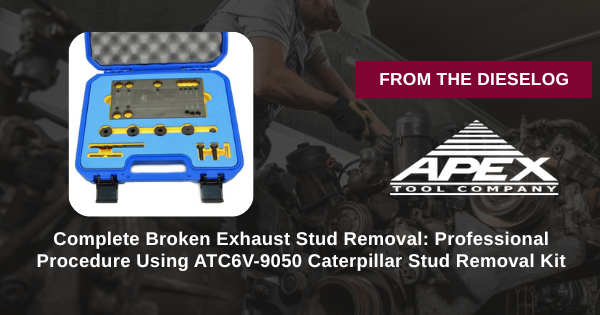
Complete Broken Exhaust Stud Removal: Professional Procedure Using ATC6V-9050 Caterpillar Stud Removal Kit
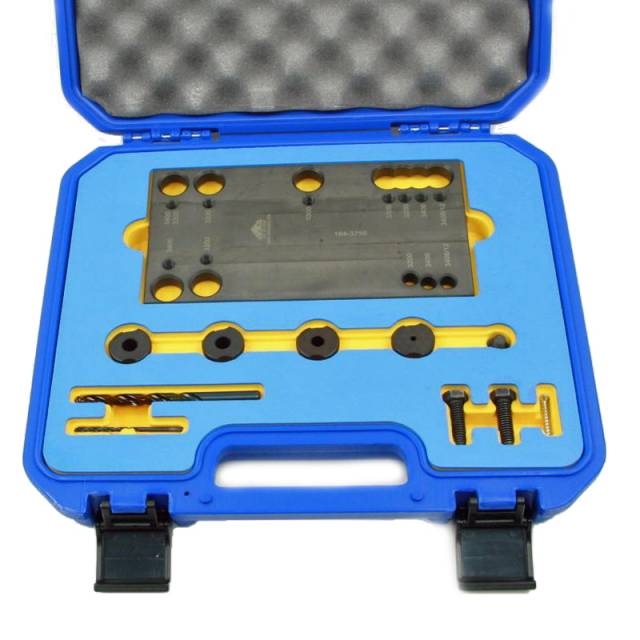
Removing broken exhaust manifold studs from Caterpillar diesel engines (3200, 3300, 3400, C9, C15, C16, C18, C27, C32) requires precision technique, proper tools, and careful planning. This complete workflow guide covers the ATC6V-9050 Broken Stud Removal Tool Group for professional engine service. From stud assessment through final extraction and hole repair, follow these steps for safe broken stud removal every time—protecting expensive cylinder heads and enabling cost-effective service repairs instead of component replacement.
GET STUD REMOVAL KIT NOW
Complete Extraction Coverage • Professional Workflow
Phase 1: Broken Stud Assessment & Preparation
- Identify broken stud location – Locate broken exhaust manifold stud on cylinder head.
- Assess stud condition – Determine if broken flush, below surface, or partially protruding.
- Inspect manifold area – Check for damage, corrosion, or debris around broken stud.
- Clean manifold surface – Remove carbon, oil, and contaminants from exhaust manifold area.
- Apply penetrating oil – Soak broken stud with penetrating oil; wait 24-48 hours minimum for corrosion release.
- Prepare work area – Clear space around manifold; gather ATC6V-9050 kit and tools.
Phase 2: ATC6V-9050 Kit Setup & Fixture Installation
- Inspect kit components – Check drill fixture, bushings, and drills for damage or defects.
- Verify engine series compatibility – Confirm fixture is correct for Caterpillar engine (3200/3300/3400 vs. C-series).
- Position drill fixture on manifold – Align fixture over broken stud location per kit instructions.
- Secure fixture to manifold – Fasten fixture firmly; it must not shift during drilling.
- Verify fixture alignment – Double-check that fixture centers properly over broken stud.
- Clean fixture and bolt hole area – Remove any oil or debris from fixture surfaces.
Phase 3: Drill Bushing Installation & Alignment
- Select correct drill bushing size – Match bushing to broken stud diameter.
- Install alignment bushing in fixture – Insert primary bushing per kit assembly instructions.
- Verify bushing concentricity – Ensure bushing is centered over broken stud.
- Install secondary drill bushing – If multi-stage drilling, install secondary guide bushing.
- Check bushing seating – Ensure bushings are fully seated; no movement or play.
- Align fixture with stud – Final verification that fixture/bushings center perfectly on stud.
Safe Stud Removal = Protected Cylinder Head
ORDER ATC6V-9050 NOW →Phase 4: Precision Drilling Through Broken Stud
- Select precision drill bit – Choose drill bit from kit tailored to broken stud size.
- Install drill bit in drill chuck – Mount bit securely; verify it won't slip during drilling.
- Insert drill bit through bushing – Feed bit through guide bushing; ensure straight alignment.
- Start drilling at low speed – Begin drilling slowly to establish pilot hole.
- Increase drilling speed gradually – Maintain steady pressure; do not force or jerk bit.
- Drill straight through stud – Continue drilling slowly through entire stud length.
- Apply cooling fluid if needed – Use cutting fluid to reduce friction and heat during drilling.
- Drill through and slightly into manifold – Penetrate stud completely and slightly beyond.
- Withdraw drill bit carefully – Remove bit slowly without binding in hole.
- Clear drilling debris – Use compressed air to blow out metal chips from drilled hole.
Phase 5: Broken Stud Extraction
- Install extraction tool in drilled hole – Thread extraction tool or stud remover into drilled hole.
- Gradually tighten extraction tool – Turn tool slowly to grip broken stud internal threads.
- Apply steady upward pressure – Pull extraction tool upward with controlled force.
- For stuck studs, apply penetrating oil again – If extraction resists, add more penetrating oil; wait 15 minutes.
- Resume extraction with slightly more force – Increase pressure gradually; avoid sudden jerking.
- Feel for stud movement – Experienced techs sense when stud begins to extract.
- Continue steady extraction pressure – Maintain even force; stud should rise slowly and evenly.
- Extract stud completely – Remove stud fully from bolt hole; separate from extraction tool.
Professional Stud Extraction Protects Expensive Cylinder Heads
ADD TO CART • ATC6V-9050Phase 6: Threaded Hole Inspection & Repair
- Remove extraction tool from hole – Unthread extraction tool; set aside broken stud safely.
- Inspect threaded hole condition – Check for damage, stripping, or enlarged diameter.
- Clean hole thoroughly – Blow out all metal chips and debris from drilling and extraction.
- Measure threaded hole diameter – Verify hole is not enlarged beyond acceptable limits.
- If hole is damaged – May require helicoil insert or repair procedure per OEM specifications.
- If hole is acceptable – Proceed with new stud installation per Caterpillar service manual.
- Prepare hole for new stud – Clean threads and apply anti-seize compound if required by OEM.
- Install new exhaust stud – Thread new stud into hole; tighten to Caterpillar specification torque.
Critical Warnings: Avoid These Mistakes
- ❌ NEVER skip penetrating oil soak – 24-48 hour wait is critical for corrosion release
- ❌ NEVER use wrong fixture for engine series – Fixture must match specific Caterpillar model
- ❌ NEVER drill without drill bushing – Bushings ensure correct angle and prevent cylinder head damage
- ❌ NEVER force the drill bit – Steady, controlled drilling prevents bit breakage and damage
- ❌ NEVER skip cooling fluid during drilling – Heat and friction can damage surrounding material
- ❌ NEVER apply sudden jerking on extraction – Smooth, steady pressure prevents component damage
- ❌ NEVER ignore threaded hole damage – Damaged holes require repair before new stud installation
- ❌ NEVER skip hole inspection after extraction – Verify threads are acceptable before reassembly
Professional Extraction = Protected Components
The Stud Removal Kit Every Caterpillar Shop Needs
BUY NOW → $250
✅ Caterpillar 3200-3400 • C9-C32 Series
✅ Precision Fixture • Drill Bushings • Precision Drills
✅ Professional-Grade • Safe Extraction
✅ Precision Fixture • Drill Bushings • Precision Drills
✅ Professional-Grade • Safe Extraction
overall rating:
my rating:
log in to rate