
Blog
Volvo D16 Thermostat Seal & Timing Cover Service Steps
Precision cooling system and timing cover service guidelines for commercial fleet mechanics.

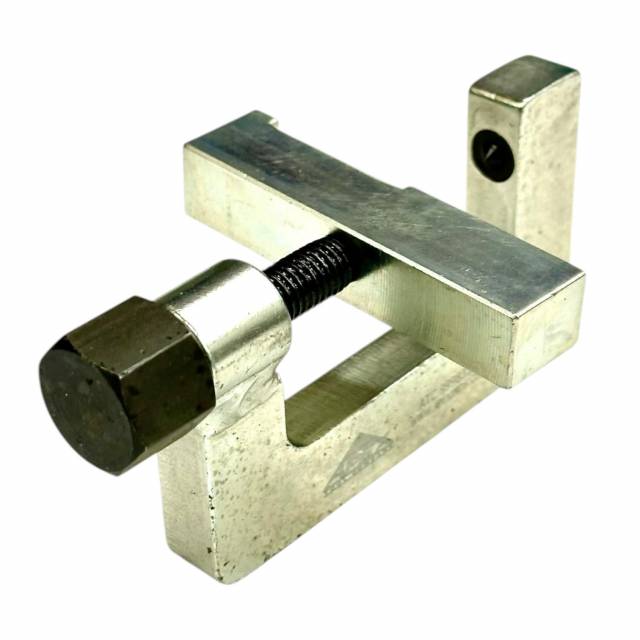
Prepping a Volvo D16 highway tractor for a thermostat replacement or front timing cover reassembly? Learn the proper technical sequence to level the cover plate and seat the thermostat seal cleanly using the ATC 9998318 tool.
Why Off-Angle Seal Drivers Cause Persistent Coolant Leaks
The thermostat housing interface on a Volvo D16 operates under continuous thermal cycling and cooling system pressure. When replacing the thermostat, the internal rubber/elastomer seal must be pressed into the timing gear cover bore. If a technician uses flat hammer drifts, sockets, or loose punches to seat this seal, entry pressure is distributed unevenly. The seal casing cocks in the bore, buckling the delicate sealing lip or pinching the outer rubber perimeter. Furthermore, if the timing gear cover was recently removed and reinstalled without leveling, the cover face sits misaligned relative to the thermostat housing flange. Once the engine reaches operating temperature, the pressurized coolant easily forces its way past the distorted seal lip and uneven housing joint, causing steady coolant loss. Utilizing the ATC 9998318 tool levels the timing cover plate flush while pressing the seal down a guided, 100% parallel axis to stop leaks before they start.
The 5-Step Thermostat Seal & Cover Alignment Protocol
- Teardown & Surface Triage: Drain the engine cooling system completely. Remove the thermostat housing and extract the old thermostat element and seal. Thoroughly clean old gasket scale, corrosion, and coolant glaze from the timing gear cover bore and housing mating face using solvent and a non-abrasive pad.
- Level the Timing Gear Cover Assembly: If servicing or reinstalling the front timing gear cover, position the cover loosely against the engine block. Place the leveling press face of the ATC 9998318 tool squarely against the designated cover registration points to hold the cover perfectly flat and aligned while hand-torquing cover bolts to spec.
- Stage the Replacement Thermostat Seal: Position the fresh OEM thermostat seal squarely over the entrance of the timing cover bore. Verify that the seal lip is clean, undamaged, and oriented correctly according to Volvo service bulletin guidelines.
- Apply Controlled Parallel Pressing: Place the drive face of the ATC 9998318 tool squarely over the seal casing. Using a manual driver handle or gentle, controlled pressure, press the tool forward. The precision-machined shoulder of the ATC 9998318 will press the seal evenly into the bore well until the tool shoulder bottoms out flat against the cover face.
- Inspect Depth & Reassemble Housing: Withdraw the ATC 9998318 tool and visually inspect the installed seal to verify 360-degree uniform depth and an un-distorted sealing lip. Install the fresh thermostat, bolt the housing down in sequence, refill the coolant, and pressure-test the system to confirm a leak-free repair.
PRO-TECH SEAL INSTALLATION SAFETY DIRECTIVE:
Always apply pressing force smoothly by hand when seating thermostat seals using the ATC 9998318 tool! Never strike the tool with heavy steel shop sledges or air impact hammers, as violent impact shocks can crack the cast aluminum timing cover or deform the internal seal seat. Controlled, steady pressure yields a flawless, leak-free installation every time.
Precision Shop Tooling. Prevent Costly Volvo D16 Coolant Leaks.
Get Your ATC 9998318 Tool Now
overall rating:
my rating:
log in to rate