Blog
Front & Rear Crankshaft Seal Removal: Complete Volvo Workflow Using ATC88800502
Crankshaft Seal Removal Workflow | Volvo Complete Guide
Front & Rear Crankshaft Seal Removal: Complete Volvo Workflow Using ATC88800502
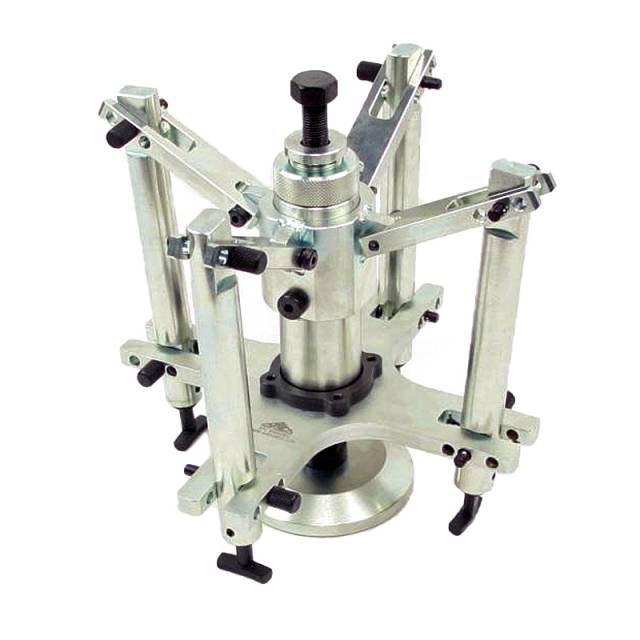
Crankshaft seal removal on Volvo diesel engines requires precision, proper tooling, and adherence to manufacturer procedures. This complete workflow guide covers the ATC88800502 Front & Rear Crankshaft Seal Remover Tool for professional heavy-duty diesel shops. From pre-removal inspection through seal extraction and surface preparation for new seal installation, follow these steps for damage-free, professional-grade seal service every time—protecting critical engine surfaces and maintaining shop profitability.
GET SEAL REMOVER NOW
Complete Workflow Coverage • OEM Equivalent
Phase 1: Pre-Removal Inspection & Preparation
- Identify seal location – Front (near balancer) or rear (flywheel area)?
- Document seal part number – Verify 21779548, 22191895, or compatible part number.
- Clean removal area thoroughly – Remove oil, grease, and debris.
- Prepare work space – Ensure adequate room for tool leverage and seal extraction.
- Gather supporting equipment – Brake cleaner, rags, penetrating oil, containers for fasteners.
- Inspect surrounding components – Check crankshaft surface and seal bore for existing damage.
Phase 2: Front Crankshaft Seal Removal (If Applicable)
- Remove harmonic balancer if necessary – Follow OEM procedure; note position.
- Position ATC88800502 on seal – Ensure tool is properly seated on seal lip.
- Apply steady extraction force – Use breaker bar or torque wrench with controlled pressure.
- Avoid sudden jerking – Smooth, continuous pressure prevents crankshaft scoring.
- Monitor seal movement – Seal should extract smoothly and straight.
- If seal binds, apply penetrating oil – Wait 15-30 minutes; resume extraction carefully.
- Remove seal completely – Extract seal from bore; separate tool from seal.
Phase 3: Rear Crankshaft Seal Removal (If Applicable)
- Access rear seal location – Remove flywheel or flexplate if required.
- Clean seal area thoroughly – Remove all oil and debris from bore.
- Attach ATC88800502 to rear seal – Position tool for proper engagement.
- Apply steady extraction force – Controlled pressure prevents bore damage.
- Extract seal straight out – No twisting or tilting; maintain parallel extraction.
- Inspect bore for damage – Check for scoring or damage left by previous seal.
- Remove tool from extracted seal – Separate carefully.
Damage-Free Extraction = Successful Rebuilds
ORDER ATC88800502 NOW →Phase 4: Crankshaft Surface Inspection & Preparation
- Inspect crankshaft journal – Check for scoring, pitting, or surface damage.
- Clean crankshaft surface thoroughly – Use brake cleaner and soft cloth; never steel wool.
- Measure journal surface condition – Use micrometer to verify diameter within OEM spec.
- Check seal bore condition – Inspect for scoring, cracks, or debris.
- Clean seal bore completely – Remove all old seal material and contamination.
- Verify bore roundness – Use bore gauge if available; compare to OEM specifications.
- Document surface conditions – Photo record for quality assurance.
Phase 5: New Seal Installation & Verification
- Select new seal – Verify correct part number (21779548, 22191895, or equivalent).
- Clean new seal before installation – Remove any factory debris or contamination.
- Install new seal using proper tool – Use OEM installer or ATC equivalent for correct depth.
- Verify seal seating – Ensure seal is fully seated in bore at correct depth.
- Apply OEM-spec sealant if required – Follow manufacturer recommendations.
- Reinstall supporting components – Harmonic balancer, flywheel, or flexplate as applicable.
- Verify installation quality – Check for leaks before engine startup.
Every Crankshaft Seal Service Needs Professional Tools
ADD TO CART • ATC88800502Critical Warnings: Avoid These Mistakes
- ❌ NEVER pry on seals with screwdrivers – Damages crankshaft and bore permanently
- ❌ NEVER use pliers or clamps for extraction – Marks seal surface and tears bore
- ❌ NEVER apply sudden jerking force – Causes crankshaft scoring and bore damage
- ❌ NEVER skip bore cleaning – Debris in bore causes new seal leaks
- ❌ NEVER skip crankshaft inspection – Damaged journals prevent new seal seating
- ❌ NEVER reuse old seals – Old seals cannot reseal
- ❌ NEVER install new seal without proper tool – Improper depth causes leaks or damage
- ❌ NEVER skip leak testing – Verify seal function before customer delivery
Professional Seal Service = Reliable Engines
The Crankshaft Seal Remover Every Volvo Shop Needs
BUY ATC88800502 NOW → $650
✅ Volvo 9990113 Replacement • 88800502 Equivalent
✅ Front & Rear Seals • Dual Function
✅ Professional-Grade • Zero Damage Risk
✅ Front & Rear Seals • Dual Function
✅ Professional-Grade • Zero Damage Risk
overall rating:
my rating:
log in to rate