Blog
Complete Ford 7.3L Powerstroke Fuel Injector Sleeve Cup Removal & Installation: ATC 303-DS105 Professional Procedure
Professional fuel injector sleeve cup service procedure for Ford 7.3L Powerstroke F-Series Super Duty trucks.

Professional technicians follow this exact 12-phase procedure using the ATC 303-DS105 tool to safely extract worn fuel injector sleeve cups and install OEM replacements on Ford F-Series Super Duty 7.3L Powerstroke engines. Proper technique prevents bore damage, fuel leakage, and complete injection system failure.
Introduction: Critical Sleeve Cup Service
Ford 7.3L Powerstroke fuel injector sleeve cups are precision sealing components that position injectors and isolate high-pressure fuel (2,000+ PSI) from cylinder bores. Worn or damaged sleeves create fuel leakage that contaminates coolant, causes white smoke, reduces power, and eventually destroys the engine. Professional removal and installation demand specialized tools, exact procedures, and meticulous care to protect the cylinder head bore and maintain critical fuel system sealing.
Phase 1-3: Engine Preparation & Fuel System Depressurization
- Let engine cool to safe touch temperature (allow 30+ minutes after shutdown) – Hot cylinder head risks burn injury and fuel vaporization during service
- Disconnect fuel supply line at injection pump or fuel tank – Prevent fuel spillage during service. Use absorbent material under work area
- Crank engine with fuel shutoff activated to relieve fuel pressure – Critical safety step: depressurizes fuel rails before component removal
- Locate fuel injector access (remove valve covers as required) – Clear work area around injector and sleeve cup location
- Inspect injector and surrounding area for fuel saturation or leakage evidence – Assess condition and document fuel system integrity before service begins
Phase 4-6: Fuel Injector Removal & Sleeve Cup Access
- Remove fuel injector electrical connector and solenoid wires – Tag wires for reassembly. Verify connector is fully released before pulling
- Remove fuel supply line from top of injector – Cap line to prevent fuel dripping and contamination. Have absorbent material ready
- Remove fuel injector using properly sized injector socket or wrench – Do NOT use excessive force (risk of injector seizure). Steady, even pressure only
- Inspect removed injector for damage or carbon buildup – Determine if injector requires cleaning, service, or replacement
- Clean cylinder head bore area around sleeve cup opening – Remove all fuel residue, carbon, and debris to expose sleeve cup clearly
- Verify sleeve cup is accessible and shows no protective shrouds blocking removal – Ensure clear access for ATC 303-DS105 tool engagement
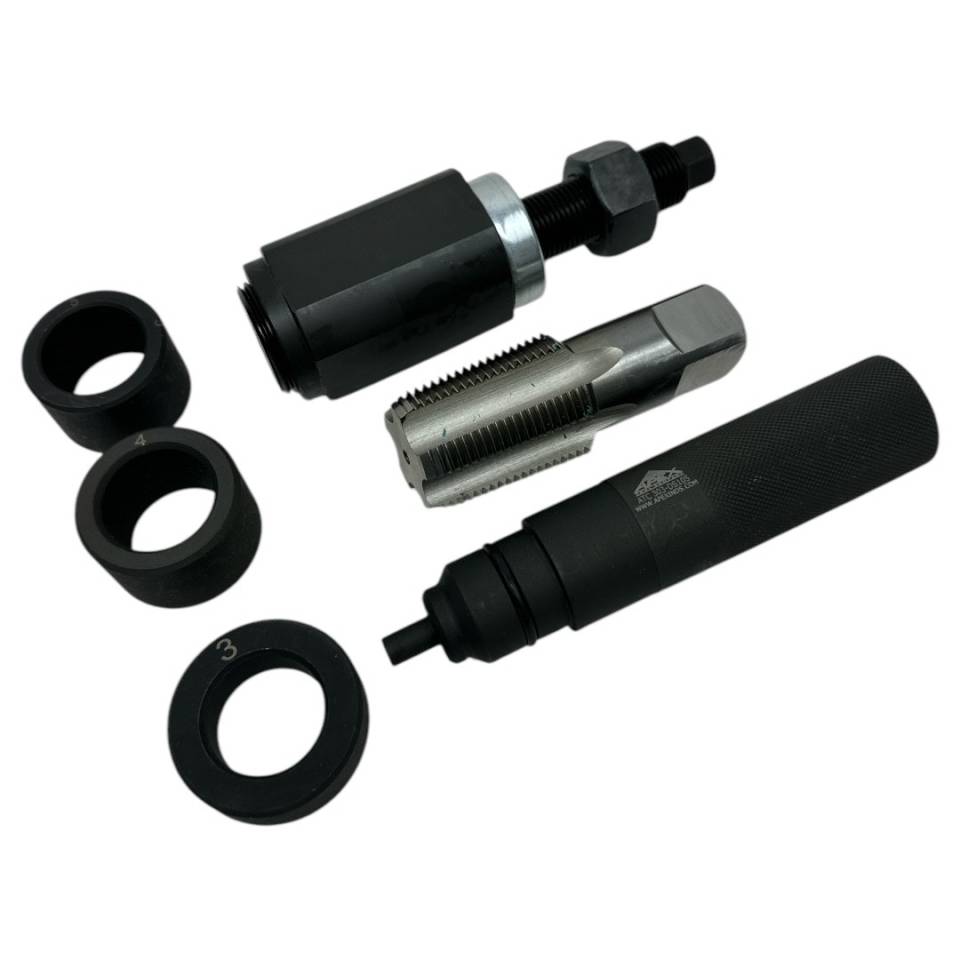
Phase 7-9: ATC 303-DS105 Sleeve Cup Removal Setup
CRITICAL: ATC 303-DS105 Setup for Safe Sleeve Cup Extraction
- Inspect ATC 303-DS105 remover jaws for wear or damage – Verify jaws grip sleeve cup surfaces without slipping or marring
- Position ATC 303-DS105 jaw assembly over sleeve cup hex – Align jaws to grip flat sides of cup (do NOT grip cylindrical body)
- Tighten jaw assembly hand-tight around sleeve cup – Ensure secure grip without crushing cup or damaging bore surface
- Attach ATC 303-DS105 extraction handle or lever arm – Prepare for controlled pull force application
- Verify jaw assembly is properly centered over cup bore opening – Misalignment could damage bore during extraction. Check alignment from multiple angles
- Apply steady, even extraction force using proper mechanical advantage – Do NOT use hammering or jerking force (risks bore damage). Smooth, controlled pressure only
Phase 10-12: Controlled Extraction, Bore Inspection & Cleaning
- Apply steady extraction force using ATC 303-DS105 until sleeve cup separates completely – Typically 2–4 minutes of controlled pulling. Watch for signs of stuck cup
- If cup is seized, apply penetrating oil and wait 15 minutes before re-attempting extraction – Carbon and corrosion may require soak time. Never force extraction violently
- Remove ATC 303-DS105 from extracted sleeve cup once fully separated – Inspect cup for damage and assess condition (reusable or requires replacement)
- Clean cylinder head bore thoroughly using brass brush and solvent – Remove ALL carbon, fuel residue, and debris from bore walls and seating surface
- Inspect bore for scoring, cracks, or damage – Run your finger across bore surface (smooth, no rough spots). Damage requires bore rework before new cup installation
- Verify bore threads are intact and undamaged – Minor damage can often be cleaned; severe damage requires professional bore repair or head replacement
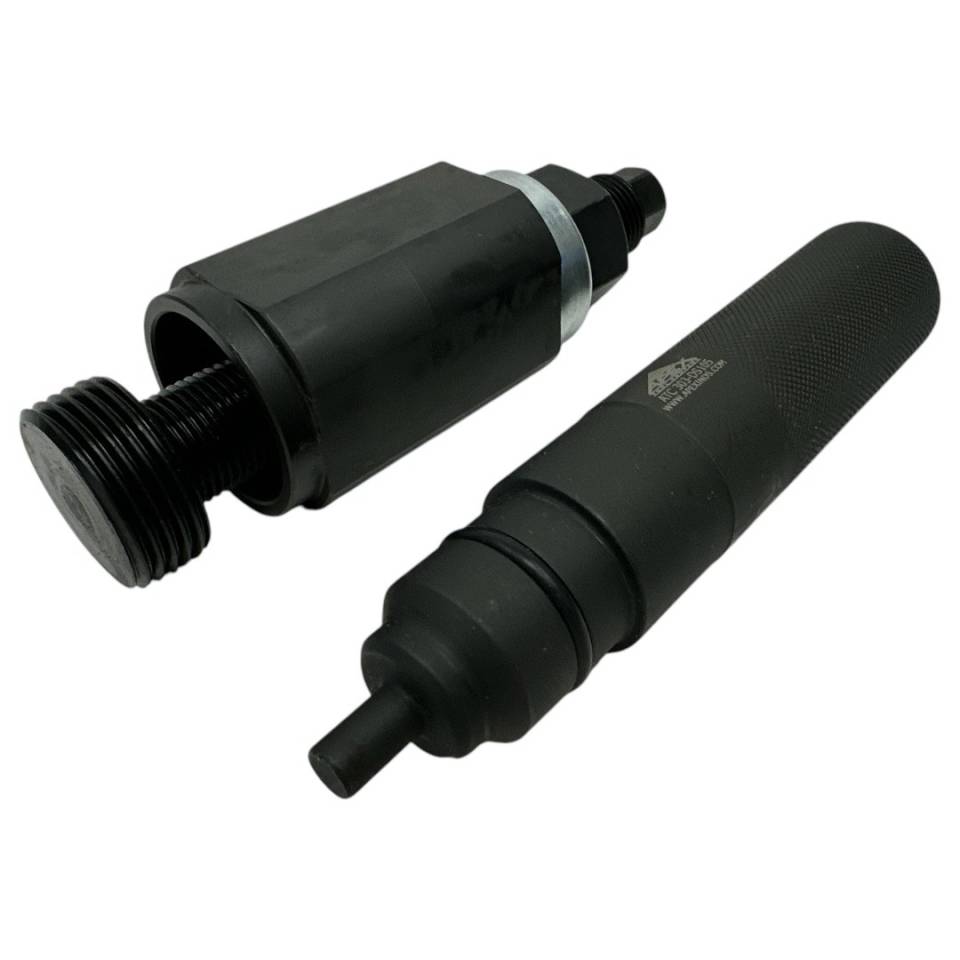
Phase 13-15: New Sleeve Cup Installation & Injector Reassembly
- Prepare OEM replacement sleeve cup (F4TZ-9F538-A specification) – Verify part number matches Ford service manual for your engine
- Inspect new sleeve cup for defects before installation – Verify cup is clean, undamaged, and ready for service
- Position ATC 303-DS105 installer jaws on new sleeve cup – Align cup hex with bore opening. Jaws should grip cup securely for installation force
- Apply controlled installation force using ATC 303-DS105 until cup seats completely in bore – Proper seating force is critical (follow Ford specification: typically 40–60 ft-lbs)
- Verify new sleeve cup is flush with cylinder head surface – No protrusion or recession. Cup must be perfectly seated for fuel system sealing
- Remove ATC 303-DS105 installer and inspect cup seating – Verify cup is fully seated and shows no lateral movement when tapped gently
Phase 16-18: Fuel Injector Reinstallation & System Testing
- Install fuel injector (clean or new) into newly seated sleeve cup – Screw injector in hand-tight first, then tighten with proper wrench. Do NOT over-torque (risk: damaged cup or injector)
- Reconnect fuel supply line to injector top – Verify connection is secure, no fuel drips, and line routing is clear
- Reconnect injector electrical connector and solenoid wires – Verify connections are fully seated, no pinched wires, no exposed terminals
- Reinstall valve covers with new gaskets – Torque cover bolts in proper sequence to prevent warping
- Reconnect fuel supply line to fuel pump/tank – Prime fuel system and bleed air from fuel lines
- Engine start and idle check (no load) – Verify no fuel leaks from injector or sleeve cup area. Listen for normal injector clicking sound
- Road test under load (light to moderate throttle) – Confirm no white smoke, normal power delivery, and complete absence of fuel odor from exhaust
Critical Safety Warnings: Sleeve Cup Service Procedure
MUST AVOID THESE FATAL ERRORS:
- ❌ Never skip fuel system depressurization – Pressurized fuel can spray unpredictably, causing burns and fuel contamination
- ❌ Never use hammering force on sleeve cup extraction – Damages cylinder head bore threads, requires expensive rework ($1,200–$3,500)
- ❌ Never install new cup without bore cleaning – Carbon debris prevents proper seating, causes fuel leakage and injection failure
- ❌ Never over-torque injector into cup – Excessive force damages cup or injector, creates leakage or misalignment
- ❌ Never skip bore inspection for damage – Cracked or scored bores leak fuel, compromise sealing, require head replacement
- ❌ Never use incorrect sleeve cup part number – Wrong cup dimension (F4TZ-9F538-A is critical) causes misalignment and injection failure
- ❌ Never skip leak testing after service – Improper seating causes delayed fuel leakage, engine damage, or catastrophic failure
- ❌ Never operate engine without road load verification test – Bench symptoms don't guarantee road performance (may reveal hidden failures)
Professional Sleeve Cup Service Documentation
Why ATC 303-DS105 Eliminates Risky Injection Service
Traditional Risky Removal Methods:
- ❌ Hammering methods → Bore damage ($1,200–$3,500 rework)
- ❌ Pry bar damage → Sleeve cup and bore thread destruction
- ❌ Guesswork installation → Misalignment, fuel leakage, white smoke
- ❌ Hours of struggle → Extended labor costs, customer frustration
- ❌ No proper tools → Risk of catastrophic engine failure
ATC 303-DS105 Professional Advantages:
- ✅ Zero bore damage (precision-engineered engagement)
- ✅ Clean extraction without damaging cup or threads
- ✅ Dual-function remover/installer (one professional tool)
- ✅ Proper installation force (prevents over-compression)
- ✅ 30-minute complete service vs. hours of struggling
- ✅ Professional reliability and repeatable results
- ✅ Zero fuel leakage or injection misalignment
- ✅ Complete protection against $9,000–$18,500 engine failure
Service Professionally. Protect Engines. Eliminate Fuel Leakage Failures.
Get ATC 303-DS105 – $340.00
overall rating:
my rating:
log in to rate