Blog
Complete In-Vehicle Injector Cup Service: Professional Procedure Using ATC151-4832-221-9777 Kit
In-Vehicle Injector Cup Service Procedure | Caterpillar Complete Guide
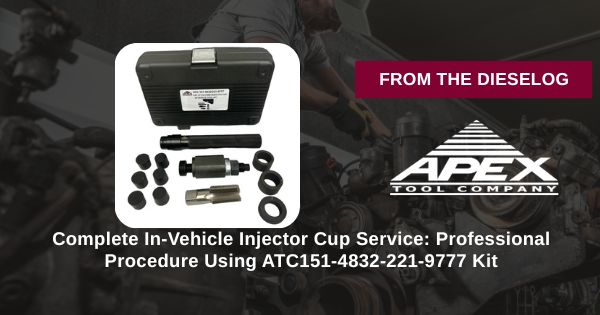
Complete In-Vehicle Injector Cup Service: Professional Procedure Using ATC151-4832-221-9777 Kit

Injector cup failures on Caterpillar C7, C9, and 3126B engines (HEUI fuel systems) require efficient in-vehicle service. This complete workflow guide covers the ATC151-4832-221-9777 Injector Cup Remover & Installer Kit for professional diesel engine shops. From initial diagnosis through cup removal, bore cleaning, new cup installation, and final verification, follow these steps for reliable in-vehicle injector cup replacement every time—eliminating costly head removal and minimizing engine downtime while maintaining service quality.
GET INJECTOR CUP KIT NOW
Complete In-Vehicle Service • Professional Workflow
Phase 1: Injector Cup Condition Diagnosis & Assessment
- Identify symptoms of injector cup failure – Check for rough idle, white smoke, coolant-fuel contamination, or performance loss.
- Perform visual inspection – Remove engine cover if needed; inspect injector area for obvious damage or leaks.
- Check for coolant in fuel tank – Coolant-fuel crossover indicates cup seal failure; confirms replacement needed.
- Verify engine model compatibility – Confirm engine is C7, C9, or 3126B with HEUI fuel system (NOT MEUI mechanical-injection).
- Inspect fuel system history – Determine if cup is corroded, damaged, or stuck due to age/environmental exposure.
- Plan service approach – Confirm in-vehicle service is appropriate; prepare for 2–4 hour injector cup replacement.
Phase 2: Engine Preparation & Safety Setup
- Ensure engine is completely cold – Never work on hot injector systems; allow 4+ hours for cool-down.
- Disconnect negative battery terminal – Prevents accidental starter engagement or electrical hazards.
- Release fuel pressure – Use fuel system pressure relief valve per Caterpillar procedure; depressurize completely.
- Drain coolant if required – Some procedures require coolant drainage to protect against spillage; check OEM manual.
- Prepare work area – Clear injector area; gather service tools and ATC151-4832-221-9777 kit components.
- Organize small fasteners – Label bags for fuel lines, clamps, connectors; prevents loss during service.
Phase 3: Fuel Injector Removal & Hardware Disconnect
- Remove fuel supply line – Disconnect fuel inlet line from injector; cap to prevent contamination.
- Remove fuel return line – Disconnect return line from injector; place in clean container to catch residual fuel.
- Disconnect electrical connector – Unplug injector electrical connection; store safely to prevent corrosion.
- Remove fuel injector hold-down clamp – Unbolt clamp securing injector; set aside fasteners in labeled bag.
- Carefully remove fuel injector – Pull injector straight up; do not tilt or allow tip to contact surfaces.
- Inspect injector condition – Note any damage; may require replacement if sealing surfaces are compromised.
- Place injector on clean surface – Protect injector tip; keep away from dirt and contamination.
In-Vehicle Service = Zero Head Removal Risk
ORDER KIT NOW →Phase 4: Injector Cup Removal Using ATC151-4832 Remover Tool
- Inspect ATC151-4832 remover tool – Check for damage or defects before installation.
- Clean injector cup bore area – Remove any dirt, carbon, or debris from cup recess in cylinder head.
- Position remover tool in cup bore – Align tool directly over injector cup opening; ensure centered engagement.
- Insert remover tool into cup – Slowly lower remover tool; position capture mechanism around cup.
- Apply downward pressure to lock remover – Press down firmly; remover tool should lock securely onto cup.
- Verify firm grip on cup – Gentle rotation test confirms tool is locked and will not slip during extraction.
- Apply extraction pressure slowly – Pull remover tool upward with steady, controlled force.
- For stuck cups, apply penetrating oil – If cup resists, stop and apply penetrating oil; wait 15–30 minutes.
- Resume extraction with increased force – Continue pulling with steady pressure; cup should extract smoothly.
- Remove cup completely – Extract cup fully; separate from remover tool; inspect cup condition.
Phase 5: Cup Bore Cleaning & Inspection
- Inspect cup bore for damage – Check for cracks, scoring, or corrosion on bore walls.
- Clean cup bore thoroughly – Use soft wire brush or cloth to remove carbon deposits and debris.
- Remove corrosion carefully – Do not damage bore surfaces; use bronze brush or soft scrubbing only.
- Flush bore with mineral oil – Use cloth to wipe bore; ensure all loose material is removed.
- Verify bore diameter is acceptable – Bore should not be enlarged or damaged beyond specification.
- If bore is damaged, consult OEM – Severe damage may require professional reboring or bore repair.
- Dry bore completely – Use compressed air to remove cleaning fluid; ensure no moisture remains.
- Apply light oil coating – Thin coating prevents oxidation while waiting for new cup installation.
Efficient Injector Cup Service Maintains Fleet Profitability
ADD TO CART • ATC151-4832-221-9777Phase 6: New Injector Cup Installation Using ATC221-9777 Installer Tool
- Prepare new injector cup – Select correct cup part number (227-1200, 227-291, 229-1490 per OEM specification).
- Clean new cup and bore one final time – Ensure cup and bore are completely clean and dry.
- Inspect ATC221-9777 installer tool – Verify tool is in good condition; no damage or wear.
- Position installer tool in bore – Align tool directly over cup bore; ensure centered alignment.
- Install new cup into bore – Position cup on installer tool guide; ensure straight, level orientation.
- Lower installer tool with new cup – Slowly press down with steady, even pressure; cup should seat smoothly.
- Continue until cup bottoms in bore – Cup will contact bore bottom; apply final firm pressure to fully seat.
- Verify cup seating – Cup should be fully seated with no gaps or rocking movement.
- Remove installer tool carefully – Withdraw tool slowly; ensure cup remains seated in bore.
- Visually inspect cup seating – Confirm cup is flush with bore surface and properly aligned.
Phase 7: Fuel Injector Reinstallation & System Verification
- Position fuel injector over cup – Align injector tip with new cup opening; ensure straight insertion.
- Lower injector into bore – Slowly insert injector; ensure tip centers in cup.
- Reinstall injector hold-down clamp – Bolt clamp to specified torque (typically 25–35 N•m per OEM).
- Reconnect electrical connector – Plug electrical connection; ensure secure seating.
- Reconnect fuel supply line – Attach fuel inlet line; tighten to OEM specification.
- Reconnect fuel return line – Attach return line; ensure no leaks or loose connections.
- Verify all connections are tight – Check fuel lines, clamps, and electrical connections one final time.
- Refill coolant if drained – Return to specified level per OEM procedure; bleed air if needed.
- Reconnect negative battery terminal – Restore electrical power; prepare for engine start.
- Prime fuel system – Activate fuel pump; allow system to pressurize and bleed air.
- Start engine and verify operation – Listen for normal idle quality; check for unusual sounds or smoke.
- Perform test drive if required – Verify engine performance; confirm no rough idle or performance issues.
Critical Warnings: Avoid These Mistakes
- ❌ NEVER work on hot engine or fuel system – Severe burn risk; allow 4+ hours cool-down minimum
- ❌ NEVER skip fuel pressure relief – Pressurized system can spray fuel; safety hazard
- ❌ NEVER force injector cup remover/installer tools – Controlled pressure prevents bore damage
- ❌ NEVER use damaged or MEUI-system injector cups – Kit is HEUI-only; incompatible with MEUI injection
- ❌ NEVER skip bore cleaning and inspection – Debris causes cup seal failure and leaks
- ❌ NEVER over-tighten injector hold-down clamp – Excessive torque damages threads
- ❌ NEVER proceed with damaged cup bore – If bore is severely corroded, professional repair may be required
- ❌ NEVER skip fuel system pressure verification – Verify pressurization before starting engine
Efficient In-Vehicle Service = Maximum Uptime
The Injector Cup Kit Every Diesel Shop Needs
BUY ATC151-4832-221-9777 NOW → $320
✅ Caterpillar C7/C9/3126B • HEUI Systems
✅ Remover & Installer Included • In-Vehicle Service
✅ Professional-Grade • Downtime Savings Guaranteed
✅ Remover & Installer Included • In-Vehicle Service
✅ Professional-Grade • Downtime Savings Guaranteed
overall rating:
my rating:
log in to rate